Pages

Tuesday, September 28, 2010

TWD: Tarte Fine

 Apple Tart


 Leslie of Lethally Delicious decided on Tarte Fine for us to bake this week. If you don't know Leslie, drop on over, she belongs to a few baking groups and always has something great to eat. I'd really like to be one of her co-workers since she is so generous in sharing her goodies with them.

This tart is simplicity at its best. A crispy puff pastry crust is topped with fresh apples and a sprinkling of sugar and baked until the apples are soft and beginning to caramelize. We timed it just right and this was done right as we finished dinner, and it was a tasty way to get ready for fall and all the apple baking to come. I did enjoy making my own puff pastry just for fun, but you could throw this together in no time with the frozen packages, and have a delicious dessert with little effort.

TWD: Apple Tart
Dorie Greenspan Baking: from my home to yours

Dorie's Note: Pepperidge Farm puff pastry sheets are available in every supermarket across the country. However, I can't encourage you enough to search out an all-butter puff pastry at a local specialty store. If the store doesn't carry frozen all-butter puff pastry, perhaps it will order it for you. The pastry I buy--which is so good I stopped making puff pastry at home--is made by Dufour pastry.

Ingredients:
3 medium-size firm sweet apples, preferably Golden Delicious
Squirt of fresh lemon juice
1 sheet (about 8 ounces) frozen puff pastry, preferably all butter (see above), thawed
2 teaspoons milk or heavy cream
1 large egg, beaten with about 1/2 teaspoon water, for egg wash
3-4 teaspoons sugar
1/3 cup apricot jam, for glazing

Center a rack in the oven and preheat the oven to 400 degrees F.

Peel the apples, slice them in half lengthwise and core them. Cut the apples halves in half again and cut about 7 lengthwise slices from each quarter. Put the slices into a bowl and toss them with the lemon juice.

On a sheet of parchment paper or a silicone baking mat, roll the sheet of puff pastry out into a rectangle that is about 9 1/2 x 10 1/2 inches. If the dough is warm, cover it with a piece of plastic wrap and refrigerate it for about 20 minutes. If it's still cool, just lift the paper or mat and place it on a baking sheet. Arrange the apple slices in slightly overlapping rows on the pastry, making sure to leave a border of 1/4 to 1/2 inch bare. Brush the borders lightly with the milk or cream, then brush the egg wash over the apple slices. Sprinkle the apples and the borders with the sugar.

Bake the tart for 30 to 35 minutes, or until the pastry is puffed and golden around the edges and the apples are soft and brown at the borders. Remove from the oven. If you want the edges of the apples to be even darker, you can run the tart under the broiler; be very careful not to overbake the pastry border. (To avoid burning the edges, you can cover the perimeter of the tart with aluminum foil.)

Boil the jam with a smidgen of water until it liquifies, then brush the glaze over the apples (if the jam has any chunks of apricot in it, avoid them).

Serve the tart hot or warm.

Playing Around:
If you'd like a sweeter tart, before you arrange the apple layer, scatter 2 tablespoons butter, cut into bits, over the pastry rectangle and sprinkle over 2 tablespoons sugar. Omit the egg wash, and once the apples are in place, brush them with 3-4 tablespoons melted butter and sprinkle with about 3 tablespoons sugar. Bake and glaze the tart as directed.

To see what the other bakers made visit the TWD blogroll.

Monday, September 27, 2010

Daring Bakers

Sugar Cookies
The September 2010 Daring Bakers’ challenge was hosted by Mandy of What the Fruitcake?!. Mandy challenged  everyone to make Decorated Sugar Cookies based  on recipes from Peggy Porschen  and
 The Joy of Baking. We used our favorite sugar cookies recipe.
The theme for the cookies was September. We love to decorate sugar cookies and have tried our hand at football, helmets, and jersey for the football season so we thought we would try something new. Our cookies were for Mini Me, who started college at UC Irvine this month, their mascot is this anteater. 

Sugar Cookies

3 c  all-purpose flour
2 tsp baking powder
1 c sugar
2 sticks butter
1 egg
1/2 tsp pure vanilla extract
1/2 tsp pure almond extract
½ tsp  salt

Preheat oven to 350.
Combine the flour and baking powder, set aside. Cream the sugar and butter. Add the egg and extracts and mix. Gradually add the flour mixture and beat just until combined, scraping down the bowl, especially the bottom.
Roll onto a floured surface and cut into shapes. Place on parchment lined baking sheets and bake for 10-12 minutes. Let sit a few minutes on the sheet, then transfer to a cooling rack.

Visit the  the Daring Kitchen for both the recipe and to see the awesome cookies created by the bakers.


Tuesday, September 21, 2010

TWD: Coffee Break Muffins

Coffee Break Muffins


 Rhiani of Chocoholic Anonymous picked Coffee-Break Muffins from Dori's book, Baking: From my Home to Yours. These light and delicate muffins had a delicious coffee flavor, but that wasn't quite enough for us- they needed a little something to make them special.


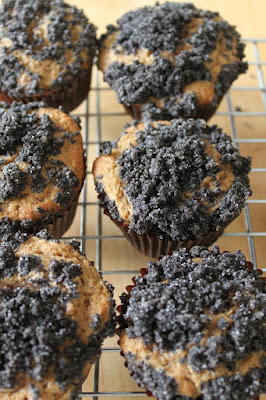
To half of the batter I added chocolate chips and an Oreo cookie crumb topping, with a coffee/chocolate combination in mind and it was a hit with the mocha lovers at my house.


The cinnamon flavor was not very strong, so next time I would increase the cinnamon in the batter and I would add a cinnamon and sugar struesel topping to the plain muffins to give them that little something extra. The plain muffins are a good starting point for any number of variations, and a nice change from the blueberry or banana muffins we usually make.


Visit Rhiani if you want the recipe. To see what the other TWD bakers thought visits our blogroll.

Friday, September 17, 2010

Blueberry Panna Cotta


We have been pretty busy the last couple of weeks getting Mini Me ready to go off to college. We did take time to have a little BBQ with our friends Mr. and Mrs. A. and to enjoy the lingering summer weather. This panna cotta was a great make ahead dessert, and since Mr. and Mrs. A try to follow a sugar free diet, it was easy to make one that they could enjoy. Everyone loved the silky smooth and creamy dessert and it was the perfect ending to a beautiful outdoor meal celebrating the end of summer.


For a dessert made entirely from heavy cream, this was not at all heavy. It had a wonderful lightness that was perfect alongside the sweet berries. We made them in small ramekins, and it was the perfect individual portion.


Panna Cotta
via David Lebovitz

4 cups (1l) heavy cream (or half-and-half)
1/2 cup (100g) sugar
2 teaspoons of vanilla extract, or 1 vanilla bean, split lengthwise
2 packets powdered gelatin (about 4 1/2 teaspoons)
6 tablespoons (90ml) cold water

1. Heat the heavy cream and sugar in a saucepan or microwave. Once the sugar is dissolved, remove from heat and stir in the vanilla extract.
2. Lightly oil eight custard cups with a neutral-tasting oil.
3. Sprinkle the gelatin over the cold water in a medium-sized bowl and let stand 5 to 10 minutes.
4. Pour the very warm Panna Cotta mixture over the gelatin and stir until the gelatin is completely dissolved.
5. Divide the Panna Cotta mixture into the prepared cups, then chill them until firm, which will take at least two hours but I let them chill at least four hours.
* This was a fairly firm panna cotta and I would reduce the gelatin to 3-1/2 teaspoons next time


Blueberry Sauce:
Juice the orange in to a small sauce pan. Over medium, bring to a boil and reduce by 1/3 volume  Add one and a half cups fresh or frozen blueberries, boil until thick. Taste and sweeten as desired. We also added a splash of Grand Marnier after we took it off the heat. Chill before serving.

You could do this with any number of fruit/flavor combinations throughout the year, depending on the season. The leftover sauce is a good ice cream topper, and is great mixed in yogurt for an easy and delicious breakfast treat.


Sugar Free Panna Cotta


1 cups heavy cream
3 cup half-and-half or milk
1/2 cup splenda
2 teaspoons of vanilla extract, or 1 vanilla bean, split lengthwise
3 1/2 teaspoons powdered gelatin
6 tablespoons (90ml) cold water
Flavor with zest of an orange


1. Heat the heavy cream and sugar in a saucepan or microwave. Once the sugar is dissolved, remove from heat and stir in the vanilla extract. (If using organge zest add it to the cream (or vanilla bean, scrape the seeds from the bean into the cream and add the bean pod.) Cover, and let infuse for 30 minutes remove bean pod if using. Rewarm the mixture before continuing.
2. Lightly oil eight custard cups with a neutral-tasting oil.
3. Sprinkle the gelatin over the cold water in a medium-sized bowl and let stand 5 to 10 minutes.
4. Pour the very warm Panna Cotta mixture over the gelatin and stir until the gelatin is completely dissolved.
5. Divide the Panna Cotta mixture into the prepared cups, then chill them until firm, which will take at least two hours but I let them chill at least four hours.


Links: Foodie Fridays at Designs by Gollum
          Fresh, Clean and Pure Friday at La Bella Vita

Tuesday, September 7, 2010

TWD: Peanut Butter Crisscrosses

Peanut Butter Crisscrosses

 Jasmine of Jasmine Cuisine selected Peanut Butter Crisscrosses to bake this week. We all love peanut butter cookies so it would have been hard to turn down this recipe. With lots of other treats in the house I only made half the recipe and got 26 cookies.
Baked as per the recipe the cookies were sweet and crispy.  We prefer our peanut butter cookies to have a crispy edge and a soft, chewy center so we underbaked the second pan by a few minutes and they were perfect.
Peanut Butter Crisscrosses  
from Baking: From My Home to Yours, by Dorie Greenspan
ingredients:
  • 2 1/2 cups all-purpose flour
  • 1 teaspoon of baking soda
  • 1/2 teaspoon baking powder
  • 1/4 teaspoon salt
  • 1 pinch of grated nutmeg 1 cup unsalted butter, at room temperature
  • 1 cup peanut butter (crunchy or creamy)
  • 1 cup brown sugar,  firmly packed
  • 3/4 cup sugar
  • 2 large eggs
  • 1 1/2 cups chopped salted peanuts
  • 1/2 cup sugar to coat
Preparation:

Pre heat oven to 350F. Cover 2 cookie sheets with parchment paper or silicone mats.

Mix together the flour, baking soda, baking powder, salt and nutmeg in a bowl.

In another bowl, beat the butter at medium speed with an electric mixer for a minute or two, or until creamy. Add peanut butter and beat for one more minute. Add brown sugar and sugar and beat for another 3 minutes. Add eggs, one at a time, beating one minute after each addition. Scrape the sides and bottom of the bowl and on low speed, add dry ingredients, beating just until they disappear into the batter.Add peanuts. The dough will be soft. (I chill the dough for an hour, so it is easier to work with)

Pour half a cup of sugar in a small bowl. Using a tablespoon, take small balls of dough, roll it between the palms of your hand and then roll in the bowl of sugar to coat. Place balls on prepared baking sheets, leaving 2 inches of space between each. Dip a fork in sugar and press against each ball to flatten cookie. Then press in the opposite direction to form a criss cross

Bake for 12 minutes,rotating the pans after 6 minutes.  The cookies are ready when they are lightly colored and still a little soft in the center.

Cool cookies on the plates a few minutes, then transfer to a wire rack to cool completely.


It's easy to enjoy these cookies with a glass of milk or a bowl of ice cream. If you want the recipe, visit Jasmine. To see what the other TWD baker thought visit our blog roll.


Thursday, September 2, 2010

Peach Pie


I picked our last peach today. It's always sad when the summer fruit season ends. We eat so much fresh fruit during the summer when we can just pick it off the tree, or go to our close farmer's market. We are lucky to have 2 peach trees that ripen at different times, so we have fresh peaches from mid June through mid August. As we do every year, we enjoyed all things peach- homemade ice cream, kuchen (tart), smoothies, sorbet, short cake, cobbler and of course peach pie.


Mimi Jr. made these cute mini pies on a day that we picked a few too many to eat right away. For most of us they are big enough for two to share, but Boy Mimi insists that they are the perfect size for one growing boy!


She started with our favorite pie crust from Julia Child and lined four mini pie pans with crust and placed them on a rimmed baking sheet.  This makes it easier to get them into and out of the oven and catches any filling that bubbles over.


Peach Pie
adapted from America's Test Kitchen

2 1/2 lb peaches, peeled pitted and sliced about 7 cups
1 to 1 1/4 cup sugar
3 to 4 tablespoons corn starch
1 Tablespoon instant tapioca
Juice and zest of one lemon
Pinch salt
Freshly grated nutmeg

Toss the sliced peaches with lemon juice and zest, 1 cup of sugar, 3 tablespoons cornstarch and 1 tablespoon tapoica, salt and nutmeg.  If your peaches are tart add up to 4 tablespoons more sugar. If they are very juicy add an aditional tablespoon cornstarch. Divide filling among 4 mini pie tins or 1 nine inch pie pan lined with unbaked pie crust.


Strussel Topping
Adapted from America's Test Kitchen
Although cormeal seems like a strange strussel ingredient, we liked that it added texture to the topping without making it overly sweet.
1 cup all  purpose flour
1/3 cup light brown sugar
1/3 cup granulated sugar
1 tablespoon fine gorund cornmeal.
pinch salt
6 tablespoon unsalted butter, melted
.
In a small bowl, mix all of the dry ingredients together. Drizzle with the melted butter and stir with a fork untiul roughly combined.
Cover pie(s) with streusel topping and bake in a preheated oven at 425 degrees for 25 minutes.  Reduce heat to 375 degrees and continue baking until the juices are bubbling and the crust is golden brown, about 25 minutes longer. Cool before serving.

Perfect with a scoop of homemade vanilla ice cream.


We are taking this to the Foodie Friday Party at Designs by Gollum and to the Fresh Friday blog hop at La Bella Vita