Tuesday, August 10, 2010

TWD :Chocolate Ganache Ice Cream

Chocolate Ganache Ice Cream

 Katrina of Baking and Boys picked Chocolate Ganache Ice Cream. The lone woman in a houseful of boys, Katrina has her hands full, yet she always manages to cook up some tasty treats.

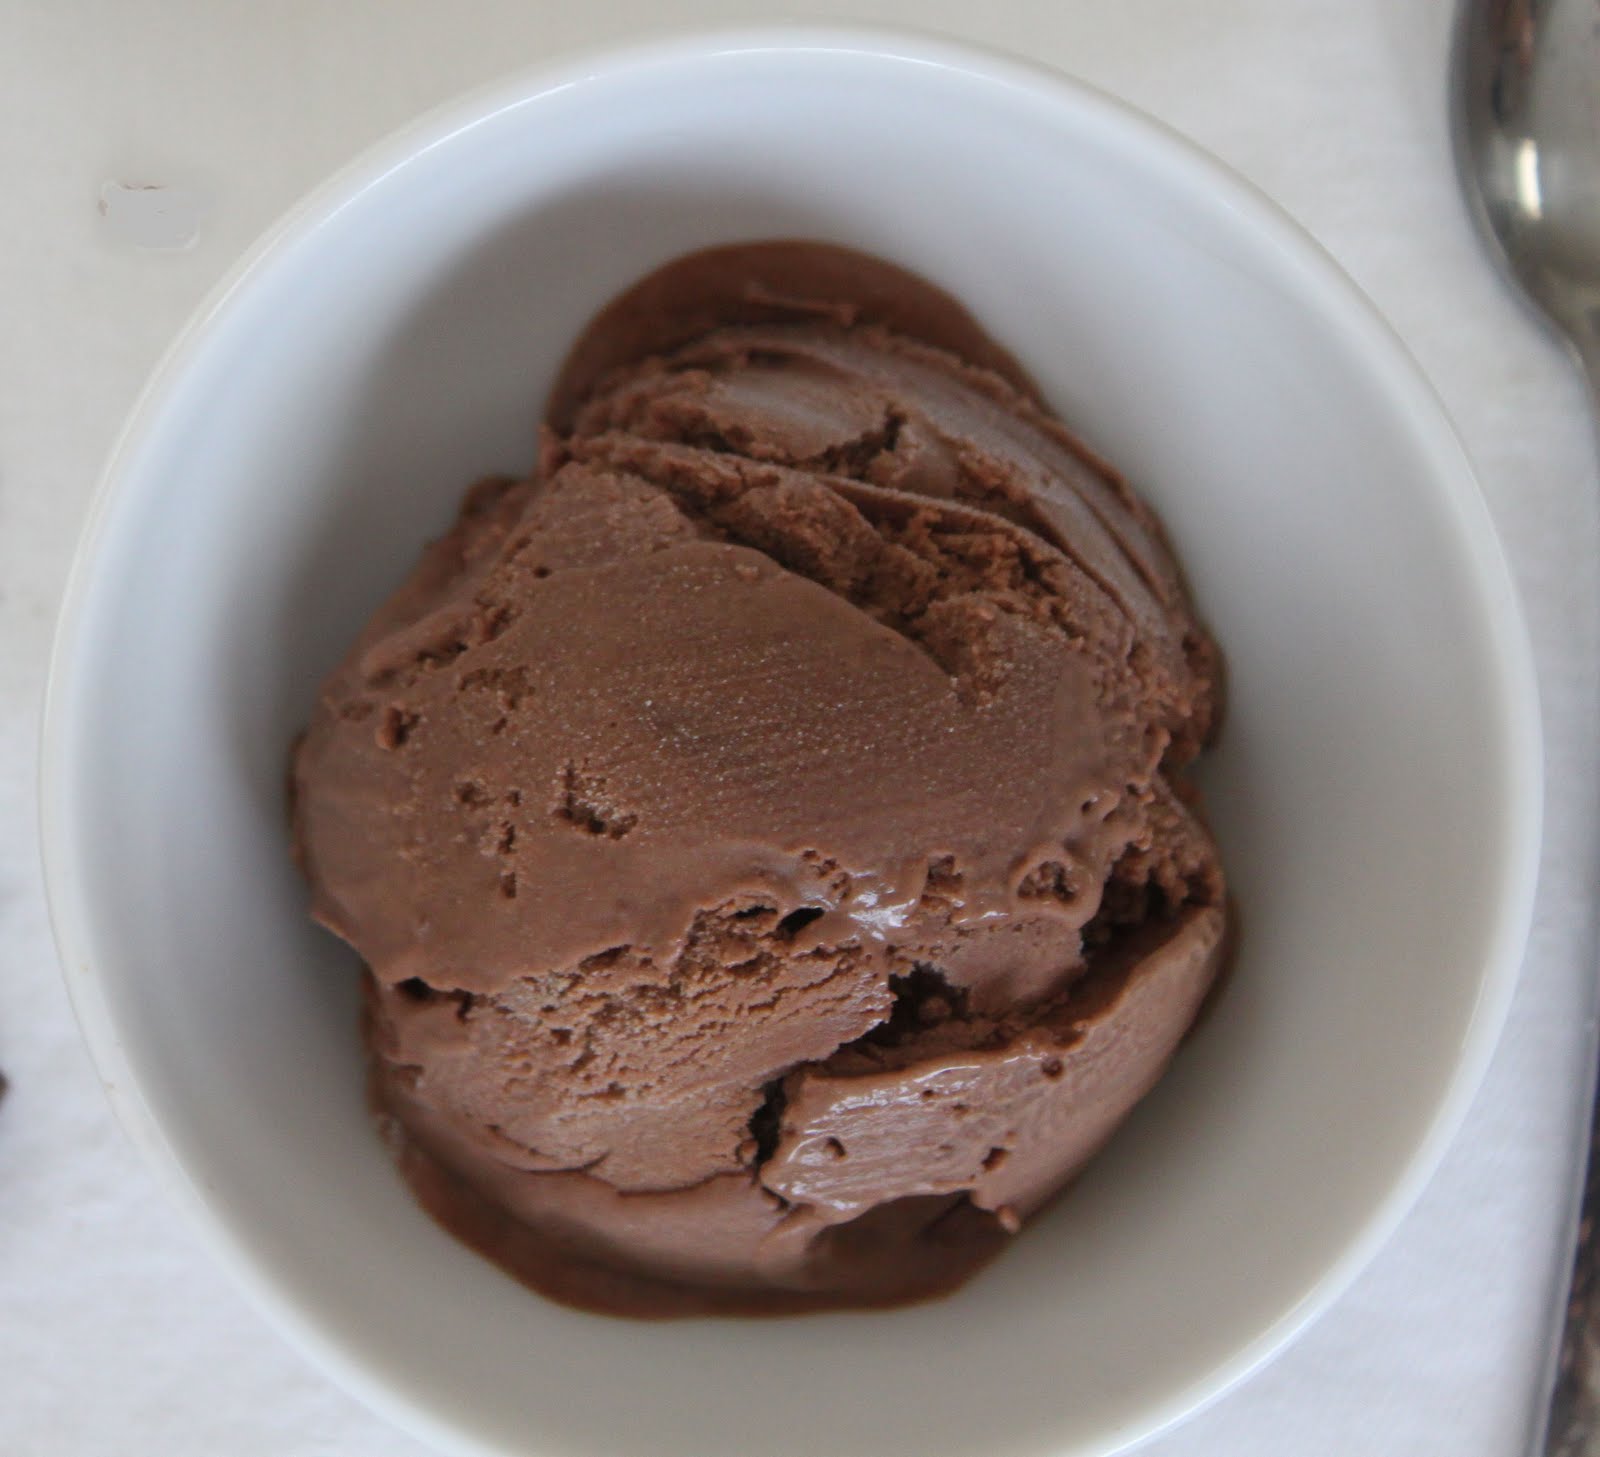
When I first saw this recipe pick, I had mixed feelings. None of us really like chocolate ice cream because it usually tastes artificial  and  doesn't have a real chocolate flavor or texture, so I was hoping that this wouldn't be a waste of time, ingredients, and freezer space. But I was also excited, hoping that this recipe would be the one to change our minds since Dorie has had more hits than misses with our family. And with this recipe, Dorie succeeds again. We all liked the smooth creamy texture and deep, true chocolate flavor. Everyone practically licked their bowls clean, and the remaining ice cream was gone in record time. I know that this ice cream will be reappearing as the summer days get hotter, and that says a lot coming from a bunch of people who "don't like" chocolate ice cream!

This ice cream has a few simple ingredients and is very easy to customize.  Add some nuts, chocolate chunks, and marshmallows for Rocky Road, or crushed candies or cookies for your own special treat. Whatever you do, you will definitely enjoy this creamy, chocolatey ice cream.

Chocolate Ganache Ice Cream
Dorie Greenspan, Baking From My Home to Yours
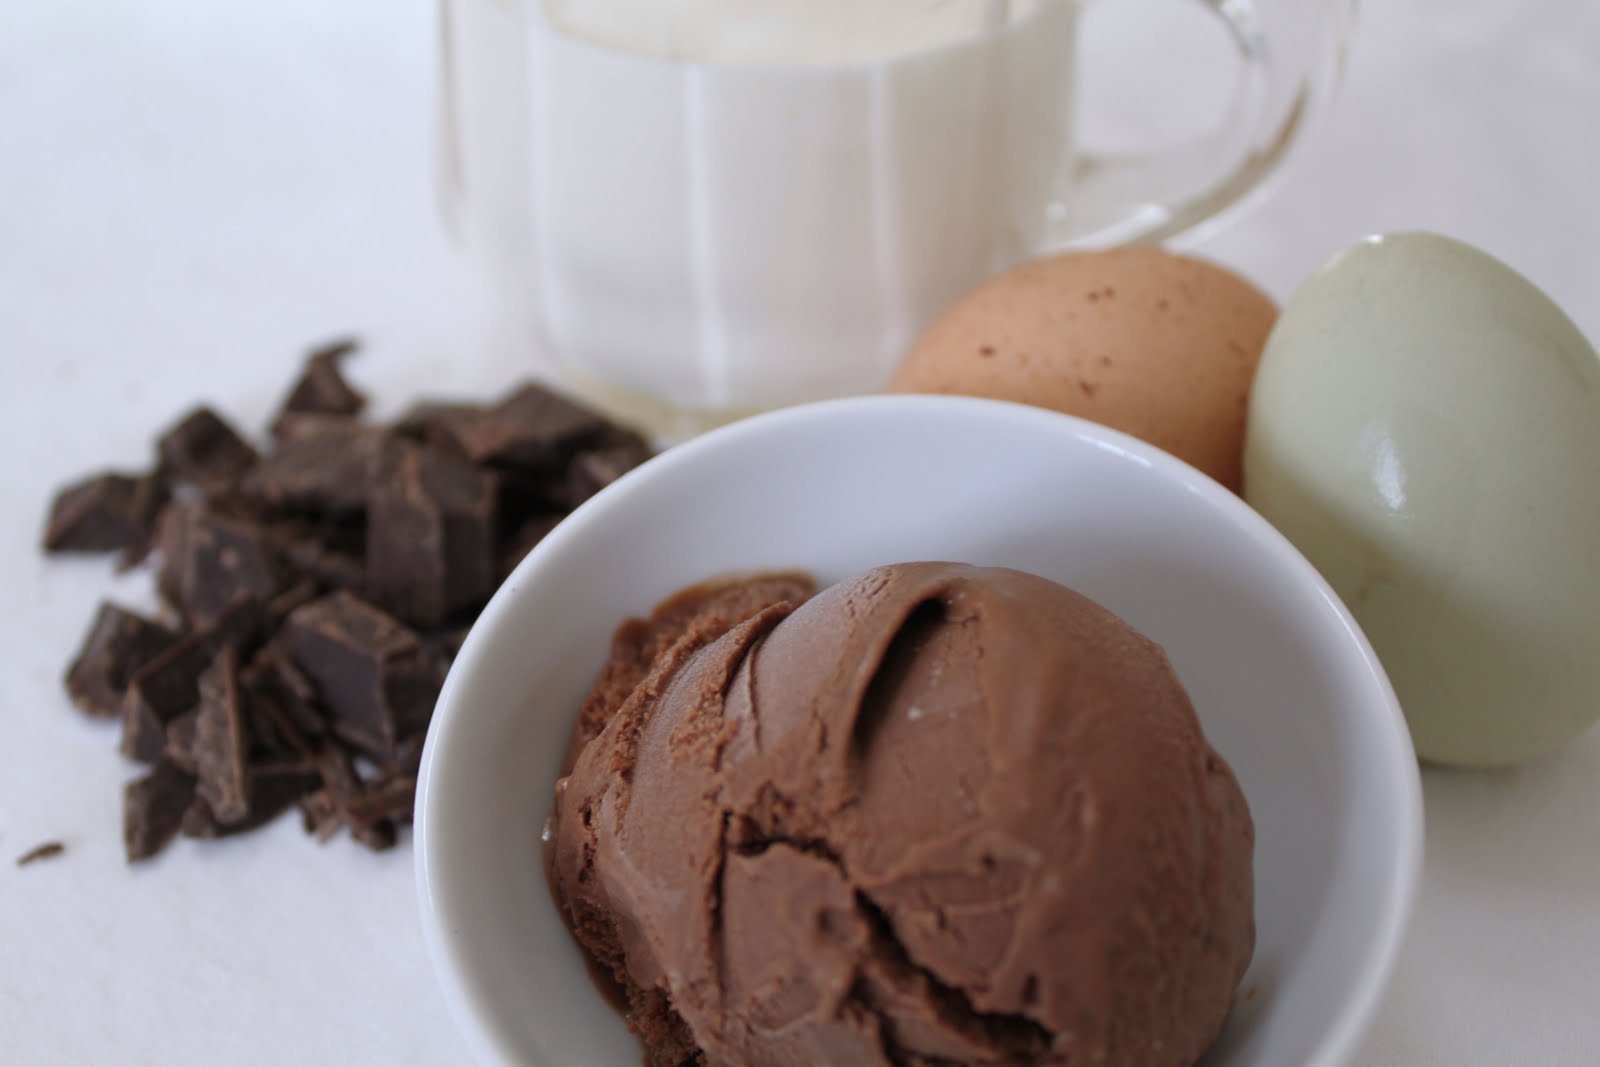
6 ounces bittersweet chocolate, finely chopped
1 ½ cups heavy cream
1 cup whole milk
4 large egg yolks
1/3 cup sugar


Put the chocolate in a 2-quart liquid measuring cup or a large heatproof bowl. Bring ¾ cup of the cream to a boil. Pour the cream over the chocolate and let it sit a minute, then using a rubber spatula and starting in the center of the mixture, slowly stir the cream into the chocolate in ever-widening concentric circles. When the ganache is smooth, set it aside.
Bring the milk and the remaining ¾ cup cream to a boil in a medium heavy-bottomed saucepan.
Meanwhile, in a medium bowl, whisk the yolks and sugar together until well blended and just slightly thickened. Still whisking, drizzle in about one third of the hot liquid—this will temper, or warm, the yolks so they won’t curdle. Whisking all the while, slowly pour in the remaining liquid. Pour the custard back into the pan and cook over medium heat, stirring without stopping, until the custard thickens slightly and coats the back of a spoon; if you run your finger down the bowl of the spoon, the custard should not run into the track. The custard should reach at least 170 degrees F, but no more than 180 degrees F, on an instant-read thermometer. Immediately remove the pan from the heat and slowly and gently stir the custard into the ganache.
Refrigerate the custard until chilled before churning it into ice cream.
Scrape the chilled custard into the bowl of an ice cream maker and churn according to the manufacturer’s instructions. Pack the ice cream into the container and freeze it for at least 2 hours, until it is firm enough to scoop. Makes about 1 quart.
Serving: If the ice cream is very firm—as ice cream made with premium-quality chocolate often is—allow it to sit on the counter for a few minutes before scooping or warm it in a microwave oven using 5-second spurts of heat.
Storing: Packed tightly in a covered container, the ice cream will keep in the freezer for about 2 weeks

Thanks for a great pick Katrina. If you want the recipe for this excellent ice cream stop by Baking with Boys and Katrina will have the recipe for you, along with her special take on the recipe.  If you want to see what the other TWD bakers made visit our blog roll.

THE WINNERS
Thank to everyone who participated in the Girard's salad dressing  give away. Winners where chosen by :
Random Integer Generator

Here are your random integers, generated with replacement:

9 24 5 3 16
Timestamp: 2010-08-09 20:57:19 UTC

Barbara at Barbara Bakes
Becky Boyer at Columbus Foodie
Scrambled Hen Fruit
Michelle at Big Black Dog
Lynn  at Queen of the Castle Recipes

Please email (epsteinrr5@gmail.com) your complete mailing address so Girard's can send you your winnings.


Tuesday, August 3, 2010

TWD:Gingered Carrot Cookies

 Gingered Carrot Cookies

 Natalia of gatti fili e farina chose Gingered Carrot Cookies this week. I wasn't really excited about these cookies, but that's why you participate in a group like this, to try a recipe that you might not otherwise think twice about. However, I was pleasantly suprised by these cookies. For some reason I thought these would be just like carrot cakes, and they were not. Neither the ginger nor the carrots overpowered these little cookies. They were mildly spiced and slightly cripsy on the outside but still soft and moist on the inside. Mimi Jr. thought they were like scones, filled with nuts and raisins (no coconut for us this time). With a cup of coffee they were the perfect breakfast cookie, tasty and not too sweet.


 Gingered Carrot Cookies
 Baking from my home to yours by Dorie Greenspan

2 cups all-purpose flour
1 teaspoon baking powder
1/2 teaspoon salt
1 teaspoon ground ginger
Pinch freshly grated nutmeg
1 1/2 sticks (12 tablespoons) unsalted butter at room temperature
2/3 cup sugar
1/3 cup (packed) light brown sugar
1 large egg
1/2 teaspoon pure vanilla extract
1 cup shredded carrots (about 3, peeled and trimmed)
1 cup sweetened shredded coconut
1 cup moist, plump raisins (dark or golden)
1/2 cup coarsely chopped pecans, preferably toasted

Position the racks to divide the oven into thirds and preheat the oven to 375 degrees F. Line two baking sheets with parchment or silicone mats.
Whisk together the flour, baking powder, salt, ginger and nutmeg.
Working with a stand mixer, preferably fitted with a paddle attachment, or with a hand mixer in a large bowl, beat the butter on medium speed until creamy and smooth. Add the sugars and beat for 2 minutes or so, then add the egg and beat for another minute. Reduce the mixer speed to low and beat in the vanilla.
Continuing on low speed, add the dry ingredients in 2 or 3 batches and beat only until they just disappear into the mix. You'll have a very thick dough, and you might be tempted to overbeat it to incorporate flour-don't.
 Mix in the carrots, coconuts, raisins and pecans. Spoon the dough onto the baking sheets in heaping tablespoonfuls, leaving about an inch of space between them; these cookies don't spread much.
Bake for 16 to 18 minutes, rotating the sheets from top to bottom and front to back at the midway point. The cookies should be light brown and only just firm on top. Carefully transfer the cookies to racks to cool to room temperature.

 To see what the other  TWD baker thought visit our blog roll.
If you want to enter the Girard's salad dressing give away leave a comment by this Saturday  August 7.

Friday, July 30, 2010

Summers Salads and a Give Away

I was recently contacted by Girard premium salad dressings and given the opportunity to try their line of premium salad dressings.  They sent me bottle of their three new flavors- apple poppyseed, creamy balsamic, and peach mimosa,  and one bottle of their classic Champagne dressing. We eat a lot of salads during the summer because they are quick and easy, and perfect for a relaxing dinner on the patio, so this was a great chance to change up some of our usual salads with some new flavors.

I sampled each of the dressings and was impressed with the fresh flavors and the balance between the acid and the oil. On my menu was Julia Child's Cobb salad and the classic champagne dressing was perfect match for this salad.
 
Cobb Salad
1/2 head finely chopped iceberg lettuce
1 small head finely chopped romaine lettuce
Grilled or poached chicken breast
Red Onion
corn kernels
tomatoes that have been seeded
hard boiled eggs
bacon, crisply cooked
blue cheese
avocado

Fill a salad bowl with the chopped lettuces. Dice the chicken breast and toss with a tablespoon of salad dressing,then arrange on top of the lettuce. Finely chop the hard boiled eggs and season with salt and pepper before arranging next to the chicken. Chop remaining ingredients and place them on top of the lettuce. Just before serving toss the entire salad with enough dressing to coat the ingredients evenly.


Along with the dressings Girard's sent a along a few recipes to try. The two that caught my eye were a cococus salad with the classic champagne and a chicken salad with the apple poppy seed dressing. We have a couscous salad that we make a lot during the summer so instead of the usual blasamic/olive oil drizzle, I used the chanpange dressing and it was really good. I also love the apple salad at Panera, so I thought this would be the perfect opportunity to make it at home with the apple poppy seed dressing.

Coucous Salad

This is my go-to couscous salad.
2 cups cooked coucous
finely chopped red onion
toasted pine nuts
sweet one hundred tomatoes, halved (or any other variety of cherry tomato)
finely chopped basil
crumbled feta cheese
salt and pepper
Griard's Champagne dressing

Toss first 6 ingredients together and mix with 1/4 cup of dressing and salt and pepper. Refrigerate until chilled. Just before serving toss with additional dressing to taste.

Chicken Apple Salad

This is my version of chicken apple salad..  Add enough of each ingredient to suit your tastes and for the number of servings you need. I usually use about 2 cups of greens per serving for a main dish salad.
Mixed greens
sliced red onion
chopped toasted walnuts
shredded cheddar cheese
dried cranberries or cherries
chopped grilled chicken breast
chopped celery
crumbled bacon
apple chips
Girard 's Apple Poppy Seed dressing


I tried the balsamic dressing over vine ripe tomatoes and it was the perfect mix of balsamic vinegar and oil.
The only dressing I haven't used yet is the peach mimosa, but I hope to give it a try this weekend.

Girard's has generously offered to send 5 lucky readers the same samples they sent me. To enter just leave a comment about your favorite salad. Be sure that you include your email if your comment doesn't link back to your blog. Comments must be received by August 7th at 12 a.m. pacific time.

Here is a link to an online coupon for $2.00 off one bottle of Girard’s Salad Dressing.
GIRARDS COUPOON Please note that the coupon is on a first come, first serve basis, so be sure to act fast!


Tuesday, July 27, 2010

TWD: Blondies

Chewy, Chunky Blondies


 Nicole of Cookies on Friday picked Chewy, Chunky Blondies for our TWD treat this week. Boy Mimi had some free time on his hands so he volunteered to get into the kitchen and make these blondies. Because we like our blondies soft and gooey we only baked ours for 30 minutes, and they were perfect. They had a nice crispy crust and the middle was rich and chewy.


They were everything a blondie should be- soft, chewy and full of brown sugar flavor.  As a family we really liked these blondies, execpt for the butterscotch chips, so next time we will leave them out or use toffee bits. They were a nice change from a regular chocolate brownie, and a step up from a plain chocolate chip cookie. They were the perfect afternoon snack and really easy to put together, especially since Boy Mimi did all the work! They would be the perfect thing to take to a party or on a picnic, and make a great dessert when they are fresh from the oven and topped with some homemade vanilla gelato.

Blondies
 Baking from My Home to Yours by Dorie Greenspan

2 cups flour
¾ teaspoon baking powder
½ teaspoon baking soda
½ teaspoon salt
2 sticks (8 ounces) unsalted butter, at room temperature
1-1/2 cups (packed) light brown sugar
½ cup sugar
2 large eggs
1 teaspoon pure vanilla extract
6 ounces bittersweet or semisweet chocolate, chopped into chips or 1 cup store bought chocolate chips
1 cup butterscotch chips or Heath Toffee Bits
1 cup coarsely chopped walnuts
1 cup sweetened shredded coconut

Center a rack in the oven and preheat the oven to 325 degrees F. Butter a 9” x 13” baking pan and put it on a baking sheet.

Whisk together the flour, baking powder, baking soda, and salt.

Working with a stand mixer, preferably fitted with a paddle attachment, or with a hand mixer in a large bowl, beat the butter on medium speed until smooth and creamy. Add both sugars and beat for another 3 minutes, or until well incorporated. Add the eggs one by one, beating for 1 minute after each addition, then beat in the vanilla. Reduce the mixer speed to low and add the dry ingredients, mixing just until they disappear into the batter. Using a rubber spatula, stir in the chips, nuts, and coconut. Scrape the batter into the buttered pan and use the spatula to even the top as best as you can.

Bake for about 40 minutes, or until a knife inserted into the center of the blondies comes out clean. The blondies should pull away from the sides of the pan a little and the top should be a nice honey brown. Transfer the pan to a rack and cool for about 15 minutes before turning the blondies out onto another rack. Invert onto a rack and cool the blondies to room temperature right side up.

Cut into 32 bars, roughly 2-1/4” x 1-1/2”


Thanks Nicole for a great pick.  To see what the other TWD bakers made check our blog roll.


Daring Bakers: Swiss Roll

Swiss Roll

The July 2010 Daring Baker's challenge was hosted by Sunita of Sunita's World- life and food. Sunita challenged everyone to make an ice-cream filled Swiss roll that’s then used to make a bombe with hot fudge. Her recipe is based on an ice cream cake recipe from Taste of Home.

Let me just say that this is not a pretty dessert. It tasted fine, but it's just not gorgeous to look at. And the looks definitely did not stop it from disappearing rather quickly. As usual with the Daring Bakers, this was a family project. Mini Me made the Swiss roll cake which we filled with a vanilla mascarpone mousse. Boy Mimi made his fabulous coffee ice cream, and I contributed the vanilla gelato and hot fudge sauce. We used the cake recipe provided on the Daring Bakers forum for the Swiss roll and while the texture was nice, it just didn't have enough chocolate flavor. The recipe can be found here.


Vanilla Mascarpone Mousse
8oz mascarpone
2 teaspoon vanilla
8oz whipping cream
1/2 cup sugar, divided

In a mixing bowl whip the cream with 1/4 cup sugar and 1 teaspoon vanilla. In a second bowl beat the mascarpone with the remaining teaspoon vanilla and sugar. Fold the whipped cream into the mascarpone.
Chill.


Coffee Ice Cream
1 1/2 cups whole milk
1 1/2 cups heavy cream,
3/4 cups sugar
4 egg yolks
1 teaspoon vanilla
2-3 tablespoons instant espresso powder
pinch salt

Heat milk, cream instant espresso powder and 1/2 cup sugar over medium heat,stirring to dissolve sugar, about 5 minutes.
Whisk egg yolks with remaining sugar until smooth. Stirring constantly  slowly add about 1 cup of the hot milk to the egg yolk. then slowly add the egg yolk mixture back into the remaining hot milk. continue to cook the custard over medium heat until it is very hot, but not simmering and custard coats the back of a spoon.
Strain custard into a bowl set over ice water and let cool. When cool remove from ice bath cover with plastic wrap and refrigerate until completely chilled, about 3 hours.
When chilled churn in ice cream machine according to manufacturer's directions.

Vanilla Gelato
2 cups whole milk
1/2 cup sugar
3 egg yolks
1 cup cream.
2 teaspoons vanilla
pinch of salt

Heat milk over low heat. In a small bowl beat egg yolks until thick and creamy. Add 2 tablespoons of hot milk to eggs stirring constantly. Add eggs, sugar and salt to remaining milk in sauce pan. Return to heat and cook over medium heat, until custard thickens, but do not boil.  Remove from heat. Place pan in a bowl of ice water to stop cooking then add cream and vanilla. Refrigerate until cold and process in your ice cream machine according to manufacturer directions.

Hot Fudge Sauce
1/2 cup brown sugar
1/2 cup white sugar
1/2 cup cocoa powder
pinch salt
2/3 cup heavy cream
4 tablespoons butter
1 teaspoon vanilla

Mix all ingredients except vanilla in a sauce pan. Stir to combine. continue string over medium heat until smooth and the sugars have melted. Remove from heat add vanilla and cool to room temperature. To serve warm, reheat over hot water or in microwave.


Sunita thank you for a fun challenge. To see what the other Daring Bakers made visit our blog roll

Tuesday, July 13, 2010

TWD:Brrr ownies

Brrrr ownies
No it's not the brownies, but this is where we ate ours, Lake Powell UT/AZ . The majesty of Lake Powell is awe inspiring. The clear water, starry sky and layers of earth sandwiched together is indescribable in its beauty. It literally just takes your breath away.


Karen of Welcome to Our Crazy Blessed Life selected Brrrr-ownies for this weeks treat. We made these  moist, dark chocolaty and minty brownies before we left to Lake Powell.


Since we were long gone, I didn't read the P&Q to find out to pros and cons of this week's recipe. For us the brownies were just perfect. Not overly minty, moist but not too gooey and full of chocolate. Besides that, they traveled well and stayed fresh for a few days. We kept them in the cooler and they were the perfect cold and minty treat on those 100 degree afternoons. I definitely was not turning on an oven in the middle of the desert just for a brownie so everyone was glad that I had made these and brought them along.


Brrr-ownies
 Baking from My Home to Yours by Dorie Greenspan

5 Tablespoons unsalted butter cut into 5 pieces
3 ounces bittersweet chocolate, coarsely chopped
3 ounces unsweetened chocolate, coarsely chopped
2/3 cup sugar
2 large eggs
1 teaspoon pure vanilla extract
pinch of salt
1/3 cup all purpose flour
1 cup (6 ozs) York Peppermint Pattie Bites (or equal weight of patties) chopped into bits

 Getting Ready: Center a rack in the oven and preheat the oven to 325 degrees F. Line an 8 inch square baking pan with foil. Butter the foil and place the pan on a baking sheet.

Set a heatproof bowl over a saucepan of simmering water. Put the butter in the bowl, top with chopped chocolates and stir occasionally until the ingredients are just melted - you don't want then to get so hot that the butter separates. Remove the bowl from the pan of water.
  
With a whisk, stir in the sugar. Don't be concerned when your smooth mixture turns grainy. Whisk in the eggs one at a time. Add the vanilla and whisk vigorously to bring the batter together and give it a shine before gently stirring in the salt and flour; stir only until incorporated. Switch to a rubber spatula and fold in the peppermint pieces. Scrape the batter into the pan and smooth the top with the rubber spatula.

Bake the brownies for 30 to 33 minutes, or until the top is dull and a thin knife inserted into the center comes out almost clean. (The tip of the knife may be a touch streaky) Transfer the pan to a rack and cool to room temperature.


When they are completely cool, turn out onto a rack, peel away the foil and invert onto a cutting board. Cut into 16 2 inch squares.

Fish tacos were never fresher!

To see what the other TWD bakers made visit our blog roll.

Tuesday, July 6, 2010

TWD: Tarte Noire

Tarte Noire
Mimi's Kitchen is on vacation. We are drifting on a houseboat on Lake Powell in Arizona, so no internet or cell service here. I will catch up on your blogs when we return next week.
 Dharmagirl of  bliss: towards a delicious life  chose Tarte Noire. This dessert was an easy to make silky chocolate ganache in a sweet pastry crust. We flavored ours with smokey chipotle chilies, topped them with sweetened whipped cream and dusted them with a little cayenne pepper.

The chipotle doesn't hit you right away, it kind of sneaks up on you as a surprise ending to the intense chocolate. After your first bite you have to stop and wonder, what is that extra something? Although I love a good sweet chocolate ganache, the addition of the spice made for a nice change. Mini Me doesn't like spicy things, but she did enjoy the subtle heat in this tart, so I knew it wasn't too hot. The filling was really smooth and creamy, and very rich, so just a small slice was the perfect after dinner treat. Although the deep chocolatey flavor of this tart was excellent, it would also be good topped with some fresh raspberries, or flavored with some peppermint or orange extracts, or even some instant espresso.

Tart Noir
Baking: from my home to your Dorie Greenspan

Filling:
8 ounces bittersweet chocolate, finely chopped
1 cup plus 2 tablespoons heavy cream
1/2 stick (4 tablespoons) unsalted butter, cut into 4 pieces, at room temperature

Crust:
1 9-inch tart shell made with Sweet Tart Dough or Chocolate Shortbread Tart Dough, fully baked and cooked

Put the chopped chocolate in a heatproof bowl and have a whisk or a rubber spatula at hand. 

Bring the cream to a boil, then pour half of it over the chocolate and let it sit for 30 seconds. Working with the whisk or spatula, very gently stir the chocolate and cream together in small circles, starting at the center of the bowl and working your way out in increasingly larger concentric circles. Pour in the remainder of the cream and blend it into the chocolate, using the same circular motion. When the ganache is smooth and shiny, stir in the butter piece by piece. Don't stir the ganache any more than you must to blend the ingredients—the less you work it, the darker, smoother, and shinier it will be. (The ganache can be used now, refrigerated, or even frozen for later.)

Pour the ganache into the crust and, holding the pan with both hands, gently turn the pan from side to side to even the ganache. Refrigerate the tart for 30 minutes to set the ganache, then remove the tart from the fridge and keep it at room temperature until serving time. 

Makes 8 servings. 

Storing: The tart should be served the day it is made. However, the ganache can be made ahead and kept in the refrigerator for up to 2 days. When you are ready to use it, allow it to come to room temperature, then heat it gently in a microwave oven, using 5-second spurts of heat and checking on its progress vigilantly, until it is pourable. O you can put the bowl of ganache in a larger bowl of hot water and stir every 10 seconds until it can be poured. You can even freeze the ganache, tightly covered, for up to 2 months. Thaw it overnight in the refrigerator, bring it to room temperature, and then warm it in a microwave oven or bowl of hot water until it is pourable. 
  
Sweet Tart Dough
Makes enough for one 9-inch crust

The simplest way to make a tart shell with this dough is to press it into the pan. You can roll out the dough, but the high proportion of butter to flour and the inclusion of confectioners' sugar makes it finicky to roll. I always press it into the pan, but if you want to roll it, I suggest you do so between sheets of plastic wrap or wax paper or inside a rolling slipcover.

1-1/2 cups all-purpose flour
1/2 cup confectioners' sugar
1/4 teaspoon salt
1 stick plus 1 tablespoon (9 tablespoons)
very cold (or frozen) unsalted butter, cut into small pieces
1 large egg yolk

Put the flour, confectioners' sugar and salt in a food processor and pulse a couple of times to combine. Scatter the pieces of butter over the dry ingredients and pulse until the butter is coarsely cut in—you should have some pieces the size of oatmeal flakes and some the size of peas. Stir the yolk, just to break it up, and add it a little at a time, pulsing after each addition. When the egg is in, process in long pulses—about 10 seconds each—until the dough, which will look granular soon after the egg is added, forms clumps and curds. Just before you reach this stage, the sound of the machine working the dough will change—heads up. Turn the dough out onto a work surface and, very lightly and sparingly, knead the dough just to incorporate any dry ingredients that might have escaped mixing.

To press the dough into the pan: Butter a 9-inch fluted tart pan with a removable bottom. Press the dough evenly over the bottom and up the sides of the pan, using all but one little piece of dough, which you should save in the refrigerator to patch any cracks after the crust is baked. Don't be too heavy-handed—press the crust in so that the edges of the pieces cling to one another, but not so hard that the crust loses its crumbly texture. Freeze the crust for at least 30 minutes, preferably longer, before baking.
To partially or fully bake the crust: Center a rack in the oven and preheat the oven to 375 degrees F.

Butter the shiny side of a piece of aluminum foil and fit the foil, buttered side down, tightly against the crust. (Since you froze the crust, you can bake it without weights.) Put the tart pan on a baking sheet and bake the crust for 25 minutes. Carefully remove the foil. If the crust has puffed, press it down gently with the back of a spoon. For a partially baked crust, patch the crust if necessary, then transfer the crust to a cooling rack (keep it in its pan).
To fully bake the crust: Bake for another 8 minutes or so, or until it is firm and golden brown. (I dislike lightly baked crusts, so I often keep the crust in the oven just a little longer. If you do that, just make sure to keep a close eye on the crust's progress—it can go from golden to way too dark in a flash.) Transfer the tart pan to a rack and cool the crust to room temperature before filling.
To patch a partially or fully baked crust, if necessary: If there are any cracks in the baked crust, patch them with some of the reserved raw dough as soon as you remove the foil. Slice off a thin piece of the dough, place it over the crack, moisten the edges and very gently smooth the edges into the baked crust. If the tart will not be baked again with its filling, bake for another 2 minutes or so, just to take the rawness off the patch.

Chocolate Shortbread Tart Dough

1 1/4 cups all-purpose flour
1/4 cup unsweetened cocoa powder
1/4 cup confectioner's sugar
1/4 teaspoon salt
1 stick plus 1 tablesppon (9 tablespoons) very cold (or frozen) unsalted butter, cut into small pieces
1 large egg yolk

Put the flour, cocoa, confectioner's sugar and salt in a food processor and pulse a couple of times to combine. Scatter the pieces of butter over the dry ingredients and pulse until the butter is coarsely cut in—you should have pieces the size of oatmeal flakes and some the size of peas. Stir the yolk, just to break it up, and add it a little at a time, pulsing after each addition. When the egg is in, process in long pulses—about 10 seconds each—until the dough, which will look granular soon after the egg is added, forms clumps and curds. Just before you reach this stage, the sound of the machine working the dough will change—heads up. Turn the dough out onto a work surface and very lightly and sparingly knead the dough just to incorporate any dry ingredients that might have escaped mixing. 

Press the dough into the pan. To bake it, follow the directions for Sweet Tart Dough. 

Makes enough for one 9-inch crust.

Storing: Well wrapped, the dough can be kept in the refrigerator for up to 5 days or frozen for up to 2 months. While the fully baked crust can be packed airtight and frozen for up to 2 months, I prefer to freeze the unbaked crust in the pan and bake it directly from the freezer—it has a fresher flavor. Just add about 5 minutes to the baking time. 


If you want to see what the other TWD bakers made check our blog roll. See you next week.


Thursday, July 1, 2010

Cupcake Fun


Come on in and have a birthday cupcake!  This month Mimi's Kitchen is one year old.  One year ago, I didn't even know that blogs existed. My neighbor Mrs. M sent me an email about a Martha Stewart show on cake pops. I was fascinated. One thing lead to another and I ended up at the Daring Bakers. I thought what a fun way to spend time with my children, who all enjoy baking and cooking.


You can join The Daring Bakers without a blog, but that link wasn't working and I wanted to join ( I can be some what impatient), so I clicked on the blog link and the next thing I knew I had created Mimi's Kitchen. Now just what is a food blog? For me, this blog is my cookbook to my children. For years, every time I made something my children liked they would say, Mimi put that in your cookbook, so now I have.


  I'm usually a pretty a shy person, so when I got my very first comment from Ingrid  (The 3 B's Baseball, Baking & Books) I was excited that someone noticed me. Then one day Ozoz  (The Kitchen Butterfly) asked me a question that made me laugh. So, I began to make my own comments, and ask questions of other bloggers when I wanted to know about an ingredient or method.


I never realized just how many people love to cook and bake for fun. I now know that my large collection of cookbooks, cooking magazines and kitchen gadgets is not abnormal and that other people also buy cake pans because they are just too cute to pass up.  


I thought these flower cupcakes were the perfect way to celebrate my blog's summer birthday. To make these fun cup cakes from What's New Cupcake, just bake up a batch of your favorite cupcakes and frost them in what ever frosting you like. I found that white frosting worked best with the white marshmallows that are used for decoration. Each cupcake takes about 22 miniature marshmallows. Snip them in half on the diagonal and drop into a bowl of colored sugar. I also discovered that I needed to roll back the cut edges of the marshmallows so more sugar would adhere to the cut surface. Starting at the outside edge place marshmallow in concentric circles over the top of the frosted cupcake. I filled the center with yellow jimmies. You could also use a Skittles or M&M's. These were really easy to do and would be a fun project for children (an adult might need to cut the marshmallows)


I'm still learning the ins and outs of blogging.  Baking is easy, writing is not and photography is a whole new skill set. Hopefully, over time, I will improve my content, my comments and my photos.
Thank You, all for making my first year in Mimi's Kitchen so much fun. I have enjoyed meeting, baking and traveling along with you. 


I'm sending these to the Foodie Friday party at Designs by Gollum