Thursday, May 27, 2010

Daring Bakers:Croquembouche

Croquembouche


It has been many years since I made croquembouche. I made it for a Christmas party when my children were small, and they were so delighted with the beautiful caramel and cream puff structure. It was tall and glistening with caramel, and almost looked like the beautiful Christmas trees that you see in lit up Rockafeller Center in New York.


The May 2010 Daring Bakers’ challenge was hosted by Cat of Little Miss Cupcake . Cat challenged everyone to make a piece montée, or croquembouche, based on recipes from Peter Kump’s Baking School in Manhattan and Nick Malgieri. The individual parts of this elegant dessert are not hard to make. It starts with pate a choux, an easy dough for the puffs, which are filled with pastry cream, and the caramel both holds it together and acts as a delicate, elegant, decoration. Mini Me made the cream puffs and Mimi Jr. made the pastry cream and together we assembled our tower. Good team work made this go really fast! Although I have used other recipes for both the cream puffs and pastry cream in the past, this time we used both the recipes as given from the Daring Bakers fourm and they worked out nicely. Although the puffs and pastry cream can be made a day ahead, this dessert is best eaten within a few hours of construction so the puffs don't get soggy. Lucky for me, the eating part is never a problem in our house and it disappeared pretty fast.

Pate a Choux
 (Yield: About 28)

¾ cup (175 ml.) water
6 Tbsp. (85 g.) unsalted butter
¼ Tsp. salt
1 Tbsp. sugar
1 cup (125 g.) all-purpose flour
4 large eggs
For Egg Wash: 1 egg and pinch of salt

Pre-heat oven to 425◦F/220◦C degrees. Line two baking sheets with parchment paper.
Preparing batter:
1. Combine water, butter, salt and sugar in a saucepan over medium heat. Bring to a boil and stir occasionally. At boil, remove from heat and sift in the flour, stirring to combine completely.

2. Return to heat and cook, stirring constantly until the batter dries slightly and begins to pull away from the sides of the pan

3. Transfer to a bowl and stir with a wooden spoon 1 minute to cool slightly.

4. Add 1 egg. The batter will appear loose and shiny. It is at this point that you will add in the next egg. Repeat until you have incorporated all the eggs.

Piping:
Transfer batter to a pastry bag fitted with a large open tip (I piped directly from the bag opening without a tip). Pipe choux about 1 inch-part in the baking sheets. Choux should be about 1 inch high about 1 inch wide.
Using a clean finger dipped in hot water, gently press down on any tips that have formed on the top of choux when piping. You want them to retain their ball shape, but be smoothly curved on top.


 Vanilla Crème Patissiere

1 cup (225 ml.) whole milk
2 Tbsp. cornstarch
6 Tbsp. (100 g.) sugar
1 large egg
2 large egg yolks
2 Tbsp. (30 g.) unsalted butter
1 Tsp. Vanilla

1. Dissolve cornstarch in ¼ cup of milk. Combine the remaining milk with the sugar in a saucepan; bring to boil; remove from heat.
2. Beat the whole egg, then the yolks into the cornstarch mixture. Pour 1/3 of boiling milk into the egg mixture, whisking constantly so that the eggs do not begin to cook.
3. Return the remaining milk to boil. Pour in the hot egg mixture in a stream, continuing whisking.
Continue whisking (this is important – you do not want the eggs to solidify/cook) until the cream thickens and comes to a boil. Remove from heat and beat in the butter and vanilla.
4. Pour cream into a stainless steel/ceramic bowl. Press plastic wrap firmly against the surface. Chill immediately and until ready to use.

We divided our pastry cream in half and to one part added extra vanilla and to the other the zest of 2 oranges for a delicate orange flavor. To each we folded in about 2/3 cup whipped cream, to give us a light creamy filling.

printable recipe


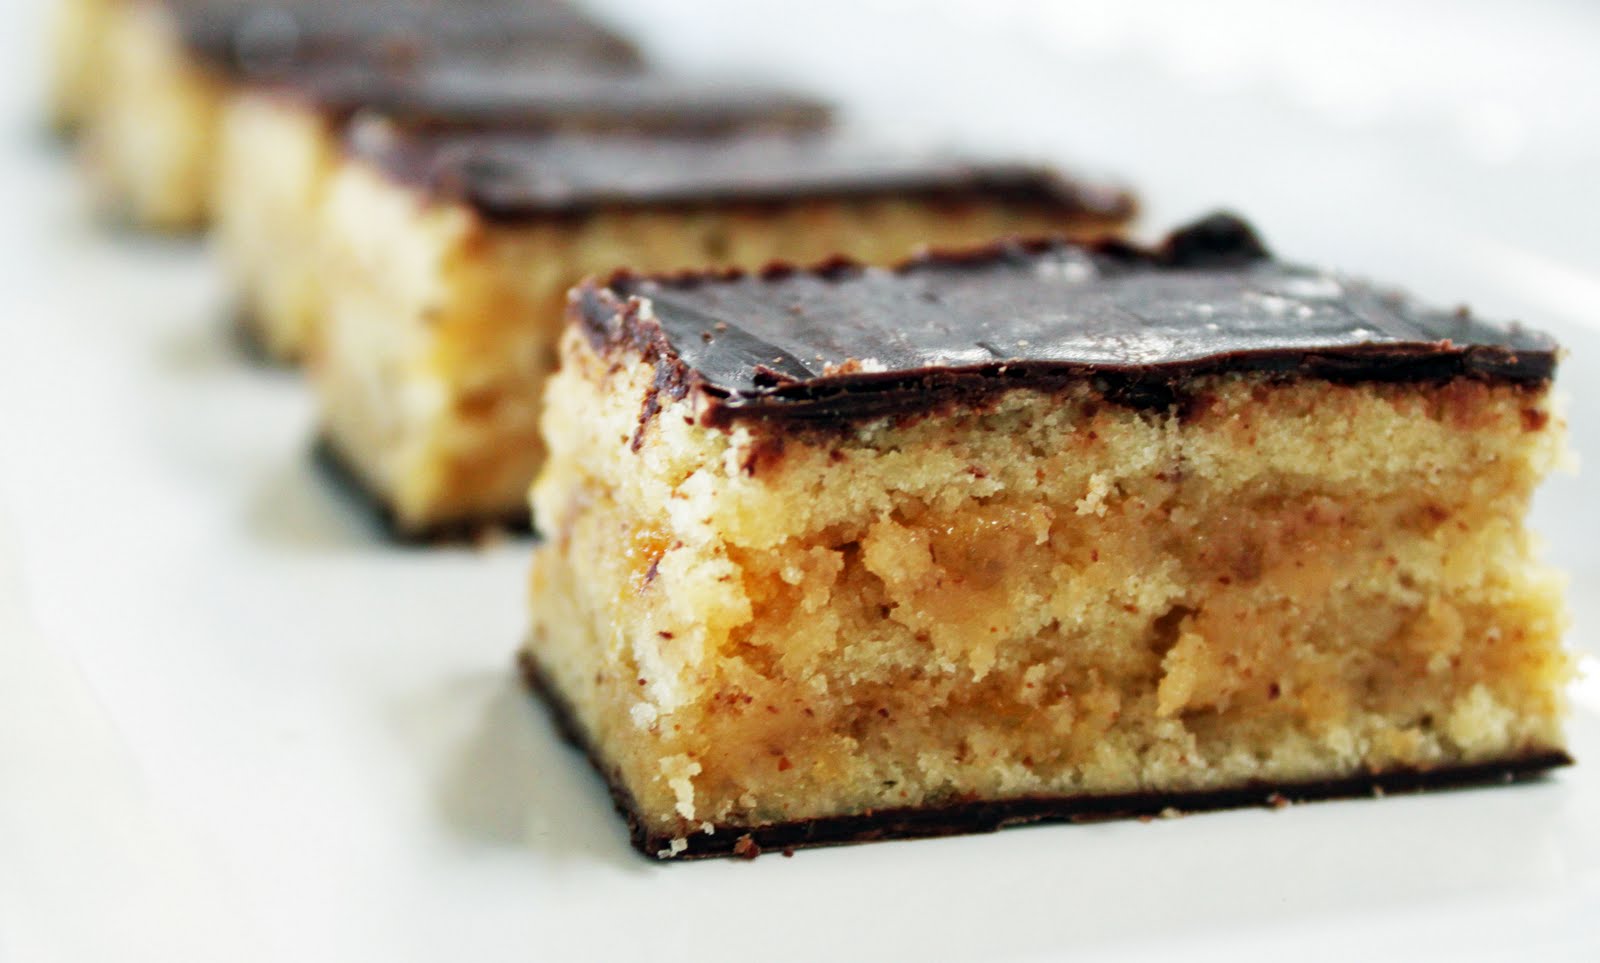
Our cream puffs were light and crispy with just a hint of sweetness. The orange filling with the caramel was a really good combination that I would definitely use again. There are endless combintaion to use for filling and decorations which makes this a good dessert to try again and again, making it different each time. If you want to see what the other Daring Bakers made visit our blog roll.

Monday, May 24, 2010

Graduation Cupcakes


Friday was a Red Letter day at Mimi's Kitchen. Mr. Mimi and I are very proud of our oldest daughter, Mimi Jr., who graduated from San Diego State University. Better yet, she did it in 4 years! Which is a good thing since her sister, Mini Me, will start college at University of California, Irvine in September.


These cup cakes are really easy to put together. SDSU's colors are red and black, so I made red velvet cupcakes in black liners, but they could easily be color customized for any school. The mortar boards are Ghirardelli chocolate squares on top of an upside down Reese's peanut butter cup. The tassels are Twizzlers, untwizzled and thinly sliced, and the tassel button is the top of a dots candy. Everything is held together with a drop of melted chocolate- one between the Reese's and the chocolate square, and one between the tassel and button, which also keeps it attached to the chocolate square. I might be tempted to make these again next month for Mini Me's high school graduation!
Red Velvet Cake

• 2 ½ cups AP flour
• 1 ½ cups sugar
• 2 tbs. cocoa baking powder
• 1 tsp baking soda
• 1 1/4 cup buttermilk
• 1 1/4 cup vegetable oil
• 1 tsp white vinegar
• 1 tsp vanilla
• 2 eggs (medium or large)
• 2 TBS red food coloring
Directions:

Grease and flour 3 cake pans or use paper liners in muffin tins.Pre heat oven to 350F.

1. Sift the flour, sugar, baking soda and cocoa powder into a big bowl that you’ll use to mix the cake.
2. Using a hand or table mixer, add the milk. Mix.
3. Add oil, mix.
4. Add vinegar and vanilla, mix.
5. Add eggs one at a time, mixing well after each addition.
6. Add the food coloring. Mix until the batter is even in color.
7. Evenly pour the batter into the three pans, or fill  muffin cups 1/2 full
8. Bake at 350 degrees F for 25 minutes for layers  or 15-18 minutes for cup cakes.
9. Let the cake cool and then frost with Cream Cheese Frosting

 Cream Cheese Frosting
2 oz butter
3 oz cream cheese
2 1/2 cups confectioners sugar
1tsp vanilla
milk

With mixer beat confectioners sugar and butter until crumbly. Add vanilla and just enough milk to make a thick paste. Beat in cream cheese 1 ounce at a time, continue beating until smooth and fluffy.
printable recipe


No Tuesday's with Dorie this week. There was just too much other stuff going on last weekend! If you want to check out this week's recipe, Banana Coconut Ice Cream Pie visit our host Spike at Spike Bakes.

SDSU Aztecs 2 -  Florida Gators 1

Monday, May 17, 2010

Sugar Drop Cookies


It's Tuesday without Dorie this week. Elizabeth of Cake or Death? decided on Apple-Apple Bread Pudding and although the recipe looks delicious and we like bread pudding, it just didn't fit in with our menu this week. Instead I have these simple sugar cookies which my son claims are his favorite cookie (but he says that about a lot of things, especially when he is hungry). These cookies have a crispy outer shell and a soft, almost creamy center, with just a whisper of cinnamon. You can easily adjust the amount of cinnamon to taste, or add similar spices that you have on hand. This very quick and easy recipe comes from an older edition of The Joy of Cooking. They are the perfect thing to throw together when you need a quick sweet, but I definitely remember spending many rainy afternoons in the kitchen when my kids were younger, watching them have tons of fun rolling the dough in a big bowl of sugar.

Sugar Drop Cookies
Joy of cooking

1 cup sugar
3/4 vegtable oil
2 eggs
1 teaspoon vanilla
2 1/2 cups flour
1 1/2 teaspoon baking powder
3/4 teaspoon salt
1 teaspoon cinnamon

granulated sugar, for rolling

 Pre heat the oven to 375F

In the bowl of a stand mixer combine the sugar and oil mix well. Add the vanilla and eggs, one at a time, beating well after each addition. Add the dry ingredients all at once and beat until well mixed. Shape dough in 1 inch balls and roll into granulated sugar. Place them on a baking sheet about 1 inch apart. Bake 10-12 minutes. Don't over bake- the cookies will not be brown when they are done. Makes 4-5 dozen cookies.
printable recipe


Friday, May 14, 2010

Chicken Satay with Peanut Sauce


Chicken Satay with Peanut Sauce is a quick, easy and tasty weeknight meal. The chicken is tender and flavorful and the peanut sauce has a hint (or more if you like) of heat. While the chicken pieces marinate soak your wooden skewers in some water so they will be ready for the grill, make the peanut sauce  and side dishes. Rice and steamed or grilled vegetables are very good with this sauce.  After thirty minutes in the marinade the chicken is ready to grill. Push 3-4 chicken pieces on a skewer and grill 2-3 minute per side.

Chicken Satay with Peanut Sauce
4 chicken breast halves
Marinade
4 cloves mince garlic
1/2 teaspoon ground coriander
1 teaspoon ground cumin
1/2 teaspoon salt
2 tablespoon soy sauce
1 tablespoon olive oil
1 tablespoon water
1/2 teaspoon crushed red pepper
1 tablespoon brown sugar
Peanut sauce
1/4 cup peanut butter
1/2 cup milk - coconut milk would be good
1/4 cup water
1 tablespoon soy sauce
1 teaspoon lemon juice
2 teaspoon brown sugar
1/2 teaspoon red pepper flakes
 cayenne pepper to taste

Cut the chicken breast on the bias into 1/2 inch strips, place in a bowl or zip lock bag.

Put all ingredient for the marinade in a blender or food processor and pulse until smooth, pour over chicken. Refrigerate for thirty minutes.

To make peanut sauce.  Stir all ingredients in a pan over low heat, until mixture just comes to a boil, remove from heat. Or place in a microwave safe dish and microwave for 1 minute. Sauce will thicken as it stands.

Heat grill, place chicken strips on skewers and grill over medium heat for 2 to3 minutes per side. Serve with peanut sauce.
printable recipe


This is my entry for Foodie Friday at Designs by Gollum


Tuesday, May 11, 2010

TWD: Quick Classic Berry Tart

Cristine of Cooking with Cristine picked Quick Classic Berry Tart. This sweet buttery tart crust filled with a vanilla pastry cream and topped with fresh fruit is the ideal spring or summer dessert.
Since I was having guests for dinner last week we made mini tarts to serve for dessert. This was the perfect dessert to have for company because both the pastry cream and the tart shells were made a day ahead. At the last minute all we had to do was assemble the tarts. We are lucky enough to live close to a small farmer's market and were able to get some delicious farm fresh berries and when we were putting everything together, we chose not to glaze the tarts since the berries were so ripe and sweet.
Because the tarts were small and the crust thick, we made small mounds of the pastry cream, which provided the right balance of crispy crust to creamy filling. We topped each of  them with a single type of berry since they were mini tarts, but on a larger tart a mix of several berries would also be good.
I had a few tart shells and pastry cream left over so I mixed the pastry cream with some caramel sauce I had made earlier and made a few banana caramel tarts. These were good, but we all liked the combination of the simple vanilla cream with the sweet, fresh berries the best. This is a great recipe for experimenting with seasonal fruits and new flavor combinations and I know we will be trying it again with whatever we can get at our farmer's market this summer.

Quick Classic Berry Tart
 Baking: From My Home To Yours
Makes 6 to 8 servings

Storing: Eat the tart as soon after it is constructed as possible, certainly on the day it is made. If you must keep it for a few hours, store it in the refrigerator, making sure to keep it away from any foods with strong odors
 About 1 1/2 cups Pastry Cream, cooled or chilled (Recipe Below)
1 9" tart shell made with Sweet Tart Dough 
2 pints fresh raspberries, blueberries, blackberries, or strawberries, or an assortment of berries 
1/3 cup red currant jelly mixed with 1 tsp of water, for glazing
 Process:  
Smooth the pastry cream by giving it a couple of strong turns with a whisk. Spoon enough pastry cream into the tart crust to come almost to the rim, then even the surface with a rubber spatula. Carefully lay the berries on the cream, arranging them in any pattern that pleases you. If you are using strawberries, either halve them from top to bottom or slice them, depending on the size of the berries and your whim.
  
Bring the jelly and the water to a boil in a microwave oven or on the stovetop. Working with a pastry brush or a pastry feather, dab each berry with a spot of jelly. Or, if you like, you can glaze the entire surface of the tart, including the bit of pastry cream that peeks through the berries.
  
Pastry Cream
Makes about 2 cups

2 cups whole milk
6 large egg yolks
1/2 cup sugar
1/3 cup cornstarch, sifted
1 1/2 tsp pure vanilla extract
3 1/2 TBSP unsalted butter, cut into bits at room temperature
  
Bring the milk to a boil in a small saucepan.
  
Meanwhile, in a medium heavy bottomed saucepan, whisk the yolks together with the sugar and cornstarch until thick and well blended. Still whisking, drizzle in about 1/4 cup of the hot milk- this will temper, or warm, the yolks so they won't curdle. Whisking all the while, slowly pour in the remainder of the milk. Put the pan over medium heat and, whisking vigorously, constantly and thoroughly (making sure to get into the edges of the pot), bring the mixture to a boil. Keep at a boil, still whisking, for 1 to 2 minutes, then remove the pan from the heat.
  
Whisk in the vanilla extract. Let sit for 5 minutes, then whisk in the bits of butter, stirring until they are fully incorporated and the pastry cream is smooth and silky. Scrape the cream into a bowl. You can press a piece of plastic wrap against the surface of the cream to create an airtight seal and refrigerate the pastry cream until cold, or, if you want to cool it quickly - as I always do- put the bowl into a larger bowl filled with ice cubes and cold water, and stir the pastry cream occasionally until it is thoroughly chilled, about 20 minutes.The pastry cream can be kept tightly covered in the refrigerator for up to 3 days.


Sweet Tart Dough
Makes 1 -  9" Crust

1 1/2 cups all purpose flour
1/2 cup confectioners sugar
1/4 tsp salt
1 stick plus 1 TBSP (9 TBSP) very cold (or frozen) unsalted butter, cut into small pieces
1 large egg yolk 

Put the flour, confectioners sugar, and salt in a food processor and pulse a couple of times to combine. Scatter the pieces of butter over the dry ingredients and pulse until the butter is coarsely cut in - you should have some pieces the size of oatmeal flakes and some the size of peas. Stir the yolk, just to break it up, and add it a little at a time, pulsing after each addition. When the egg is in, process in long pulses - about 10 seconds each- until the dough, which will look granular soon after the egg is added, forms clumps and curds. Just before you reach this stage, the sound of the machine working the dough will change- heads up. Turn the dough out onto a work surface and, very lightly and sparingly, knead the dough just to incorporate any dry ingredients that might have escaped mixing.

 Butter a 9" fluted tart pan with a removable bottom ( or for  mini tart,s mini tart pans or muffin cups) Press the dough evenly over the bottom and up the sides of the pan, using all but one little piece of dough, which you should save in the refrigerator to patch any cracks after the crust is baked. Don't be too heavy-handed - press the crust in so that the edges of the pieces cling to one another, but not so hard that the crust loses its crumbly texture. Freeze the crust for at least 30 minutes, preferably longer, before baking.

 Preheat the oven to 375. Butter the shiny side of a piece of aluminum foil and fit the foil, buttered side down, tightly against the crust. (Since you froze the crust, you can bake it without weights.) Put the tart pan on a baking sheet and bake the crust for 25 minute s(mini tarts bake for about 15 minutes). Carefully remove the foil. If the crust has puffed, press it down gently with the back of a spoon.


Bake for another 8 minutes (adjust your time for minis) or so, or until it is firm and golden brown. (I dislike lightly baked crusts, so I often keep the crust in the oven just a little longer. If you do that, just make sure to keep a close eye on the crust's progress- it can go from golden to way too dark in a flash.) Transfer the tart pan to a rack and cool the crust to room temperature before filling.
Thank you Cristine for a classic, and versatile recipe.  If you want to see what the other TWD bakers made check our blogroll.


Tuesday, May 4, 2010

TWD: Burnt Sugar Ice Cream

Burnt Sugar Ice Cream


 Becky of Project Domestication chose Burnt Sugar Ice Cream for the recipe this week. In our house the only one who really likes things burnt is Mr. Mimi, but this time I had to fight to save him a bite of this "burnt" recipe. It had the flavor of a deep, rich caramel without being too sweet and combined with the silky smooth texture, this was a hands down hit at our house. Although perfect as it is, it would also make an excellent ice cream sandwich, or you could mix it with some chocolate bits or sprinkle it with candied nuts.


This was a very easy recipe to whip up. There were justa few simple steps- make the caramel and add the cream. Temper the  egg yolks and add them to the caramel mixture, cooking to thicken- then chill and freeze. The  pinch of salt with the vanilla which further enhanced the caramel flavor.

Burnt Sugar Ice Cream
from Baking: From My Home to Yours by Dorie Greenspan (page 432)

Ingredients:
1 cup sugar
3 tablespoons water
2 cups whole milk
1 cup heavy cream
4 large egg yolks
pinch of salt
1 1/2 teaspoons pure vanilla extract

Directions:

Stir the sugar and water together in a medium heavy-bottomed saucepan. Place the pan over medium-low heat and cook until the sugar dissolves. Increase the heat and boil, without stirring, until the syrup turns a deep amber color--from time to time, brush down the sides of the pan with a wet pastry brush and swirl the pan. (Depending on the size of your pan and the intensity of the heat, it could take about 8 minutes for the caramel to color properly.)
Stand back--things can get a little wild--lower the heat and add the milk and cream. Don't be concerned when everything bubbles and seethes and the caramel hardens; it will calm down and smooth out as you heat and stir. Continue to heat and stir and when the mixture is smooth, remove the pan from the heat.
In a medium heatproof bowl, whisk the yolks and salt together until blended and just slightly thickened. Still whisking, drizzle in about one third of the hot liquid--this will temper, or warm, the yolks. Whisking all the while, slowly pour in the remaining liquid. Pour the custard back into the pan and cook over medium heat, stirring without stopping, until the custard thickens slightly and coats the back of a spoon; if you run your finger down the bowl of the spoon, the custard should not run into the track. the custard should reach at least 170 degrees F, but no more than 180 degrees F, on an instant-read thermometer. Immediately remove the pan from the heat and pour the custard into a 2-quart liquid measuring cup or clean heatproof bowl. Stir in vanilla extract.

Refrigerate the custard until chilled before churning it into ice cream.

Scrape the chilled custard into the bowl of an ice cream maker and churn according to the manufacturer's instructions. Pack the ice cream into a container and freeze it for at least 2 hours, until it is firm enough to scoop.
Makes about 1 1/2 pints.

For fun we made spun caramel bowls to serve our ice cream in.  They are easy to do, but because the moisture in the air softens the spun sugar they need to be made with in a few hours of serving.
They make a pretty presentation and add a nice little crunch to the ice cream.


Caramel nest: In a heavy bottom sauce pan heat 1/2 cup sugar with 1 tablespoon water until it caramelizes. Don't stir the sugar, just gently swirl the pan by the handle. When a caramel color is reached remove the pan from the heat, it will still darken as it cools.
As the caramel is cool it becomes sticky. When you just tap the surface with a whisk, you will notice fine strands of caramel hanging from the whisk and that is when it is ready to use. Turn a small bowl upside down, spray with non stick cooking spray and swirl these sugar strands around the outside of the bowl to form the nest. Allow to cool and slide nest off the bowl. If the caramel gets too hard return to low heat until caramel becomes more liquid.


Caramelized sugar bowls


Thanks Becky for such a great choice. To see what the other TWD bakers prepared visit our blogroll.  For the recipe visit Becky or pick up a copy of Dorie's Book, Baking: From My Home to Yours

Friday, April 30, 2010

Italian Seven Layer Almond Cookies

Italian Seven Layer Almond Cookies


I usually order my almond paste online when I will be making a large quanity of marzipan. This year I ordered 2 pounds of natural almond paste for my  Easter Hat cookies and marzipan carrots. Well imagine my surprise when I opened the container and the almond paste was brown instead of the creamy almond color. My first thought was the almond paste had spoiled and I checked the expiration date, which was still many months in the future. Upon closer inspection I could see the bits of the skins in it which turned it the brown color. I guess natural means the almond were not blanched to remove the skin prior to processing. The taste was the same, but the color was too dark to make the marzipan because it was going to be covered with a pastel fondant, and I didn't want the brown to show through.
Since I had all that almond paste it was the perfect time to try something new. After some recipe browsing, my first choice was these Seven Layer Italian cookies. Traditionally the layers are colored red, white and green, but since I had natural almond paste, I didn't want to add unnatural color. These are easy cookies to make, but they do require 8 hour of chilling before finishing.


These bar cookies are the perfect balance of almond, apricot, and chocolate. The cake is soft and creamy but the chocolate layer gives it just the right amount of crunch. The food coloring is a fun touch that can be adapted to any occassion, or completely left out. You could also use several different preserves such as raspberry or strawberry to change the flavor combinations. I know these were a hit here because they disappeared so quickly, and now I have the perfect recipe to use up any leftover almond paste.


Seven Layer Almond cookies
via Epicurious

4 large eggs, separated
1 cup sugar
1 (8-oz) can almond paste
2 1/2 sticks (1 1/4 cups) unsalted butter, softened
1 teaspoon almond extract
2 cups all-purpose flour
1/2 teaspoon salt
25 drops red food coloring  (I omitted food coloring)
25 drops green food coloring
1 (12-oz) jar apricot preserves, heated and strained
7 oz fine-quality bittersweet chocolate (not unsweetened), chopped

1. Put oven rack in middle position and preheat oven to 350°F. Butter a 13- by 9-inch baking pan and line bottom with wax paper, leaving a 2-inch overhang on 2 ends, then butter paper. I had more than one 9x13 so I did this for three pans because you have to make the three layers of the cake separately before you put them all together. It can still be done with one or two pans, there is just some waiting time in between.
2. Beat whites in mixer fitted with whisk attachment at medium-high speed until they just hold stiff peaks. Add 1/4 cup sugar a little at a time, beating at high speed until whites hold stiff, slightly glossy peaks. Transfer to another bowl.
3. Switch to paddle attachment, then beat together almond paste and remaining 3/4 cup sugar until well blended, about 3 minutes. Add butter and beat until pale and fluffy, about 3 minutes. Add yolks and almond extract and beat until combined well, about 2 minutes. Reduce speed to low, then add flour and salt and mix until just combined.
4. Fold half of egg white mixture into almond mixture to lighten, then fold in remaining whites gently but thoroughly.
5. Divide batter between the 3 pans, spread evenly.
         If using food color: Divide batter among 3 bowls. Stir red food coloring into one and green
          food coloring into another, leaving the third batch plain.  Bake in prepared pans.  If you only
          have one baking pan refirgerate that batter until ready to bake.

6. Bake layers 8 to 10 minutes, until just set. (It is important not to overcook. They’ll look like they’re not done, but a tester does come out clean.)


When all layers are cool, invert one layer (green) onto a parchment or wax-paper-lined large baking sheet. Discard paper from layer and spread with half of preserves. Invert a second layer (white) on top of the first layer, discarding paper. Spread with remaining preserves. Invert the thrid (red) layer on top of 2nd layer and discard wax or parchment paper.

Cover with plastic wrap and weight with a large baking pan. Chill at least 8 hours.

Remove weight and plastic wrap. Bring layers to room temperature. Melt 1/2 of chocolate in a double boiler or a metal bowl set over a saucepan of barely simmering water, stirring until smooth. Remove from heat. Keep chocolate over water.
Trim edges of assembled layers with a long serrated knife. Quickly spread the chocolate in a thin layer on top of cake. Chill, uncovered, until chocolate is firm, about 15 minutes. Cover with another sheet of wax paper and place another baking sheet on top, then invert cake onto sheet and remove paper. Melt remaining chocolate as above and spread chocolate over the top of the cake. Chill until firm, about 30 minutes.

Cut lengthwise into 4 strips about 1 1/2 inches wide.  Cut strips crosswise into 3/4-inch-wide cookies.

printable recipe


These will be my entry for Foodie Friday


Tuesday, April 27, 2010

Sticky Toffee Pudding and Chockablock Cookies


It's Tuesday April 27 and TWD collides with the Daring Bakers, so you get a two-fer. The Daring Bakers April Challenge was a steamed pudding and Tuesday's with Dorie selection was chockablock cookies.

Over at the Daring Bakers the April 2010 challenge was hosted by Esther of  the Lilac Kitchen. She challenged everyone to make a traditional British pudding using, if possible, a very traditional British ingredient: suet.


The Daring Bakers is a group project in our house. I joined the group so that I would have a fun way to teach my children a variety of baking skills that I take for granted. Having made steamed pudding (cakes) before I wanted them to pick a British recipe, something they might eat at a British table. A google search revealed several traditional British recipes: Roly-poly, Hasty, Teacle, Stickey Toffee and Spotted Dick. Since I have teenagers, there was no way Spotted Dick was going to make it to our table as they just couldn't get past the name without minutes of giggling and jokes, so we finally settled on Sticky Toffee Pudding. Since we couldn't find suet, we chose a recipe that didn't require it but this cake still turned out to be a good choice. It was a nice moist cake, mildly flavored with dates and covered in a gooey toffee sauce. Since the recipe made more batter than my mold could hold we baked the remaining batter in a small cake pan in the oven so we could compare baked versus steamed. They both came out delicious and moist, so whatever way is easier for you is the way to go. To the baked one we added chocolate chips, which completely over powered the date flavor, but was delicious with the toffee sauce. If you wanted to make a chocolate pudding, replace about a quarter cup of the flour with cocoa powder, and  add some chocolate chips.
Sticky Date Pudding with Toffee Sauce
adapted from Gourmet May 1998

For pudding
• 1 3/4 cups packed pitted dates (about 10 ounces)
• 2 cups water
• 1 1/2 teaspoons baking soda
• 2 cups all-purpose flour
• 1/2 teaspoon baking powder
• 1/2 teaspoon salt
• 3/4 stick (6 tablespoons) unsalted butter, softened
• 1 cup granulated sugar
• 3 large eggs

For sauce
• 1 3/4 sticks (3/4 cup plus 2 tablespoons) unsalted butter
• 1 1/2 cups packed light brown sugar
• 1 cup heavy cream
• 1/2 teaspoon vanilla
1/4 salt

Make pudding:

1. Butter and flour an 8-inch square baking pan or pudding mold , knocking out excess flour.
2. Fill the bottom of a pot large enough to hold you mold with water put a rack in the bottom to hold you mold just above the water and bring to a boil. I used my pasta pot placed the mold in the inner pot.
3. Coarsely chop dates and in a 1 1/2- to 2-quart saucepan simmer dates in water, uncovered, 5 minutes. Remove pan from heat and stir in baking soda. (Mixture will foam.) Let mixture stand 20 minutes. Pulse with an immersion blender to puree the dates; there should be some texture to the dates.
4. While mixture is standing, into a bowl sift together flour, baking powder, and salt. In a large bowl with an electric mixer beat together butter and sugar until light and fluffy. Beat in eggs 1 at a time, beating well after each addition. Add flour mixture in 3 batches, beating after each addition until just combined. Add date mixture and with a wooden spoon stir batter until just combined well.
5. Pour batter into baking pan and cover  tightly with butter aluminum foil. Set the pan in the steamer, cover steamer pan with lid and simmer for 2 hours  (adding water as necessary to prevent the pan from going dry,) or until a tested inserted in the middle comes out clean. Remove pan from steamer and cool pudding to warm on a rack.


Make sauce while pudding is cooling:
In a 1 1/2- to 2-quart heavy saucepan melt butter over moderate heat and add brown sugar. Bring mixture to a boil, stirring occasionally, and stir in cream and vanilla. Simmer sauce, stirring occasionally, until thickened slightly, about 5 minutes. It will continue to thicken as it cools. Cool sauce to warm.

Unmold and pour 1/4 of the toffee sauce over top of cake. Pour additional sauce over each slice of cake and serve with whipped cream or ice cream.
printable recipe


At TWD, Mary of Popsicles and Sandy Feet decided on Chockablock Cookies.  I was skeptical about these cookies, since they contained practically everything but the kitchen sink.  Butter, sugar, molasses, chocolate chips, coconut, nuts and raisins seemed like a ridiculously long ingredient list. I made 1/2 the recipe and got 18 large cookies, which disappeared fast. All of the flavors came together to make a rich, well balanced, crisp on the outsides and chewy in the middle cookie.


I used walnuts and included the raisins and coconut in our cookies. You could hardly tell the coconut was there, so it's not a deal breaker if you don't use it. Theses cookie are very rich and best enjoyed with a glass of cold milk. They would be equally delicious with cherries or cranberries and maybe white chocolate chips.


If you want the recipe for this flavorful cookie visit Mary. To see what the other bakers cooked up visit our TWD blogroll .