Showing posts with label Almond. Show all posts

Thursday, January 10, 2013

Granola


Whether you eat your granola plain by the handful, douse it with milk, or spoon it into yogurt, good granola can be difficult to come by. Luckily, good granola, with its slightly sweet crunchy clusters and any kind of nuts and fruits you like, is surprisingly easy to make. It takes a matter of minutes to get this into the oven, and in as much time as it would take to get to the store and back, you can have fresh, crunchy granola customized to your own taste. We love the original recipe (below) but also like to throw in some dried cranberries and pecans, and maybe a handful of mini chocolate chips if it's a chocolate kind of day.


Almond Granola with Dried Fruit
adapted  from Cooks Illustrated March/April 2012

1/3 cup maple syrup
1/3 cup packed light brown sugar
4 teaspoons vanilla
1/2 teaspoon salt
1/2 cup vegetable oil
5 cups old-fashioned rolled oats
2 cups slivered almonds, coarse chopped
2 cup dried fruit, chopped

1. Preheat oven to 325 degrees. Line a rimmed baking sheet with parchment or spray with cooking spray.
2. In a large bowl, whisk together maple syrup, brown sugar, salt, vegetable oil and vanilla. Fold in oats and almonds until thoroughly coated.
3. Transfer oats mixture to prepared pan and spread across the sheet into a thin even layer. Using a stiff metal spatula, compress oat mixture until very compact. Bake until lightly browned, 40 to 45 minutes.

When it is cool, break into large chunks or small clusters, gently stir in dried fruit and store in an airtight container.


link:Foodie Friday

Friday, April 30, 2010

Italian Seven Layer Almond Cookies

Italian Seven Layer Almond Cookies


I usually order my almond paste online when I will be making a large quanity of marzipan. This year I ordered 2 pounds of natural almond paste for my  Easter Hat cookies and marzipan carrots. Well imagine my surprise when I opened the container and the almond paste was brown instead of the creamy almond color. My first thought was the almond paste had spoiled and I checked the expiration date, which was still many months in the future. Upon closer inspection I could see the bits of the skins in it which turned it the brown color. I guess natural means the almond were not blanched to remove the skin prior to processing. The taste was the same, but the color was too dark to make the marzipan because it was going to be covered with a pastel fondant, and I didn't want the brown to show through.
Since I had all that almond paste it was the perfect time to try something new. After some recipe browsing, my first choice was these Seven Layer Italian cookies. Traditionally the layers are colored red, white and green, but since I had natural almond paste, I didn't want to add unnatural color. These are easy cookies to make, but they do require 8 hour of chilling before finishing.


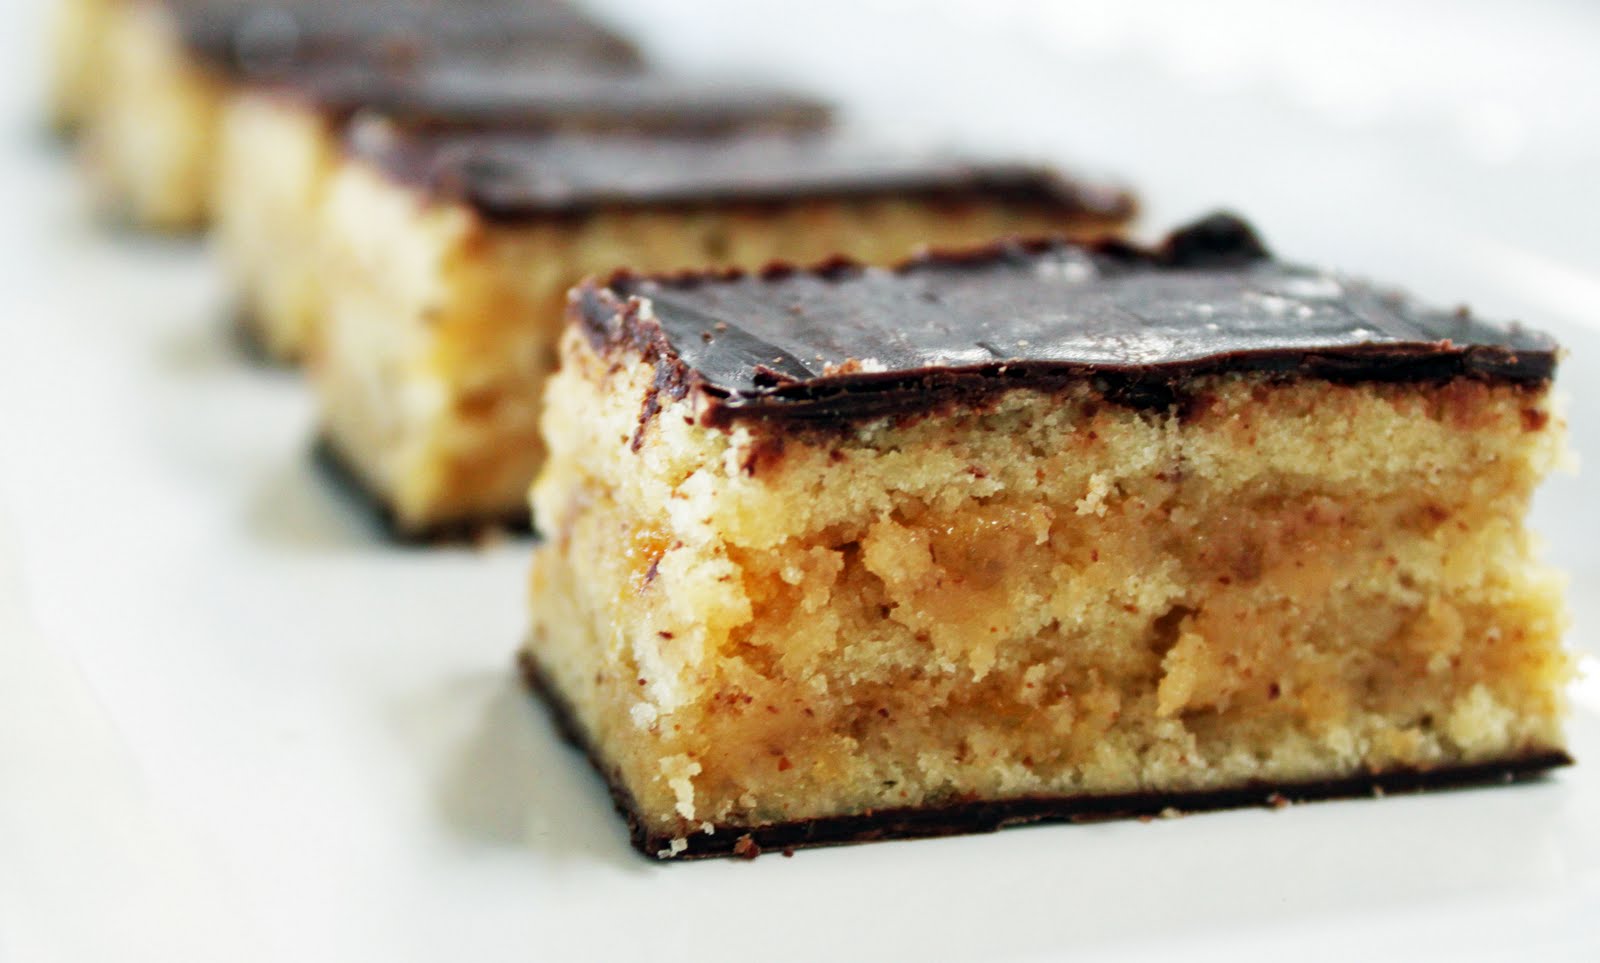
These bar cookies are the perfect balance of almond, apricot, and chocolate. The cake is soft and creamy but the chocolate layer gives it just the right amount of crunch. The food coloring is a fun touch that can be adapted to any occassion, or completely left out. You could also use several different preserves such as raspberry or strawberry to change the flavor combinations. I know these were a hit here because they disappeared so quickly, and now I have the perfect recipe to use up any leftover almond paste.


Seven Layer Almond cookies
via Epicurious

4 large eggs, separated
1 cup sugar
1 (8-oz) can almond paste
2 1/2 sticks (1 1/4 cups) unsalted butter, softened
1 teaspoon almond extract
2 cups all-purpose flour
1/2 teaspoon salt
25 drops red food coloring  (I omitted food coloring)
25 drops green food coloring
1 (12-oz) jar apricot preserves, heated and strained
7 oz fine-quality bittersweet chocolate (not unsweetened), chopped

1. Put oven rack in middle position and preheat oven to 350°F. Butter a 13- by 9-inch baking pan and line bottom with wax paper, leaving a 2-inch overhang on 2 ends, then butter paper. I had more than one 9x13 so I did this for three pans because you have to make the three layers of the cake separately before you put them all together. It can still be done with one or two pans, there is just some waiting time in between.
2. Beat whites in mixer fitted with whisk attachment at medium-high speed until they just hold stiff peaks. Add 1/4 cup sugar a little at a time, beating at high speed until whites hold stiff, slightly glossy peaks. Transfer to another bowl.
3. Switch to paddle attachment, then beat together almond paste and remaining 3/4 cup sugar until well blended, about 3 minutes. Add butter and beat until pale and fluffy, about 3 minutes. Add yolks and almond extract and beat until combined well, about 2 minutes. Reduce speed to low, then add flour and salt and mix until just combined.
4. Fold half of egg white mixture into almond mixture to lighten, then fold in remaining whites gently but thoroughly.
5. Divide batter between the 3 pans, spread evenly.
         If using food color: Divide batter among 3 bowls. Stir red food coloring into one and green
          food coloring into another, leaving the third batch plain.  Bake in prepared pans.  If you only
          have one baking pan refirgerate that batter until ready to bake.

6. Bake layers 8 to 10 minutes, until just set. (It is important not to overcook. They’ll look like they’re not done, but a tester does come out clean.)


When all layers are cool, invert one layer (green) onto a parchment or wax-paper-lined large baking sheet. Discard paper from layer and spread with half of preserves. Invert a second layer (white) on top of the first layer, discarding paper. Spread with remaining preserves. Invert the thrid (red) layer on top of 2nd layer and discard wax or parchment paper.

Cover with plastic wrap and weight with a large baking pan. Chill at least 8 hours.

Remove weight and plastic wrap. Bring layers to room temperature. Melt 1/2 of chocolate in a double boiler or a metal bowl set over a saucepan of barely simmering water, stirring until smooth. Remove from heat. Keep chocolate over water.
Trim edges of assembled layers with a long serrated knife. Quickly spread the chocolate in a thin layer on top of cake. Chill, uncovered, until chocolate is firm, about 15 minutes. Cover with another sheet of wax paper and place another baking sheet on top, then invert cake onto sheet and remove paper. Melt remaining chocolate as above and spread chocolate over the top of the cake. Chill until firm, about 30 minutes.

Cut lengthwise into 4 strips about 1 1/2 inches wide.  Cut strips crosswise into 3/4-inch-wide cookies.

printable recipe


These will be my entry for Foodie Friday


Tuesday, April 13, 2010

TWD: Swedish Visiting Cake

This week Nancy of The Dogs Eat the Crumbs selected Swedish Visiting Cake. This cake was a winner all around. It was so easy to throw together, and in less than an hour I had a delicious cake with a moist center and perfectly crunchy outer edge. The almonds and sugar on top were a simple way to add a little more crunch and touch of sweetness in every bite. Of course if you feel the need to embellish, there are no limits to the possibilities; you could add chopped or grated apple as they would be delicious with the lemon and almond, or you could add a little cinnamon and nutmeg or sliced pears and anise. But truth be told, this cake is fabulous just the way it is..
 Everyone loved the delicate lemon and almond flavors in this cake. Boy Mimi wanted to be sure that I included the recipe in my family recipe book. Because this cake is so simple and quick, and can be tweaked in so many ways, it's perfect for those days when you want a sweet treat, but don't have anything fancy on hand. I know I will be making this one again soon!

Swedish Visiting Cake
Dorie Greenspan Baking:from my home to yours

1 cup sugar, plus extra for sprinkling
Grated zest of 1 lemon
2 large eggs 
1/4 teaspoon salt
1 teaspoon pure vanilla extract
1/2 teaspoon pure almond extract
1 cup all-purpose flour
1 stick (8 tablespoons) unsalted butter, melted and cooled
About 1/4 cup sliced almonds (blanched or not)
Center a rack in the oven and preheat the oven to 350 degrees F. Butter a seasoned 9-inch cast-iron skillet or other heavy ovenproof skillet, a 9-inch cake pan or even a pie pan.

Pour the sugar into a medium bowl. Add the zest and blend the zest and sugar together with your fingertips until the sugar is moist and aromatic.

Whisk in the eggs one at a time until well blended. Whisk in the salt and the extracts.

Switch to a rubber spatula and stir in the flour.

Finally, fold in the melted butter. Scrape the batter into the pan and smooth the top with a rubber spatula. Scatter the sliced almonds over the top and sprinkle with a little sugar. If you're using a cake or pie pan, place the pan on a baking sheet.

Bake the cake for 25 to 30 minutes, or until it is golden and a little crisp on the outside; the inside will remain moist. Remove the pan from the oven and let the cake cool for 5 minutes, then run a thin knife around the sides and bottom of the cake to loosen it. You can serve the cake warm or cooled, directly from the skillet or turned out onto a serving plate. 
printable recipe
Nancy, thanks for a great pick this week. If you want to see what the other TWD bakers thought, visit our blogroll.


Tuesday, October 27, 2009

DB: Macaroons

THE DARING BAKERS OCTOBER  CHALLENGE: MACAROONS


The 2009 October Daring Bakers' challenge was brought to us by Ami S. She chose macaroons from Claudia Fleming’s The Last Course: The Desserts of Gramercy Tavern as the challenge recipe.
Thank you Ami for hosting this month's challenge. We really had a good time learning to make these delicious cookies. They were easy to make, and come with endless flavor possibilities for both the cookie and the filling. I will definitely be making these again!

Our first batch had a chocolate ganache filling and the second had a whipped white chocolate espresso ganache for the filling. Both were fantastic. I didn’t try to vary the flavor and color of the cookies because I  wanted to be sure that I could make them successfully before experimenting.

On the first attempt the batter seemed too thick; the resulting cookies had feet but didn't have a smooth and shiny surface. Even though they didn't look like Ami's picture, the cookies still tasted great. On the second and third batch I used the recipe on Syrup & Tang, which was simpler, since all the ingredients are based on the weight of the egg whites. Whenever I have extra egg whites I toss them into a cup and put them in the refrigerator until I have a need for them, and almost always forget how many egg whites are in the cup. The Syrup & Tang recipe solved that problem because it is based on a ratio of egg whites to the other ingredients so all you have to do is weigh egg whites and add the proper amount of sugar, almond meal and confectioner's sugar. This method resulted in cookies that had a smooth shiny crust and a chewy center, which is exactly how a macaroon should look and taste.

Macaroons with white chocolate espresso ganache filling.


Ingredients


Confectioners’ (Icing) sugar: 2 ¼ cups (225 g, 8 oz.)
Almond flour: 2 cups (190 g, 6.7 oz.)
Granulated sugar: 2 tablespoons (25 g , .88 oz.)
Egg whites: 5  (at room temperature)

Directions:

1. Preheat the oven to 200°F (93°C). Combine the confectioners’ sugar and almond flour in a medium bowl. If grinding your own nuts, combine nuts and a cup of confectioners’ sugar in the bowl of a food processor and grind until nuts are very fine and powdery.

2. Beat the egg whites in the clean dry bowl of a stand mixer until they hold soft peaks. Slowly add the granulated sugar and beat until the mixture holds stiff peaks.

3. Sift a third of the almond flour mixture into the meringue and fold gently to combine. If you are planning to add zest or other flavorings to the batter, now is the time. Sift in the remaining almond flour in two batches. Be gentle! Don’t overfold, but fully incorporate your ingredients.

4. Spoon the mixture into a pastry bag fitted with a plain half-inch tip (Ateco #806). You can also use a Ziploc bag with a corner cut off. It’s easiest to fill your bag if you stand it up in a tall glass and fold the top down before spooning in the batter.

5. Pipe one-inch-sized (2.5 cm) mounds of batter onto baking sheets lined with nonstick liners (or parchment paper).

6. Bake the macaroon for 5 minutes. Remove the pan from the oven and raise the temperature to 375°F (190°C). Once the oven is up to temperature, put the pans back in the oven and bake for an additional 7 to 8 minutes, or lightly colored.

7. Cool on a rack before filling.

Yield: 10 dozen. Ami's note: My yield was much smaller than this. I produced about two dozen filled macaroons.
Macaroons with semi-sweet chocolate ganache filling.

If you want to try the Syrup and Tang method just follow this link.

Wednesday, September 30, 2009

Almond, Anise and Orange Biscotti


There was a chill in the air this morning and leaves are starting to drop. It’s almost fall here. Yesterday the temperature dropped into the 70’s for the first time and we had rain clouds. Clear skies today and a little more heat, but fall is definitely around the corner. When the fall weather hits there is nothing like a hot cup of coffee or tea in the late afternoon with a sweet crunchy biscotti. It’s like a grownup after school treat or an energizer before cooking dinner. How ever you look at it, it’s a delicious way to spend a few moments of your day.


Almond, Anise and Orange Biscotti
Adapted from: Dolce Italiano Desserts from the Babo Kitchen by Gina DePalma

3 ½ cups unbleached flour
1 Tsp baking powder
1 tsp salt
4 cups whole blanched almonds
4 large eggs
2 large egg yolks
2 cups granulated sugar
2 tsp vanilla extract
1 TBS anise seeds
Freshly grated zest of I large orange

Coarsely chop the almonds and set aside.

Mix flour, baking powder and salt together

In the bowl of an electric mixer fitted with the paddle attachment, beat together the eggs, egg yolks and 2 cups of sugar at medium speed until light, about 2 minutes. Beat in vanilla extract, anise seeds and orange zest. Add the dry ingredients, then the chopped nuts beating to make a soft dough. Chill for 2 hours or until the dough is firm enough to handle.

Pre heat the oven to 325F. Divide the dough in 5 portions. On a lightly floured surface, shape each portion of the dough into a log about 1 ½ inches in diameter and about ten inches long. Place on a greased, or silpat covered baking sheet 3 inches a part.

Bake logs until lightly golden brown and firm to the tough, about 20-25 minutes. Rotate the baking sheet, 180 degrees, half way through baking. Allow logs to cool on baking sheet and then on wire racks until they are cool to the touch. About 40 minutes. Reduce oven temperature to 200F. with a sharp knife slice the cooled biscotti slightly on the bias into 2/4 inch thick slices. Stand on baking sheet. Return to oven and cook 20 minutes until they are toasted, dry and crisp. Cool completely on baking sheet store in an air tight container. Makes about 4 dozen