Showing posts with label Bar cookies. Show all posts

Wednesday, February 25, 2015

Lemon Bars


 One of my favorite things about cooking and baking is that each season has something to look forward to in the kitchen. The summer brings overflowing  vegetable from the gardens and juicy stone fruit, the holidays are full of pumpkin and peppermint, and January brings an abundance of citrus to the table.   

We love to have a bowl of tangerines and oranges for snacking and fresh juice, limes are squeezed into fun cocktails, and lemons very quickly turn into these lemon bars. We have been making these for so many years I'm not sure where the original recipe came from, but I do know that they are a staple in January when we are looking for a sweet treat to highlight all the lemons we acquire!


Lemon Bars
Ingredients
2 cups plus 2 Tablespoons flour
½ cup powdered sugar
½ teaspoon salt
1 cup butter, soft or melted
4 eggs slightly beaten
2 cups sugar
6 tablespoons lemon juice
Zest of one lemon
1 teaspoon baking powder
Optional  1/2 -1 teaspoon citric acid 
Pre heat oven 350F.
Crust:
Butter and flour or line with a foil sling a 9x13 pan (quarter sheet pan)
In a food processor combine 2 cups flour, ½ cup powdered sugar, salt and butter. Pulse to mix. Press mixture evenly into prepared pan. Bake for 20 minutes.
Filling:
In medium mixing bowl add eggs, beat with electric mixer to combine. Add sugar, lemon juice, zest, remaining 2 tablespoon flour, baking powder and citric acid is using. Beat until thoroughly combined. You can use the food process for the filing.  Pour over baked crust. Bake at 350 for 25 minutes, until center is set and edges are golden.


Cool in pan. Sprinkle top with powdered sugar. Cut in desired size and sprinkle with more powdered sugar.
If your lemons are not tart enough add ½- 1 teaspoon citric acid (fruit fresh) to the filling.
For easier cutting line baking pan with a foil sling, (Line pan with 2 sheets of foil - one down the length of the pan extending  over the ends and the other over the width extending over the sides.) spray with PAM. When the bars are cooled, lift the sling out of the pan to a flat surface for cutting.
 printable recipe


Monday, July 29, 2013

S'More Bars

It is not officially summer at our house until we have made our first round of s'mores, or at least something in the chocolate/marshmallow/graham family. Although Boy Mimi long ago took care of officially welcoming summer around a fire with some friends, we couldn't resist trying a new take on this classic summer dessert.
While these will never replace the fun of roasting a marshmallow and sandwiching it between chocolate and graham crackers, these s'mores bars hit all the right notes, and in less time than it takes to build a fire and get out the wire hangers. Bar cookies are a favorite of mine because they can be made in advance, and usually feed a crowd. We took these to our annual 4th of July party, and they were a nice sweet ending to our meal ( in addition to Mrs. A's angel food cake with her famous chocolate frosting. It was a holiday, so eating two desserts was totally allowed.)

Originally I thought I would just use a graham cracker crust topped with chocolate and marshmallows, but after some thought I decided that these needed a sturdier crust that wouldn't crumble in your hand. We went for a graham cookie/shortbread type crust. While s'mores are usually made with milk chocolate, I didn't want these bars to be too sweet so I used half milk, half dark chocolate in the middle layer. Finally, I wanted to get both the creamy marshmallow texture like the inside of the toasted marshmallow, but also the crispy exterior so on top of the marshmallow cream layer, I sprinkled some mini marshmallows to get nice and golden, like that perfectly toasted marshmallow everyone always attempts while roasting over a fire.


S'Mores Bars


3/4 cup butter
1 cup sugar
6 tablespoon brown sugar
2 cups  flour
1 egg
1 1/4 cup plus 5 tablespoon graham cracker crumbs
1 teaspoon salt
1 teaspoon vanilla
6 ounces dark chocolate chopped
6 ounce milk chocolate chopped
1 jar (7 ounces) marshmallow creme
1 1/2 cups mini marshmallow 

Cream together sugars and butter until light and fluffy. Add egg and vanilla, mix well. Add flour, salt and 1 1/4 cups graham cracker crumbs. Mix until thoroughly combined. Reserve 1 cup of mixture for topping. Press the remaining mixture into a 9x13 pan.

Sprinkle unbaked base with chopped chocolate. Dollop marshmallow creme over chocolate and spread with an off set spatula as best you can. Sprinkle mini marshmallows over top, filling in gaps in marshmallow creme layer.

Add the remaining 5 tablespoons graham cracker crumbs to reserved base and work in with finger tips. Crumble over top of mini marshmallows.

Bake in 350 oven for 25 minutes until marshmallow are golden.

Cool and cut into squares.


Link:Foodie Friday

Thursday, October 18, 2012

Pumpkin Pie Bars


Oatmeal and raisins were the mandatory ingredients for the October Improv Challenge. I usually have a couple of ideas in my mind, and I think them over for a few weeks before tackling my recipe of choice. Even though it is October, it is still so hot in my neck of the woods that I started out making oatmeal cookie ice cream. Every time I make ice cream I think it will be the last time for the year, but if it doesn't cool down soon I'll be making ice cream for Thanksgiving! Despite oatmeal and raisins bringing to mind warm, homey fall flavors in cookies and crisps, I forged ahead with my cool treat and successfully got the ice cream to taste like oatmeal cookie dough.  However, I wasn't quite able to master an oatmeal and raisin add-in that we liked, and kept mulling over ideas that could possibly make it work.


For a few days, about a week ago, we had some rain and clouds and real October weather, so I took advantage of that and decided to scrap the ice cream and go with a fall dessert. Boy Mimi loves anything pumpkin, so I decided to combine a family favorite with the challenge ingredients and came up with these pumpkin bars. They have a chewy cake-like base with a creamy pumpkin pie filling, and it is all topped with a crispy oatmeal-raisin streusel topping. It was a winning combination of cake, pumpkin pie, and oatmeal raisin cookies. Boy Mimi definitely approved and I was pleasantly surprised at how much I liked the oatmeal raisin addition to these bars. Unfortunately we are now back to 90 degrees outside so I may have to revisit that ice cream recipe, but I know we will definitely be back to this recipe, oatmeal raisin crumb and all, in the coming cooler months. 


Pumpkin Pie Bars

Prepare a 9x13 pan by spraying with cooking spray or grease and flour.
Pre-heat oven to 350F

Ingredients:
 2-1/2 cups sifted flour
 1 Tsp. salt
 1-1/2 cups sugar
 2 Tsp. double acting baking powder
 1/4 cup cold butter

Preparation: In a food processor combine flour, salt, suga,r and baking powder and mix well to blend. Cut the butter into small pieces and add to the food processor bowl. Cover and process until mixture is very fine. Make sure that the butter is completely  and evenly distributed in the flour mixture. Remove 1 1/2 cups and reserve for topping. To remaining mix add:

 1/3 cup soft butter
 1 egg

 Pulse a few times until combined, but still crumbly. Press into prepared pan.

Filling:

1 large can pumpkin or 28 ounces of fresh cooked and drained pumpkin
1 1/3 cup sugar
1 tsp salt
2 tsp cinnamon
1 tsp ground ginger
1/2 tsp ground cloves
2 eggs
2/3 cups milk.

To the now empty food processor add all ingredients and process until  homogeneous, and pour over the crust.

Topping
To reserved crust mixture add:

1/2 cup rolled oats
1/4 cup brown sugar
1 tsp cinnamon
1/4 soft butter
1/3 cup raisins

In a medium bowl mix all ingredients together to form a large crumb and sprinkle evenly over the filling mixture. Bake for 45-50 minutes until a knife inserted in the center comes out clean. Remove from oven and let cool to room temperature. Cut and serve. 
printable recipe


Links: Foodie Friday


Tuesday, November 9, 2010

TWD: Cranberry Shortbread Cake

  This week Jessica of A Singleton in the Kitchen chose Not-Just-for Thanksgiving Cranberry Shortbread cake


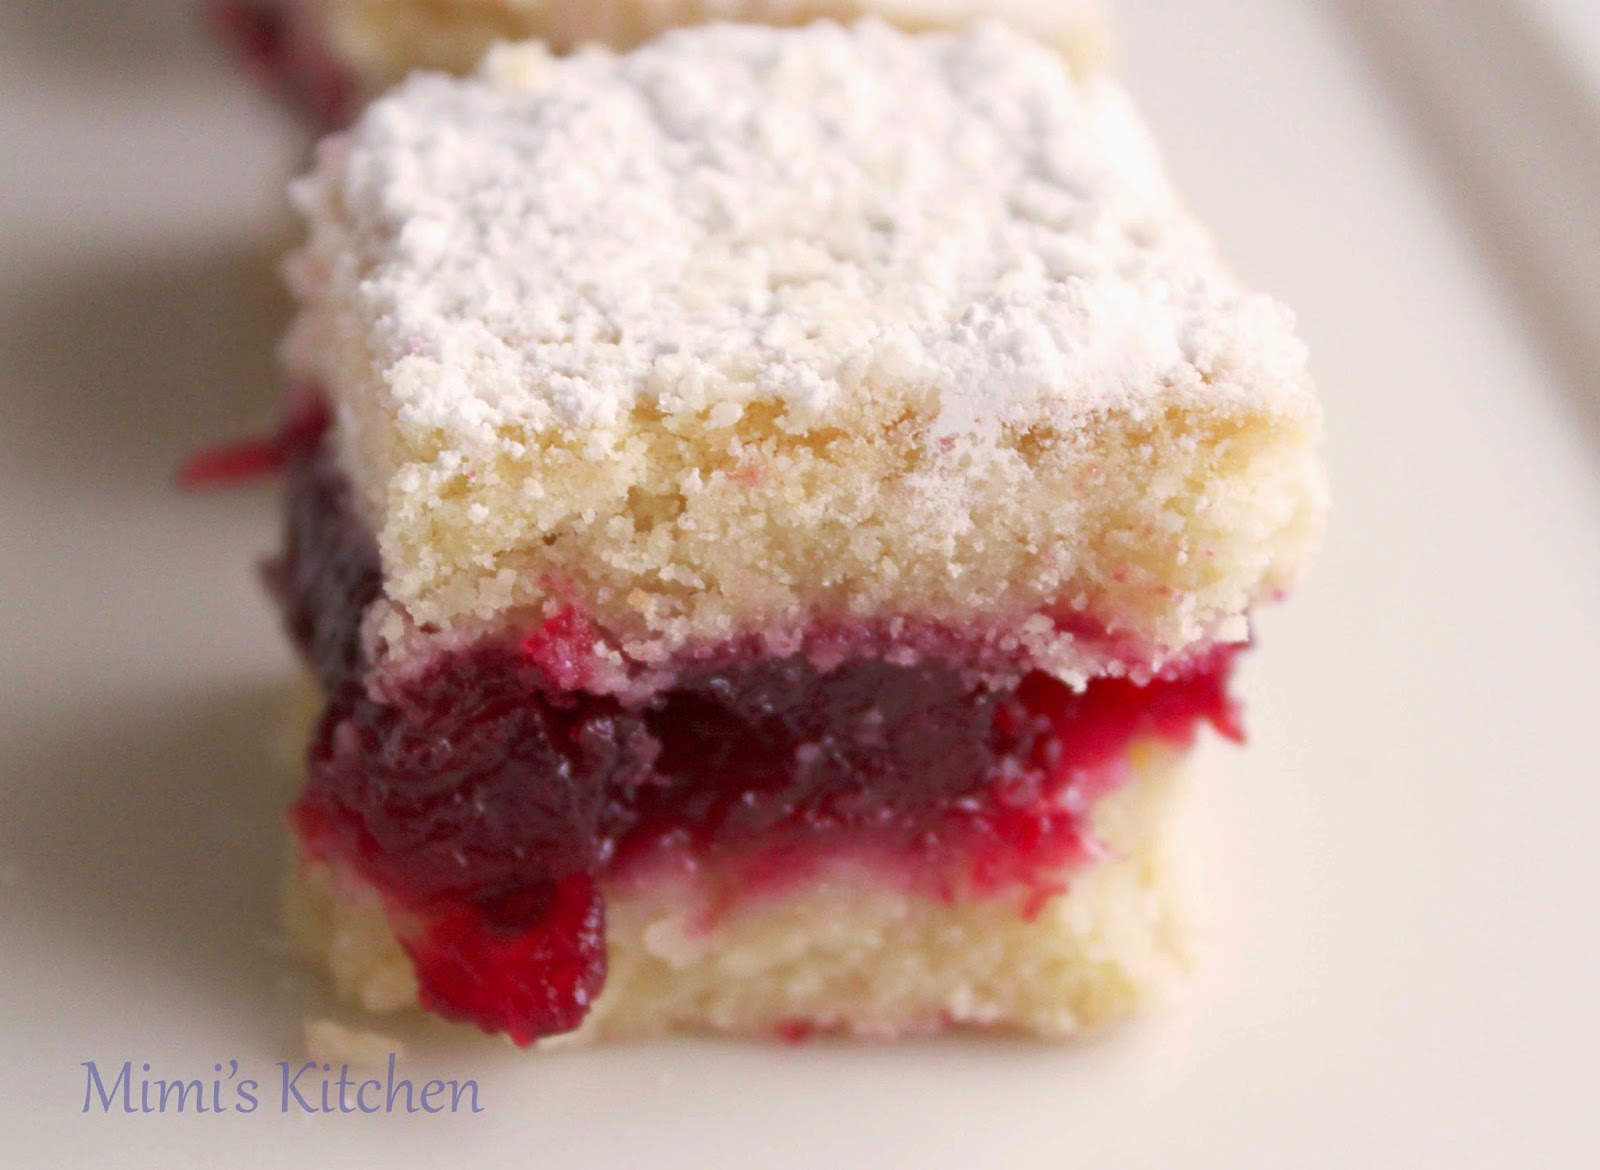
 Fresh, tangy cranberry and orange jam sandwiched between two layers of soft sweet cake made for a delicious fall treat. We loved that it was a combination of two of our favorites- shortbread and cranberry. The cranberry filling still had enough of the tart and slightly bitter flavors that we love in the fresh berries, and the cake had the perfect amount of sweetness to complement the cranberries without making them too sweet. We thought that they tasted even better after sitting in the fridge for a few hours.
The rich jewel tones of the jam and the soft ivory cake make for an eye catching dessert and a very pretty addition to a holiday dessert tray. I made ours in a 9x9 square pan instead of the round spring form pan called for in the recipe, dusted them with powdered sugar and cut them into bite size bars, which I liked because you were able to see the layers really well in each piece. 

I love to cook with fresh cranberries while they are in season, and this will definitely be added to our list of cranberry treats we look forward to every year!
Not-Just-for Thanksgiving Cranberry Shortbread cake
Baking: from my home to yours Dorie Greenspan


For the cake:

2 1/2 cups flour

1 teaspoon baking powder

Pinch salt
13 tablespoons unsalted butter, room temperature
1 cup plus 2 teaspoons sugar
1 large egg
1 large egg yolk
1 teaspoon vanilla extract.

Jam filling
1 large navel orange
About 1/4 cup orange juice
12 ounces fresh cranberries
1 cup sugar
Make jam:
Grate zest of orange into a medium saucepan. Slice off the peel, removing white pith, slice between membranes to release segments, cut segments into 1/4 inch pieces and toss into the pan. Squeeze the juice from the membranes into a measuring cup and water or juice to measure 1/4 cup. Pour it into the pan. Add the cranberries to the pan, stir in 3/4 cup sugar and set pan over medium heat and bring to a boil, stirring frequently.  Cook, stirring almost constantly, until cranberries pop and your spoon leaves tracks, about 5 minutes. Scrape jam into a bowl, taste it if it is too tart add more sugar to taste. Cool to room temperature. Store I fridge up to 2 weeks.
Cake:
Whisk together flour, baking powder and salt.
Working with a stand mixer fitted with paddle, beat butter on medium speed until soft and smooth. Add 1 cup of sugar and continue to beat until it dissolves into the butter. Reduce speed to low and add the egg and yolk, beating until they too are absorbed. Beat in vanilla . Add flour, mixing only until it is incorporated, do not over beat. Dough will be thick.
Turn dough on to a work surface and gather it into a ball, then divide in half and pat each half into a disk. Wrap disk in plastic and refrigerate 15-30 minutes.
Pre heat oven to 350f. Lightly butter a 9 inch spring form pan. I used a 9 inch square pan fitted with a parchment sling.
Work with one piece of dough at a time. For the bottom layer, roll or pat 1 disk of dough into bottom of pan. Spread the cranberry jam over the dough. Unwrap the second disk leave on plastic wrap and roll or press until it is the dimension of your pan. Carefully lift the dough and invert it onto the filling, lift off the plastic wrap and use your fingers to even it as necessary so that it covers the filling. Brush the top of the cake very gently with water and sprinkle with the remaining 2 teaspoons sugar.
Bake 35-40 minutes, or until the top of the cake is lightly golden and a thin knife inserted into the center comes out clean. Transfer the pan to a cooling rack and cool for 20 minutes. Release from pan (lift out sling or run a knife around the inner edge of spring from pan, remove sides)and let cool to room temperature.

  Visit Jessica for the recipe and visit our blog roll to see just what the other TWD bakers thought.


Thursday, August 19, 2010

Samoa Bars


Every year we look forward to the phone calls and door to door visits of the Girl Scouts in our neighborhood. It seems like we order more boxes each year, thinking that they will last longer, but in a matter of weeks our supply is gone and there is nothing to do but wait. Mimi Jr. found this recipe for homemade Samoa bars and knew it would be a hit with the other coconut lover, Boy Mimi. While nothing is ever quite as good as the original, these will definitely get us through until the next Girl Scout comes knocking at our door.


These bars were the right flavor combination, but we all agreed that the bottom crust needs to be a little bit thinner and crisper.  I would add more coconut to the caramel mixture on top to really get that toasty coconut flavor. Although we usually keep our boxes of Samoas in the freezer, we thought these were best at room temperature.


Homemade Samoa Bars
adapted from baking bites

Cookie Base:
1/2 cup sugar
3/4 cup butter, softened
1 large egg
1/2 tsp vanilla extract
2 cups all purpose flour
1/2 tsp salt

Preheat oven to 350F. Lightly grease a 9×13-inch baking pan, or line with parchment paper.

To make  the base, in a large bowl, cream together sugar and butter, until fluffy. Beat in egg and vanilla extract. Working at a low speed, gradually beat in flour and salt until mixture is crumbly, like wet sand. Do not over mix. Pour crumbly dough into prepared pan and press into an even layer. Poke holes in several places throughout the pan of dough using a fork.

Bake for 20-25 minutes, until base is set and edges are lightly browned. Cool completely on a wire rack before topping.

Topping:
3 cups shredded coconut (sweetened or unsweetened)
12-oz good-quality chewy caramels
1/4 tsp salt
3 tbsp milk or cream
10 oz. dark or semisweet chocolate (chocolate chips are ok)

Preheat oven to 300. Spread coconut evenly on a parchment-lined baking sheet (preferably one with sides) and toast, stirring every 5 minutes, until coconut is golden, about 10-15 minutes. Make sure to check often because coconut burns quickly. Cool on baking sheet, stirring occasionally. Set aside.

Unwrap the caramels and place in a large microwave-safe bowl with milk and salt. Cook on high for 3-4 minutes, stopping to stir a few times to help the caramel melt. When smooth, fold in toasted coconut with a spatula. (You can also use a double boiler, it just takes a little longer)

Put dollops of the topping all over the shortbread base. Using the spatula, spread topping into an even layer. Let topping set until cooled.

When cooled, cut into bars.
printable recipe


Once bars are cut, melt chocolate in a small bowl. Heat on high in the microwave in 45 second intervals, stirring thoroughly to prevent scorching. Dip the base of each bar into the chocolate and place on a clean piece of parchment or wax paper (I skipped this step). Transfer all remaining chocolate (or melt a bit of additional chocolate, if necessary) into a piping bag or a ziploc bag with the corner snipped off and drizzle bars with chocolate to finish. * I just drizzled chocolate on the top*

Let chocolate set completely before storing in an airtight container.

Makes 30 bar cookies.


As with most recipes I try to make them as written the first time. I can see that there could be some very tasty variation on this recipe. Ideas that we like were: substitute peanuts or toasted pecans for the coconut or for a German Chocolate Cake bar substitute some cocoa powder for flour in the base and add some toasted pecan  to the coconut in the topping.

We are sending this along to Foodie Fridays  party  at Design by Gollum. You can still enter the CSN give away here.


Thursday, June 17, 2010

Creamy Lemon Bars

There is something about citrus that transcends all seasons. In winter it is bright and lively, and in summer it is cool and refreshing. These lemon bars are an easy variation on the traditional recipe. They are smooth and creamy and cool, perfect for a make ahead summer dessert. The sweet-tart filling is almost like a custard and is delicious all by itself, but the buttery crust underneath provides the right amount of contrasting texture.


Creamy Lemon Bars
Everyday Foods- Fresh Flavor Fast

1/2 cup unsalted butter, room temperature
1/2 cup confectioner's sugar, plus more for dusting
1/4 teaspoon salt
1 cup all purpose flour
4 large egg yolks
1 can (14oz) sweetened condensed milk
3/4 cup fresh lemon juice, about 4 lemons
Lemon zest from two lemons

1.Preheat oven to 350 degrees.  Butter an 8 inch square pan. Line with parchment paper, leaving an overhang on two sides. Butter the paper.
2. With an electric mixer on high speed, cream butter, confectioner's sugar, and salt until light and fluffy. Reduce speed to low and add flour, mix until just combined. Press dough in the bottom and 1/2 inch up the sides of prepared pan. Prick all over the bottom with a fork. Bake until lightly golden, about 15 minutes.
3. While the crust bakes, whisk together egg yolks, condensed milk, lemon juice and lemon zest until smooth.  Pour over the hot crust in pan; return to oven and bake until filing is just set, 25-30 minutes. Cool completely in pan.
4. Refrigerate, covered, until filling is firm, about 2 hours.  Using paper overhang lift bars onto a cutting board. Cut in 2 inch squares. Dust with confectioner's sugar just before serving.


These bars could be made in mini cheesecake pans for individual desserts, or you could use lime juice and zest to change up the flavors. Although tradtional lemon bars are hard to beat, these were really good and super easy, and a great way to use up any leftover egg yolks.


We are sending these lemon bars to the Foodie Friday event over at Designs by Gollum

Friday, April 30, 2010

Italian Seven Layer Almond Cookies

Italian Seven Layer Almond Cookies


I usually order my almond paste online when I will be making a large quanity of marzipan. This year I ordered 2 pounds of natural almond paste for my  Easter Hat cookies and marzipan carrots. Well imagine my surprise when I opened the container and the almond paste was brown instead of the creamy almond color. My first thought was the almond paste had spoiled and I checked the expiration date, which was still many months in the future. Upon closer inspection I could see the bits of the skins in it which turned it the brown color. I guess natural means the almond were not blanched to remove the skin prior to processing. The taste was the same, but the color was too dark to make the marzipan because it was going to be covered with a pastel fondant, and I didn't want the brown to show through.
Since I had all that almond paste it was the perfect time to try something new. After some recipe browsing, my first choice was these Seven Layer Italian cookies. Traditionally the layers are colored red, white and green, but since I had natural almond paste, I didn't want to add unnatural color. These are easy cookies to make, but they do require 8 hour of chilling before finishing.


These bar cookies are the perfect balance of almond, apricot, and chocolate. The cake is soft and creamy but the chocolate layer gives it just the right amount of crunch. The food coloring is a fun touch that can be adapted to any occassion, or completely left out. You could also use several different preserves such as raspberry or strawberry to change the flavor combinations. I know these were a hit here because they disappeared so quickly, and now I have the perfect recipe to use up any leftover almond paste.


Seven Layer Almond cookies
via Epicurious

4 large eggs, separated
1 cup sugar
1 (8-oz) can almond paste
2 1/2 sticks (1 1/4 cups) unsalted butter, softened
1 teaspoon almond extract
2 cups all-purpose flour
1/2 teaspoon salt
25 drops red food coloring  (I omitted food coloring)
25 drops green food coloring
1 (12-oz) jar apricot preserves, heated and strained
7 oz fine-quality bittersweet chocolate (not unsweetened), chopped

1. Put oven rack in middle position and preheat oven to 350°F. Butter a 13- by 9-inch baking pan and line bottom with wax paper, leaving a 2-inch overhang on 2 ends, then butter paper. I had more than one 9x13 so I did this for three pans because you have to make the three layers of the cake separately before you put them all together. It can still be done with one or two pans, there is just some waiting time in between.
2. Beat whites in mixer fitted with whisk attachment at medium-high speed until they just hold stiff peaks. Add 1/4 cup sugar a little at a time, beating at high speed until whites hold stiff, slightly glossy peaks. Transfer to another bowl.
3. Switch to paddle attachment, then beat together almond paste and remaining 3/4 cup sugar until well blended, about 3 minutes. Add butter and beat until pale and fluffy, about 3 minutes. Add yolks and almond extract and beat until combined well, about 2 minutes. Reduce speed to low, then add flour and salt and mix until just combined.
4. Fold half of egg white mixture into almond mixture to lighten, then fold in remaining whites gently but thoroughly.
5. Divide batter between the 3 pans, spread evenly.
         If using food color: Divide batter among 3 bowls. Stir red food coloring into one and green
          food coloring into another, leaving the third batch plain.  Bake in prepared pans.  If you only
          have one baking pan refirgerate that batter until ready to bake.

6. Bake layers 8 to 10 minutes, until just set. (It is important not to overcook. They’ll look like they’re not done, but a tester does come out clean.)


When all layers are cool, invert one layer (green) onto a parchment or wax-paper-lined large baking sheet. Discard paper from layer and spread with half of preserves. Invert a second layer (white) on top of the first layer, discarding paper. Spread with remaining preserves. Invert the thrid (red) layer on top of 2nd layer and discard wax or parchment paper.

Cover with plastic wrap and weight with a large baking pan. Chill at least 8 hours.

Remove weight and plastic wrap. Bring layers to room temperature. Melt 1/2 of chocolate in a double boiler or a metal bowl set over a saucepan of barely simmering water, stirring until smooth. Remove from heat. Keep chocolate over water.
Trim edges of assembled layers with a long serrated knife. Quickly spread the chocolate in a thin layer on top of cake. Chill, uncovered, until chocolate is firm, about 15 minutes. Cover with another sheet of wax paper and place another baking sheet on top, then invert cake onto sheet and remove paper. Melt remaining chocolate as above and spread chocolate over the top of the cake. Chill until firm, about 30 minutes.

Cut lengthwise into 4 strips about 1 1/2 inches wide.  Cut strips crosswise into 3/4-inch-wide cookies.

printable recipe


These will be my entry for Foodie Friday


Friday, January 22, 2010

Oreo Rice Krispie Treats

Oreo Rice Krispie Treats

Sometime last fall I bookmarked Ingrid's ( at the  3B's) recipe for Rice Krispie treats with Oreo cookies.  I made these for several reasons:  1.My family loves Rice Krispie treats  2. I am not a Rice Krispie treat eater   3. I could satisfy my need to make something awesome and  4. Not add more calories to my day, because remember I don't like Rice Kirspie treats.  Needless to say item 4 didn't  quite work out. These sweet chewy marshmallows bars  with  chunks of Oreo cookies mixed in were a big hit with everyone. Like Ingrid, I think that you need to be generous with the marshmallows.

Oreo Rice Krispie Treats
3 Tablespoons butter
 5-6 cups mini marshmallow, or more
6 cups Rice Krispies
Oreo cookies  broken into chunks, about 1/2 a package, no strict measurement required.

 In a large bowl  melt butter and marshmallow in the micro wave, stiring until mixed together.  Add the Rice Krispies and Oreo chunks stir to combine. Press into a greased 9x13 pan. Cut into bars of what ever size you want.


Blog awards:
It's so nice to receive awards from bloggers that I admire so much. Barbara at Barbara Bakes passed the Happy 101 award on to me. Barbara has  many great recipes on her blog  but perhaps the best thing on her blog is that picture of her smiling, it is such a warm welcome to anyone who visits.


The rules of the award are:

1. Copy the award image into a post.
2. List 10 things that make you happy.
3. Tag ten bloggers who brighten your day.
4. Put in a link to their blogs.
5. Notify the award receivers.
6. Recipients to link back to the sender's blog.

Ten thing that Make me Happy

 My Life
the next nine are part of number 1 and are in no particular order.
 God
 My family- husband and children
 My garden
 Friends
 My kitchen
 Baking
 Comments from other bloggers
 People enjoying my baking
The sunrise, sunset too.

Ten blogger that brighten my day:  ( please don't feel that you have to follow any of the above rules, I just like your blogs)
1.Celestial Charms
2.Chow and Chatter
3.Food for a Hungry Soul
4. Moveable Feasts
5.Sidewalk Shoes
6. Salad-in-a-Jar.
7.CULINARY MUSINGS
8. Fresh Local and Best
9. Baking and Boys!
10. The Cooking Photographer


Brandy at Nutmeg Nanny sent along the Sugar Doll award.  Brandy's blog is great fun and I haven't been disappointed by any of  her recipes that I've tried . There were rules for this award too, but just refer to the above!


Thanks You, Barbara and Brandy!


Reblog this post [with Zemanta]

Tuesday, January 19, 2010

TWD:Chocolate Oatmeal Almost-Candy Bars

TWD:Chocolate Oatmeal Almost-Candy Bars


 Lillian of  Confectiona's Realm picked Chocolate Oatmeal Almost-Candy Bars for our baking this week. These easy to make bars were bursting with flavor and texture. Brown sugar, oatmeal, chocolate chips, peanuts and raisins made every bite a sweet lovers dream come true. These were rich and chewy like a deliciously unerbaked cookie, while the crunch from the peanuts and struesel was balanced perfectly by the soft chocolaty layer and moist, plump raisins. I could eat handfuls of the individual ingredients by themselves, but together, they made a fantastic bar cookie that disappeared from the pan in record time.

Chocolate Oatmeal Almost-Candy Bars
 from Baking: From My Home to Yours
 For the oatmeal layer:
2½ cups all-purpose flour
1 teaspoon baking soda
1 teaspoon salt
½ teaspoon ground cinnamon
2 sticks (8 ounces) unsalted butter, at room temperature
2 cups (packed) brown sugar
2 large eggs
2 teaspoons pure vanilla extract
3 cups old-fashioned (rolled) oats
1 cup salted peanuts, coarsely chopped

For the chocolate layer:
 14-ounce can sweetened condensed milk
2 cups (12 ounces) semi-sweet chocolate chips
2 tablespoons unsalted butter
¼ teaspoon salt
1 teaspoon pure vanilla extract
1 cup moist, plump raisins (dark or golden)
¾ cup coarsely chopped peanuts, preferably salted

Getting ready:
Center a rack in the oven, and preheat oven to 350 degrees Fahrenheit. Butter a 9-by-13-inch baking pan, and place the pan on a baking sheet.

To make the oatmeal layer:
 Whisk together the flour, baking soda, salt and cinnamon.
 Working with a stand mixer, preferably fitted with a paddle attachment, or with a hand mixer in a large bowl, beat the butter on medium speed until it is soft and creamy. Add the brown sugar and beat for 2 minutes, then add the eggs, one at a time, beating for a minute after each egg goes in. Beat in the vanilla. The mixture should be light and fluffy. Reduce the mixer speed to low and add the dry ingredients, mixing just until they disappear. Still on low speed, or working by hand with a rubber spatula, stir in the oats and chopped peanuts.
Set aside 1½ to 2 cups of the mixture, then turn the remaining dough into the buttered pan. Gently and evenly press the dough over the bottom of the pan. Set aside while you prepare the next layer.

To make the chocolate layer:
 Set a heat-proof bowl over a saucepan of simmering water. Put the condensed milk, chocolate chips, butter, and salt in the bowl and stir occasionally until the milk is warm and the chocolate and butter are melted. Remove the bowl from the pan of water and stir in the vanilla, raisins (if using), and peanuts.
 Pour the warm chocolate over the oatmeal crust, then scatter the remaining oatmeal mixture over the top. Don’t try to spread the oatmeal, and don’t worry about getting the topping even — this is fun, remember?
 Bake for 25 to 30 minutes, or until the topping is golden brown and the chocolate layer is dull and starting to come away from the sides of the pan. Transfer the baking pan to a rack and cool for about 2 hours.

Run a blunt knife between the edges of the cake and the pan, and carefully turn the cake out onto a rack. Turn right side up, then refrigerate for at least 1 hour before cutting.
 Cut into 32 rectangles, each roughly 2¼ by 1½ inches. Makes 32 bars.

Reblog this post [with Zemanta]

Saturday, January 16, 2010

Apple Streusel Pie Bars

Apple Streusel Pie Bars


     I am one lucky mom.  My children all enjoy creating in the kitchen.  My son is more of a cook than a baker .  While he has had success baking he doesn't chose to do it often (only when he needs a chocolate chip cookie). Both of my daughters  have developed into very accomplished bakers. They are well on their way to being able to adapt recipes  to suite their own style and taste. 
   Mini Me, my second daughter, made these fruity apple pie bars. Moist and cinnamony they are loaded with apples and have a crisp streusel topping. Served on a plate they would be delicious with ice cream, but the beauty of these bars is that they can be eaten out of hand.  Apple pie with out a fork! The original recipe comes from  Brandy at  Nutmeg Nanny,  Mini  Me  made a few changes of her own to make this tasty treat for party we were having.   I think they were a hit, people were eating them by the handful ( stacking one or two on the left hand while eating one with the right).


Apple Streusel  Pie Bars
adapted from Nutmeg Nanny

2 1/2 C. graham cracker crumbs
2 1/2 C. all purpose flour
1 1/2C. packed brown sugar – divided
1/2 C. granulated sugar
2 t. cinnamon - divided
1 C. butter – melted
6 cups chopped apples (cored and peeled)
Zest of one lemon
Nutmeg
Glaze

Directions:
Preheat oven to 350 degrees. Spay a half sheet pan baking spray (PAM) or lightly grease.
Combine graham cracker crumbs, flour, 1 cup brown sugar, granulated sugar, 1 1/2 teaspoons cinnamon and melted butter in large bowl until well blended. Reserve two cups of this mixtures and set aside. Press remaining crumb mixture into bottom of prepared pan. Bake for 8 minutes. Remove from oven and set aside.

After preparing apples put in glass bowl , cover with waxed paper and micro wave  on high a few minutes (depending on your micro wave) to soften. This gives the apples a head start in baking, you can omit this step if you want. 
Add remaining 1/2 cup brown sugar to apples along with the lemon zest, 1/2 tsp cinnamon and a grind of fresh nutmeg, stir  gently to dissolve sugar. Arrange apples over the baked crust. Sprinkle the reserved crumb mixture over the filling. Bake 30-35 minutes or until apples are tender and the crust is golden brown.  Remove pan to wire rack to cool completely. Glaze and serve.
 
Glaze:
1 tablespoon Butter
1 cup. powdered sugar
1 tablespoon milk (+/-)
Small splash vanilla
Smidgen of cinnamon

Combine butter, powdered sugar and cinnamon  in a small bowl  mix with a fork for spoon until  crumbly. Add vanilla and milk and stir until a smooth paste is formed.  Add more milk a drop at a time until glaze is thin enough to drizzle. Drizzle over top of apple bars. Cut and serve.
print recipe