Friday, August 27, 2010

Daring Bakers Baked Alaska

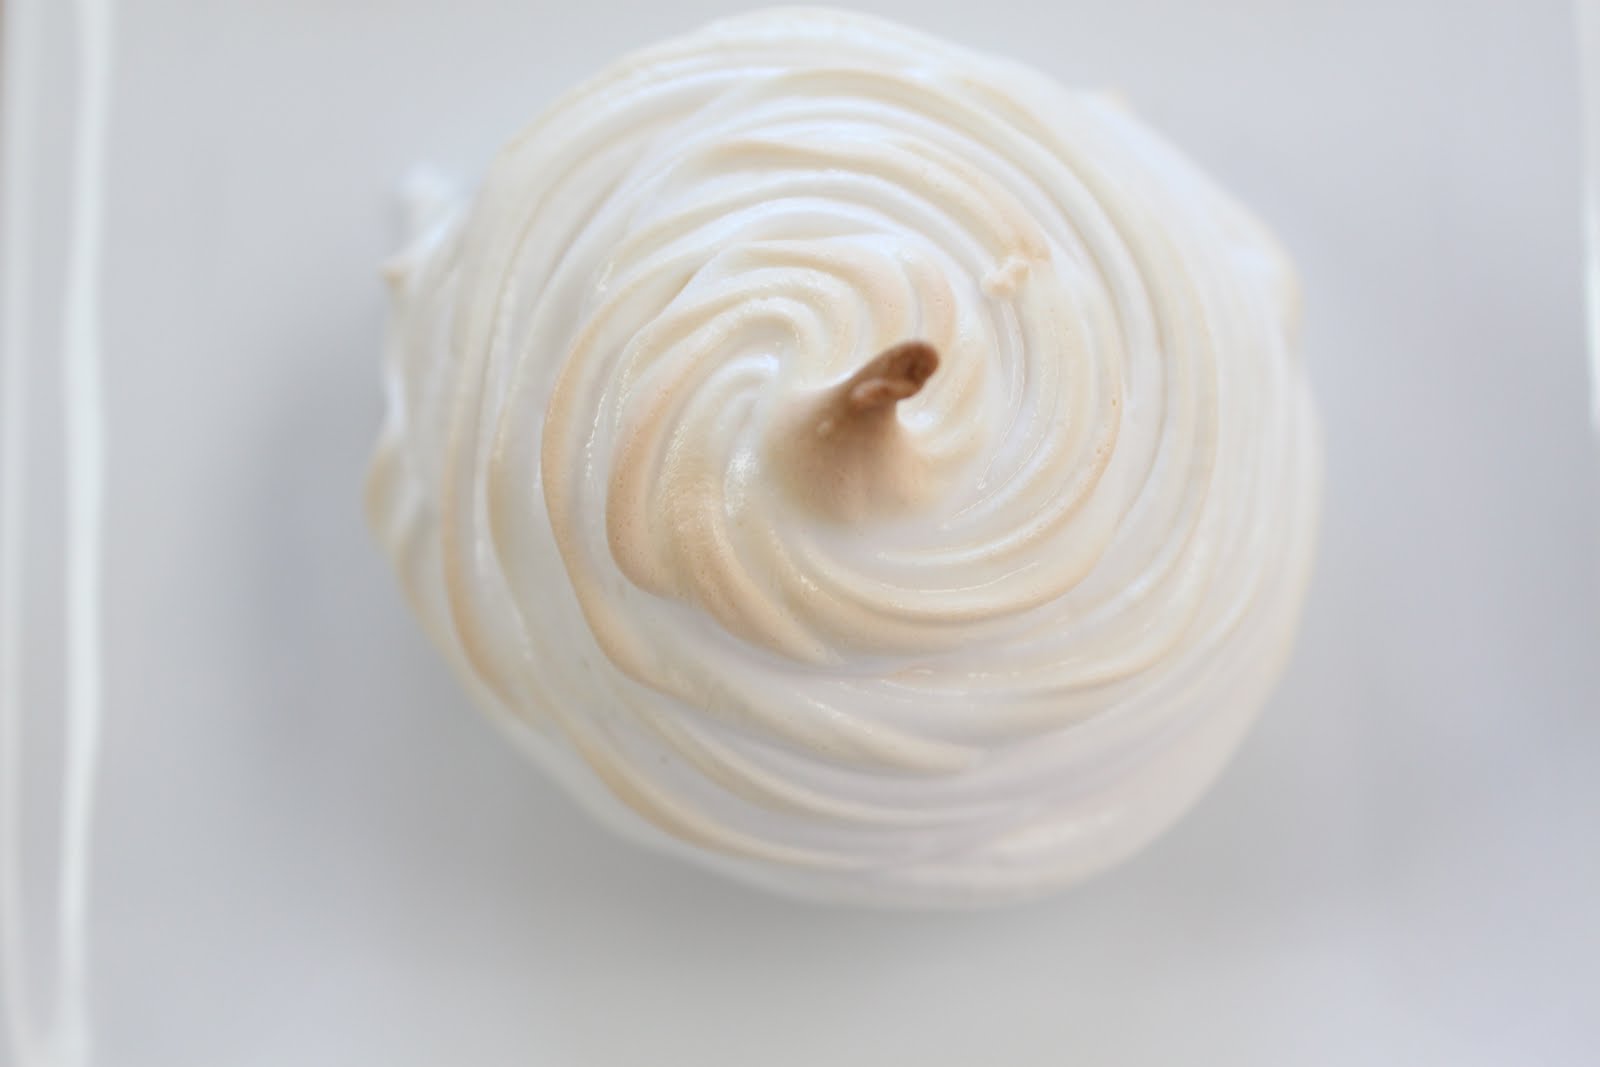
Brown Butter Pound Cake Baked Alaska

We are no strangers to Baked Alaska. Mini Me's birthday is in July, so Baked Alaska has been her birthday dessert many times. For that reason, I was thinking of skipping this challenge, but when I went to the Daring Bakers forum, people were raving about the browned butter pound cake. Since we usually make ours with a chocolate cake or brownie bottom, the pound cake was the perfect excuse to make Baked Alaska again.

The August 2010 Daring Bakers’ challenge was hosted by Elissa of 17 and Baking. For the first time, The Daring Bakers partnered with Sugar High Fridays for a co-event and Elissa was the gracious hostess of both. Using the theme of beurre noisette, or browned butter, Elissa chose to challenge Daring Bakers to make a pound cake to be used in either a Baked Alaska or in Ice Cream Petit Fours. The sources for Elissa’s challenge were Gourmet magazine and David Lebovitz’s “The Perfect Scoop”. If you want the recipes visit Elissa.

Instead of one big cake, we made mini baked Alaska's with brown sugar ice cream. The brown butter pound cake was delicious, but I have to say that the ice cream was a bit of a disappointment. You would have a hard time identifying brown sugar as the main flavor. It had good texture that stayed smooth and creamy, but just didn't have enough of the brown sugar flavor that we were expecting. If you have a brown sugar ice cream that you love, please leave me a link, or a comment if you think you know how to tweak the following recipe to make it perfect.

Brown Sugar Ice Cream
from inmamaskitchen.com
•4 egg yolks
•1 cup heavy cream
•1 cup (packed) brown sugar
•3 cups half-and-half or light cream
•1 1/2 teaspoons vanilla extract
 
In heavy, medium, non-aluminum saucepan, whisk together the egg yolks and brown sugar until thick. In another medium saucepan bring the cream and half and half just to a boil over moderate heat. Gradually whisk the hot cream into the egg yolk mixture in a thin stream. Cook over low heat, stirring constantly, until the custard is thick enough to coat the back of a spoon about 6 minutes. Do Not Boil.
Immediately strain the custard into a medium bowl. Stir in the vanilla and cool to room temperature, stirring occasionally, about 30 minutes. Cover and refrigerate until very cold, at least 5 hours.

Pour the cold custard into an ice cream maker and freeze according to the manufacturer's instructions. Let the ice cream soften slightly before serving.

Brown Butter Pound Cake Baked Alaska 

19 tablespoons (9.5 oz) (275g) unsalted (sweet) butter
2 cups (200g) sifted cake flour (not self-rising; sift before measuring)
1 teaspoon (5g) baking powder
1/2 teaspoon (3g) salt
1/2 cup (110g) packed light brown sugar
1/3 (75g) cup granulated sugar
4 large eggs
1/2 teaspoon pure vanilla extract

Preheat the oven to 325°F/160°C and put a rack in the center. Butter and flour a 9”x9” (23cmx23cm) square pan.
Place the butter in a 10” (25cm) skillet over medium heat. Brown the butter until the milk solids are a dark chocolate brown and the butter smells nutty. (Don’t take your eyes off the butter in case it burns.) Pour into a shallow bowl and chill in the freezer until just congealed, 15-30 minutes.

Whisk together cake flour, baking powder, and salt.

Beat the brown butter, light brown sugar, and granulated sugar in an electric mixer until light and fluffy, about 2 minutes. Beat in the eggs one at a time, mixing well, and then the vanilla extract. Stir in the flour mixture at low speed until just combined.

Scrape the batter into the greased and floured 9”x9” (23cmx23cm) square pan. Smooth the top with a rubber spatula and rap the pan on the counter. Bake until golden brown on top and when a toothpick inserted into the center comes out clean, about 25 minutes.

Cool in the pan 10 minutes. Run a knife along the edge and invert right-side-up onto a cooling rack to cool completely.

Meringue (For the Baked Alaska)
8 large egg whites
1/2 teaspoon (3g) cream of tartar
1/2 teaspoon (3g) salt
1 cup (220g) sugar
Beat the egg whites, cream of tartar, and salt on high speed in an electric mixer until soft peaks form. Beat in the sugar gradually in a slow stream until stiff peaks form.

Assembly Instructions – Baked Alaska
Line four 4” (10cm) diameter tea cups with plastic wrap, so that plastic wrap covers all the sides and hangs over the edge. Fill to the top with ice cream. I used a cookie scoop that was the same diameter as my mini cakes.  Cover the top with the overhanging plastic wrap and freeze for several hours, or until solid.
Level the top of the brown butter pound cake with a serrated knife or with a cake leveler. Cut out four 4” (10cm) diameter circles from the cake. Or any size you like I made mine 2.5 inches. 
Make the meringue (see above.)
Unwrap the ice cream “cups” and invert on top of a cake round. Trim any extra cake if necessary. Pipe the meringue over the ice cream and cake, or smooth it over with a spatula, so that none of the ice cream or cake is exposed. Freeze for one hour or up to a day.

Burn the tips of the meringue with a cooking blow torch. Or, bake the meringue-topped Baked Alaskas on a rimmed baking sheet in a 500°F/260°C oven for 5 minutes until lightly golden. Serve immediately.


The winner of the CSN give away is Grace at A Southern Grace. Send me your e-mail address and CSN will e- mail you your gift code.

Thursday, August 19, 2010

Samoa Bars


Every year we look forward to the phone calls and door to door visits of the Girl Scouts in our neighborhood. It seems like we order more boxes each year, thinking that they will last longer, but in a matter of weeks our supply is gone and there is nothing to do but wait. Mimi Jr. found this recipe for homemade Samoa bars and knew it would be a hit with the other coconut lover, Boy Mimi. While nothing is ever quite as good as the original, these will definitely get us through until the next Girl Scout comes knocking at our door.


These bars were the right flavor combination, but we all agreed that the bottom crust needs to be a little bit thinner and crisper.  I would add more coconut to the caramel mixture on top to really get that toasty coconut flavor. Although we usually keep our boxes of Samoas in the freezer, we thought these were best at room temperature.


Homemade Samoa Bars
adapted from baking bites

Cookie Base:
1/2 cup sugar
3/4 cup butter, softened
1 large egg
1/2 tsp vanilla extract
2 cups all purpose flour
1/2 tsp salt

Preheat oven to 350F. Lightly grease a 9×13-inch baking pan, or line with parchment paper.

To make  the base, in a large bowl, cream together sugar and butter, until fluffy. Beat in egg and vanilla extract. Working at a low speed, gradually beat in flour and salt until mixture is crumbly, like wet sand. Do not over mix. Pour crumbly dough into prepared pan and press into an even layer. Poke holes in several places throughout the pan of dough using a fork.

Bake for 20-25 minutes, until base is set and edges are lightly browned. Cool completely on a wire rack before topping.

Topping:
3 cups shredded coconut (sweetened or unsweetened)
12-oz good-quality chewy caramels
1/4 tsp salt
3 tbsp milk or cream
10 oz. dark or semisweet chocolate (chocolate chips are ok)

Preheat oven to 300. Spread coconut evenly on a parchment-lined baking sheet (preferably one with sides) and toast, stirring every 5 minutes, until coconut is golden, about 10-15 minutes. Make sure to check often because coconut burns quickly. Cool on baking sheet, stirring occasionally. Set aside.

Unwrap the caramels and place in a large microwave-safe bowl with milk and salt. Cook on high for 3-4 minutes, stopping to stir a few times to help the caramel melt. When smooth, fold in toasted coconut with a spatula. (You can also use a double boiler, it just takes a little longer)

Put dollops of the topping all over the shortbread base. Using the spatula, spread topping into an even layer. Let topping set until cooled.

When cooled, cut into bars.
printable recipe


Once bars are cut, melt chocolate in a small bowl. Heat on high in the microwave in 45 second intervals, stirring thoroughly to prevent scorching. Dip the base of each bar into the chocolate and place on a clean piece of parchment or wax paper (I skipped this step). Transfer all remaining chocolate (or melt a bit of additional chocolate, if necessary) into a piping bag or a ziploc bag with the corner snipped off and drizzle bars with chocolate to finish. * I just drizzled chocolate on the top*

Let chocolate set completely before storing in an airtight container.

Makes 30 bar cookies.


As with most recipes I try to make them as written the first time. I can see that there could be some very tasty variation on this recipe. Ideas that we like were: substitute peanuts or toasted pecans for the coconut or for a German Chocolate Cake bar substitute some cocoa powder for flour in the base and add some toasted pecan  to the coconut in the topping.

We are sending this along to Foodie Fridays  party  at Design by Gollum. You can still enter the CSN give away here.


Thursday, August 12, 2010

Pasta with Corn Pesto

 This delicious Linguine with Fresh Corn Pesto comes right from the pages of the August Bon Appetit magazine. I am trying to make more recipes out of all those cooking magazines I have. I am always so excited when they come in the mail and I pick so many things I want to make, then during the week I get so caught up with everything that I usually resort to an easy favorite for dinner, forgetting that I have so many new recipes to try.


 This recipe was not so easily forgotten. Corn is at the peak of the season here in Southern California, and it is sweet, abundant and really inexpensive, so this was the perfect recipe to throw into the mix. Pasta is usually a once a week meal anyway so there was no excuse not to try something this easy using fresh, sweet corn. We chose to have this as a side with some grilled chicken and a green salad, but you could easily mix in some chicken pieces and make it a one bowl meal.


Tagliatelle with Fresh Corn Pesto
(adapted ever so slightly from Bon Appetit August 2010)

4 bacon slices, chopped
4 cups fresh corn kernels ( I used 4 ears of corn)
1 large clove minced garlic
1 1/4 tsp.Salt
3/4 tsp freshly ground Pepper
 1/2 cup freshly grated Parmesan cheese
1/3 cup  toasted pine nuts
1/2 cup extra virgin olive oil
8 oz tagliatelle or any pasta you choose
3/4 cups torn basil leaves.

Cook bacon in a large skillet until crisp and brown. Remove from pan, leaving bacon drippings, and let bacon drain on a paper towels. Pour off all but 1 tablespoon of drippings from skillet. Add corn, garlic, salt and pepper to the skillet. Saute over medium high heat until the corn is tender, but not brown, about 4 minutes. Reserve 1 1/2 cup of the corn mixture and scrape the remaining corn into a food processor. Add 1/2 cup Parmesan cheese and pine nuts to the processor and with the machine running, slowly drizzle the olive oil through the feed tube. Blend until pesto is almost smooth.

Cook pasta in a large pot of boiling salted water until done. Drain pasta, reserving 1 1/2 cup of the cooking water. Place pasta in pasta bowl, add pesto, reserved corn kernels and about 1/2 cup of the basil. Toss pasta adding reserved cooking water to thin to desired consistency. Season to taste with salt and pepper.  Sprinkle with remaining basil and reserved bacon. Serve with additional grated Parmesan cheese.

Note: the amount of pesto from this recipe could easily sauce 1lb of pasta. The recipe called for 8 oz of pasta, I used 12 oz of linguine and had plenty of pesto sauce.
printable recipe


Tuesday, August 10, 2010

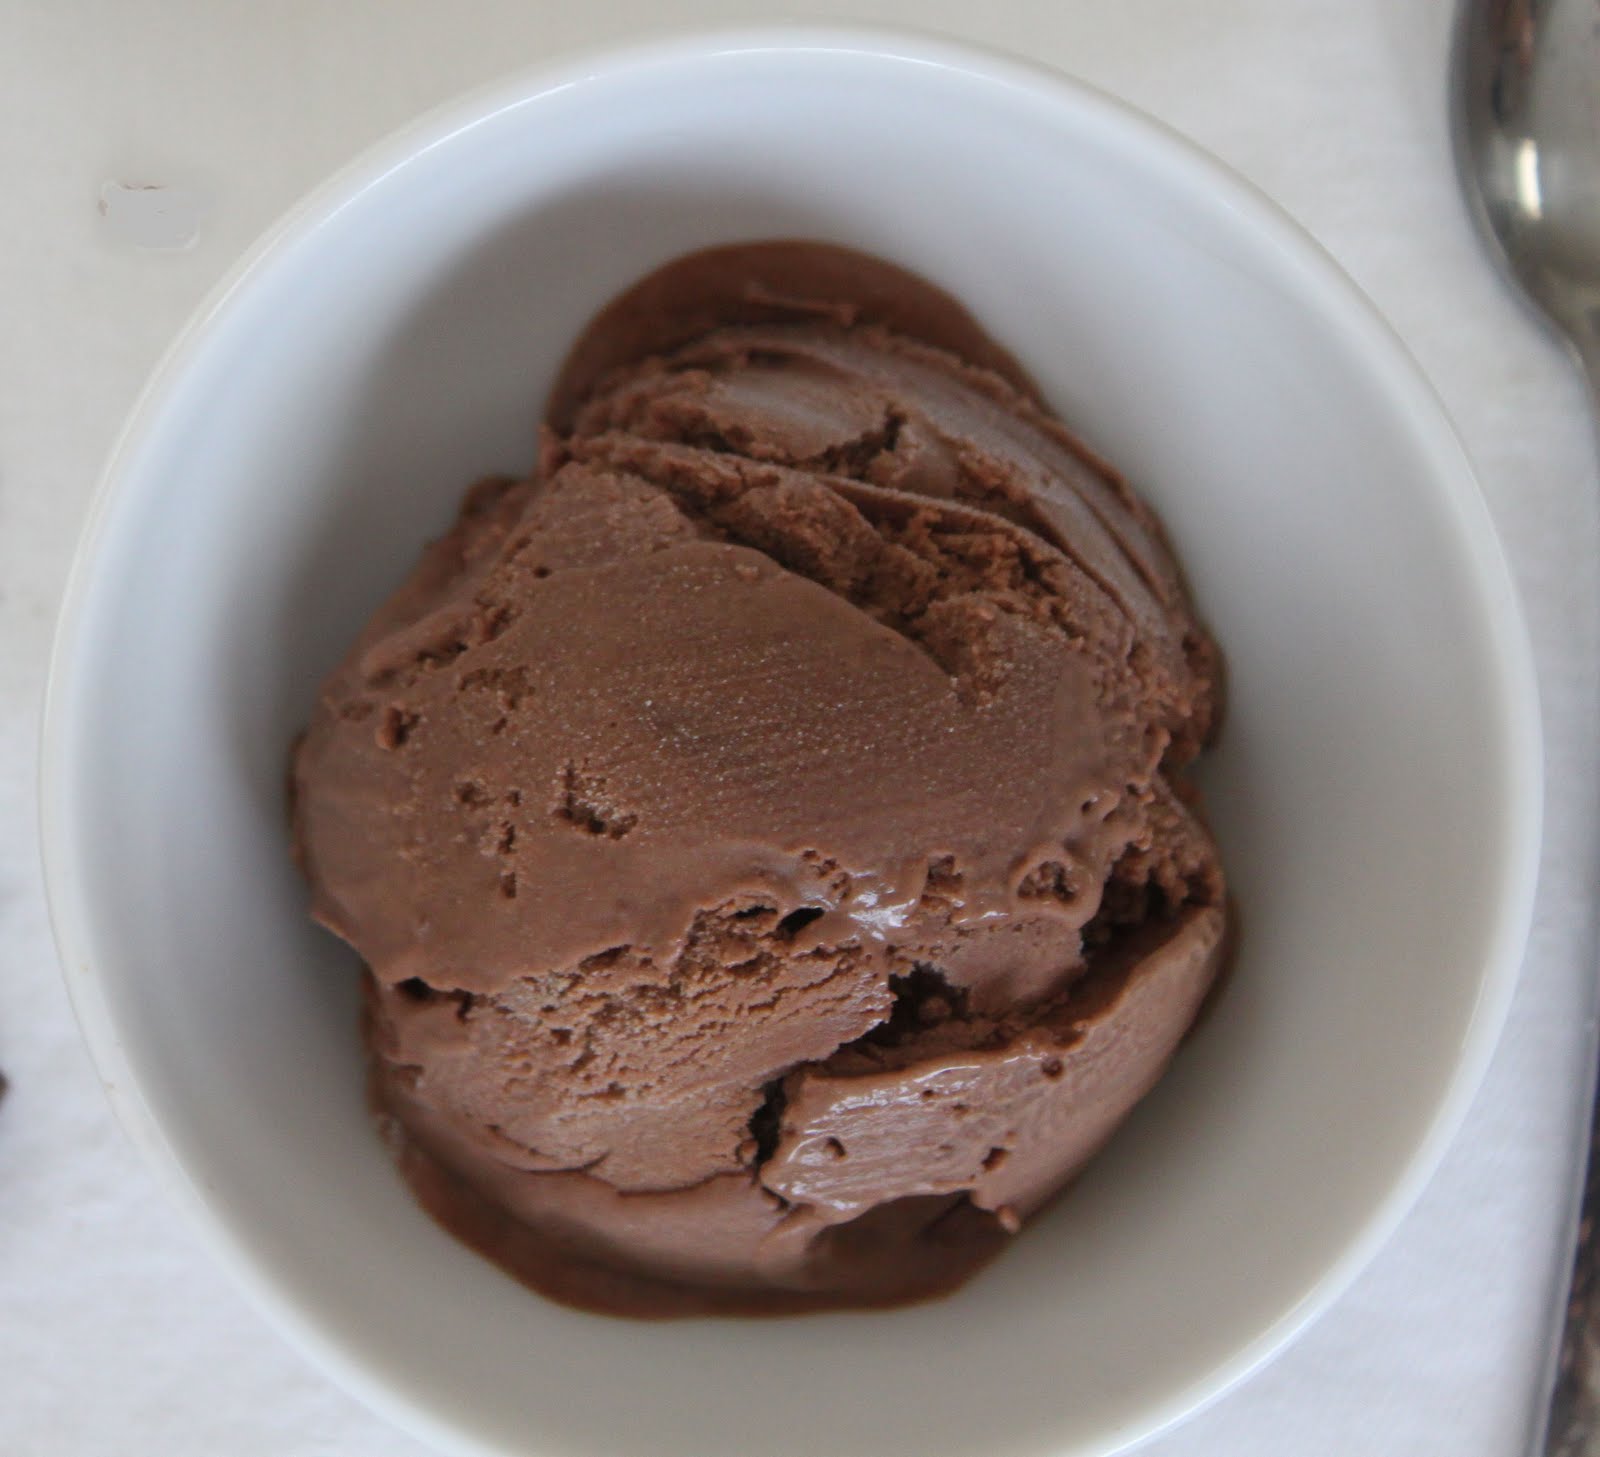
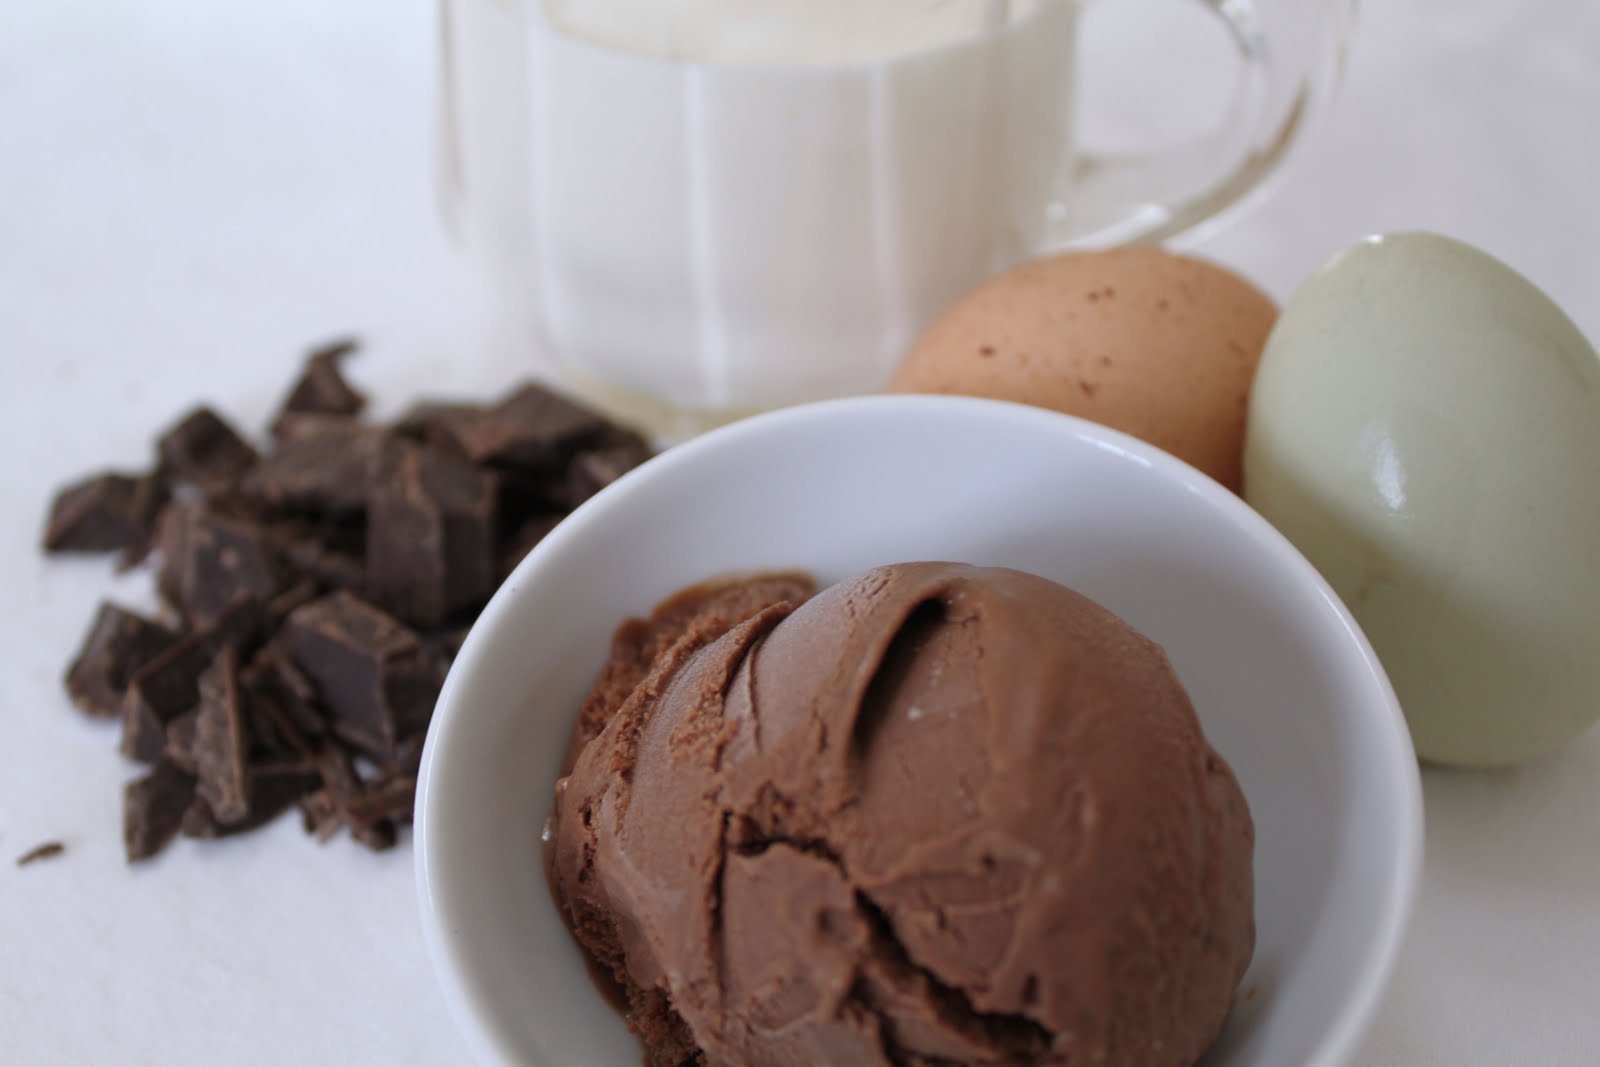
TWD :Chocolate Ganache Ice Cream

Chocolate Ganache Ice Cream

 Katrina of Baking and Boys picked Chocolate Ganache Ice Cream. The lone woman in a houseful of boys, Katrina has her hands full, yet she always manages to cook up some tasty treats.

When I first saw this recipe pick, I had mixed feelings. None of us really like chocolate ice cream because it usually tastes artificial  and  doesn't have a real chocolate flavor or texture, so I was hoping that this wouldn't be a waste of time, ingredients, and freezer space. But I was also excited, hoping that this recipe would be the one to change our minds since Dorie has had more hits than misses with our family. And with this recipe, Dorie succeeds again. We all liked the smooth creamy texture and deep, true chocolate flavor. Everyone practically licked their bowls clean, and the remaining ice cream was gone in record time. I know that this ice cream will be reappearing as the summer days get hotter, and that says a lot coming from a bunch of people who "don't like" chocolate ice cream!

This ice cream has a few simple ingredients and is very easy to customize.  Add some nuts, chocolate chunks, and marshmallows for Rocky Road, or crushed candies or cookies for your own special treat. Whatever you do, you will definitely enjoy this creamy, chocolatey ice cream.

Chocolate Ganache Ice Cream
Dorie Greenspan, Baking From My Home to Yours
6 ounces bittersweet chocolate, finely chopped
1 ½ cups heavy cream
1 cup whole milk
4 large egg yolks
1/3 cup sugar


Put the chocolate in a 2-quart liquid measuring cup or a large heatproof bowl. Bring ¾ cup of the cream to a boil. Pour the cream over the chocolate and let it sit a minute, then using a rubber spatula and starting in the center of the mixture, slowly stir the cream into the chocolate in ever-widening concentric circles. When the ganache is smooth, set it aside.
Bring the milk and the remaining ¾ cup cream to a boil in a medium heavy-bottomed saucepan.
Meanwhile, in a medium bowl, whisk the yolks and sugar together until well blended and just slightly thickened. Still whisking, drizzle in about one third of the hot liquid—this will temper, or warm, the yolks so they won’t curdle. Whisking all the while, slowly pour in the remaining liquid. Pour the custard back into the pan and cook over medium heat, stirring without stopping, until the custard thickens slightly and coats the back of a spoon; if you run your finger down the bowl of the spoon, the custard should not run into the track. The custard should reach at least 170 degrees F, but no more than 180 degrees F, on an instant-read thermometer. Immediately remove the pan from the heat and slowly and gently stir the custard into the ganache.
Refrigerate the custard until chilled before churning it into ice cream.
Scrape the chilled custard into the bowl of an ice cream maker and churn according to the manufacturer’s instructions. Pack the ice cream into the container and freeze it for at least 2 hours, until it is firm enough to scoop. Makes about 1 quart.
Serving: If the ice cream is very firm—as ice cream made with premium-quality chocolate often is—allow it to sit on the counter for a few minutes before scooping or warm it in a microwave oven using 5-second spurts of heat.
Storing: Packed tightly in a covered container, the ice cream will keep in the freezer for about 2 weeks

Thanks for a great pick Katrina. If you want the recipe for this excellent ice cream stop by Baking with Boys and Katrina will have the recipe for you, along with her special take on the recipe.  If you want to see what the other TWD bakers made visit our blog roll.

THE WINNERS
Thank to everyone who participated in the Girard's salad dressing  give away. Winners where chosen by :
Random Integer Generator

Here are your random integers, generated with replacement:

9 24 5 3 16
Timestamp: 2010-08-09 20:57:19 UTC

Barbara at Barbara Bakes
Becky Boyer at Columbus Foodie
Scrambled Hen Fruit
Michelle at Big Black Dog
Lynn  at Queen of the Castle Recipes

Please email (epsteinrr5@gmail.com) your complete mailing address so Girard's can send you your winnings.


Tuesday, August 3, 2010

TWD:Gingered Carrot Cookies

 Gingered Carrot Cookies

 Natalia of gatti fili e farina chose Gingered Carrot Cookies this week. I wasn't really excited about these cookies, but that's why you participate in a group like this, to try a recipe that you might not otherwise think twice about. However, I was pleasantly suprised by these cookies. For some reason I thought these would be just like carrot cakes, and they were not. Neither the ginger nor the carrots overpowered these little cookies. They were mildly spiced and slightly cripsy on the outside but still soft and moist on the inside. Mimi Jr. thought they were like scones, filled with nuts and raisins (no coconut for us this time). With a cup of coffee they were the perfect breakfast cookie, tasty and not too sweet.


 Gingered Carrot Cookies
 Baking from my home to yours by Dorie Greenspan

2 cups all-purpose flour
1 teaspoon baking powder
1/2 teaspoon salt
1 teaspoon ground ginger
Pinch freshly grated nutmeg
1 1/2 sticks (12 tablespoons) unsalted butter at room temperature
2/3 cup sugar
1/3 cup (packed) light brown sugar
1 large egg
1/2 teaspoon pure vanilla extract
1 cup shredded carrots (about 3, peeled and trimmed)
1 cup sweetened shredded coconut
1 cup moist, plump raisins (dark or golden)
1/2 cup coarsely chopped pecans, preferably toasted

Position the racks to divide the oven into thirds and preheat the oven to 375 degrees F. Line two baking sheets with parchment or silicone mats.
Whisk together the flour, baking powder, salt, ginger and nutmeg.
Working with a stand mixer, preferably fitted with a paddle attachment, or with a hand mixer in a large bowl, beat the butter on medium speed until creamy and smooth. Add the sugars and beat for 2 minutes or so, then add the egg and beat for another minute. Reduce the mixer speed to low and beat in the vanilla.
Continuing on low speed, add the dry ingredients in 2 or 3 batches and beat only until they just disappear into the mix. You'll have a very thick dough, and you might be tempted to overbeat it to incorporate flour-don't.
 Mix in the carrots, coconuts, raisins and pecans. Spoon the dough onto the baking sheets in heaping tablespoonfuls, leaving about an inch of space between them; these cookies don't spread much.
Bake for 16 to 18 minutes, rotating the sheets from top to bottom and front to back at the midway point. The cookies should be light brown and only just firm on top. Carefully transfer the cookies to racks to cool to room temperature.

 To see what the other  TWD baker thought visit our blog roll.
If you want to enter the Girard's salad dressing give away leave a comment by this Saturday  August 7.

Friday, July 30, 2010

Summers Salads and a Give Away

I was recently contacted by Girard premium salad dressings and given the opportunity to try their line of premium salad dressings.  They sent me bottle of their three new flavors- apple poppyseed, creamy balsamic, and peach mimosa,  and one bottle of their classic Champagne dressing. We eat a lot of salads during the summer because they are quick and easy, and perfect for a relaxing dinner on the patio, so this was a great chance to change up some of our usual salads with some new flavors.

I sampled each of the dressings and was impressed with the fresh flavors and the balance between the acid and the oil. On my menu was Julia Child's Cobb salad and the classic champagne dressing was perfect match for this salad.
 
Cobb Salad
1/2 head finely chopped iceberg lettuce
1 small head finely chopped romaine lettuce
Grilled or poached chicken breast
Red Onion
corn kernels
tomatoes that have been seeded
hard boiled eggs
bacon, crisply cooked
blue cheese
avocado

Fill a salad bowl with the chopped lettuces. Dice the chicken breast and toss with a tablespoon of salad dressing,then arrange on top of the lettuce. Finely chop the hard boiled eggs and season with salt and pepper before arranging next to the chicken. Chop remaining ingredients and place them on top of the lettuce. Just before serving toss the entire salad with enough dressing to coat the ingredients evenly.


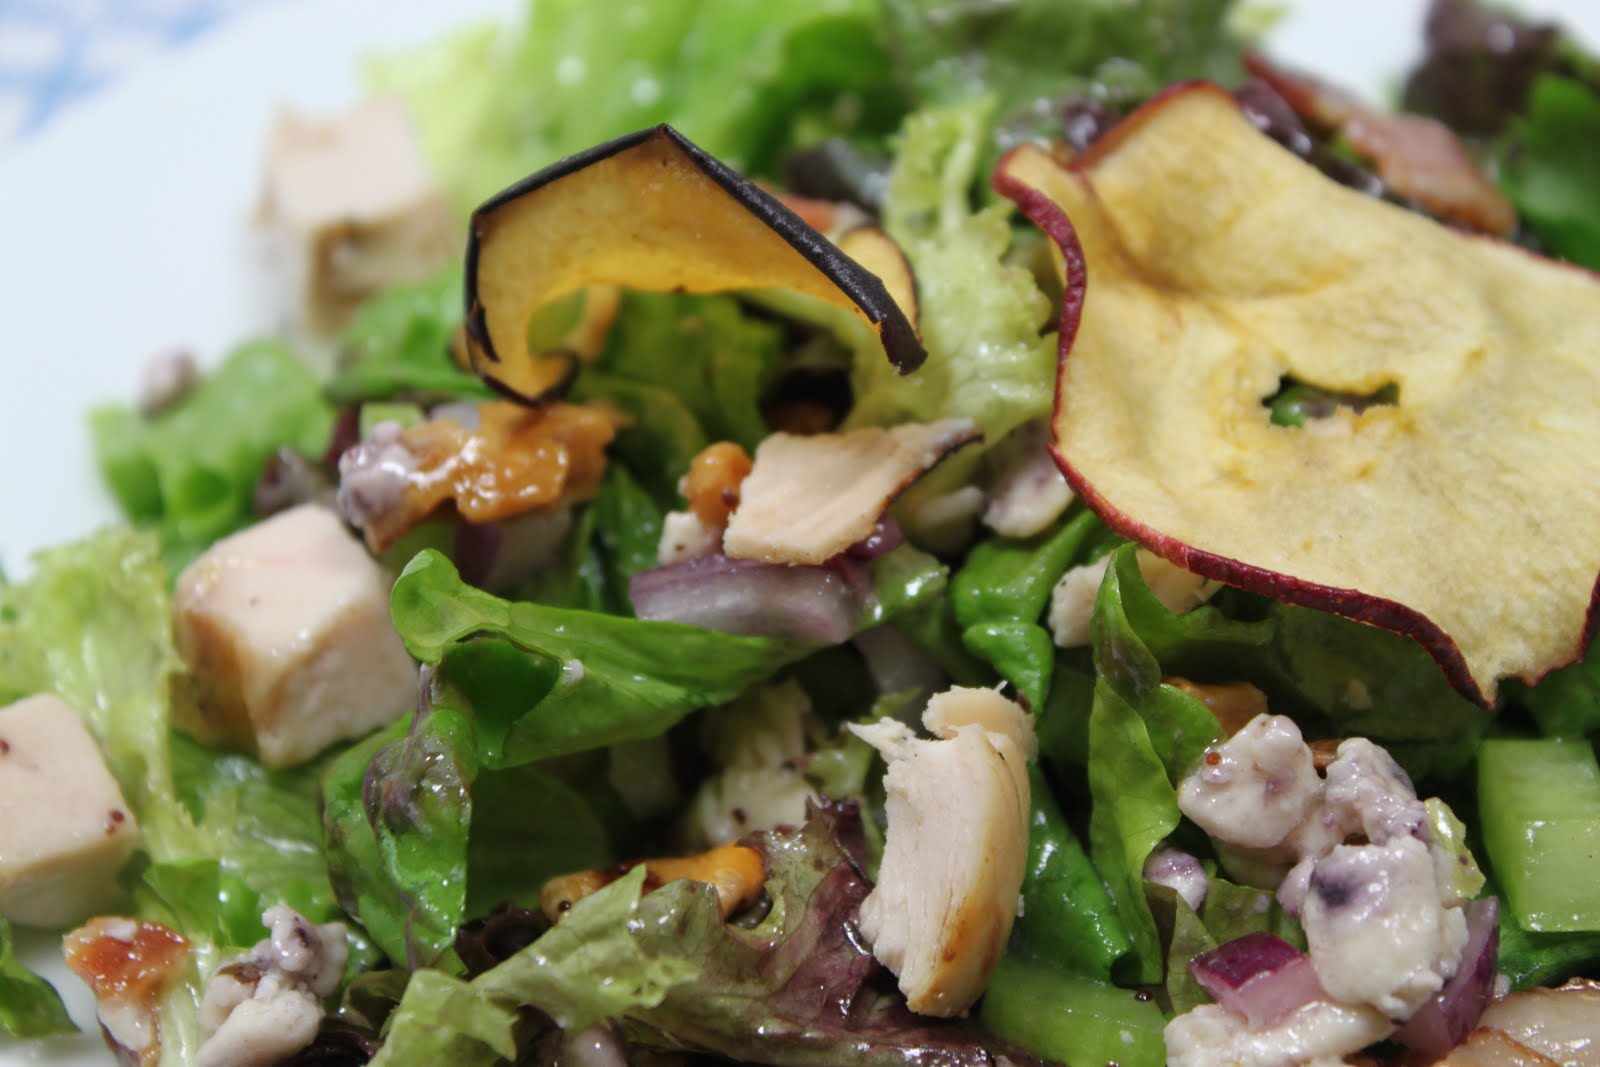
Along with the dressings Girard's sent a along a few recipes to try. The two that caught my eye were a cococus salad with the classic champagne and a chicken salad with the apple poppy seed dressing. We have a couscous salad that we make a lot during the summer so instead of the usual blasamic/olive oil drizzle, I used the chanpange dressing and it was really good. I also love the apple salad at Panera, so I thought this would be the perfect opportunity to make it at home with the apple poppy seed dressing.

Coucous Salad

This is my go-to couscous salad.
2 cups cooked coucous
finely chopped red onion
toasted pine nuts
sweet one hundred tomatoes, halved (or any other variety of cherry tomato)
finely chopped basil
crumbled feta cheese
salt and pepper
Griard's Champagne dressing

Toss first 6 ingredients together and mix with 1/4 cup of dressing and salt and pepper. Refrigerate until chilled. Just before serving toss with additional dressing to taste.

Chicken Apple Salad

This is my version of chicken apple salad..  Add enough of each ingredient to suit your tastes and for the number of servings you need. I usually use about 2 cups of greens per serving for a main dish salad.
Mixed greens
sliced red onion
chopped toasted walnuts
shredded cheddar cheese
dried cranberries or cherries
chopped grilled chicken breast
chopped celery
crumbled bacon
apple chips
Girard 's Apple Poppy Seed dressing


I tried the balsamic dressing over vine ripe tomatoes and it was the perfect mix of balsamic vinegar and oil.
The only dressing I haven't used yet is the peach mimosa, but I hope to give it a try this weekend.

Girard's has generously offered to send 5 lucky readers the same samples they sent me. To enter just leave a comment about your favorite salad. Be sure that you include your email if your comment doesn't link back to your blog. Comments must be received by August 7th at 12 a.m. pacific time.

Here is a link to an online coupon for $2.00 off one bottle of Girard’s Salad Dressing.
GIRARDS COUPOON Please note that the coupon is on a first come, first serve basis, so be sure to act fast!


Tuesday, July 27, 2010

TWD: Blondies

Chewy, Chunky Blondies


 Nicole of Cookies on Friday picked Chewy, Chunky Blondies for our TWD treat this week. Boy Mimi had some free time on his hands so he volunteered to get into the kitchen and make these blondies. Because we like our blondies soft and gooey we only baked ours for 30 minutes, and they were perfect. They had a nice crispy crust and the middle was rich and chewy.


They were everything a blondie should be- soft, chewy and full of brown sugar flavor.  As a family we really liked these blondies, execpt for the butterscotch chips, so next time we will leave them out or use toffee bits. They were a nice change from a regular chocolate brownie, and a step up from a plain chocolate chip cookie. They were the perfect afternoon snack and really easy to put together, especially since Boy Mimi did all the work! They would be the perfect thing to take to a party or on a picnic, and make a great dessert when they are fresh from the oven and topped with some homemade vanilla gelato.

Blondies
 Baking from My Home to Yours by Dorie Greenspan

2 cups flour
¾ teaspoon baking powder
½ teaspoon baking soda
½ teaspoon salt
2 sticks (8 ounces) unsalted butter, at room temperature
1-1/2 cups (packed) light brown sugar
½ cup sugar
2 large eggs
1 teaspoon pure vanilla extract
6 ounces bittersweet or semisweet chocolate, chopped into chips or 1 cup store bought chocolate chips
1 cup butterscotch chips or Heath Toffee Bits
1 cup coarsely chopped walnuts
1 cup sweetened shredded coconut

Center a rack in the oven and preheat the oven to 325 degrees F. Butter a 9” x 13” baking pan and put it on a baking sheet.

Whisk together the flour, baking powder, baking soda, and salt.

Working with a stand mixer, preferably fitted with a paddle attachment, or with a hand mixer in a large bowl, beat the butter on medium speed until smooth and creamy. Add both sugars and beat for another 3 minutes, or until well incorporated. Add the eggs one by one, beating for 1 minute after each addition, then beat in the vanilla. Reduce the mixer speed to low and add the dry ingredients, mixing just until they disappear into the batter. Using a rubber spatula, stir in the chips, nuts, and coconut. Scrape the batter into the buttered pan and use the spatula to even the top as best as you can.

Bake for about 40 minutes, or until a knife inserted into the center of the blondies comes out clean. The blondies should pull away from the sides of the pan a little and the top should be a nice honey brown. Transfer the pan to a rack and cool for about 15 minutes before turning the blondies out onto another rack. Invert onto a rack and cool the blondies to room temperature right side up.

Cut into 32 bars, roughly 2-1/4” x 1-1/2”


Thanks Nicole for a great pick.  To see what the other TWD bakers made check our blog roll.


Daring Bakers: Swiss Roll

Swiss Roll

The July 2010 Daring Baker's challenge was hosted by Sunita of Sunita's World- life and food. Sunita challenged everyone to make an ice-cream filled Swiss roll that’s then used to make a bombe with hot fudge. Her recipe is based on an ice cream cake recipe from Taste of Home.

Let me just say that this is not a pretty dessert. It tasted fine, but it's just not gorgeous to look at. And the looks definitely did not stop it from disappearing rather quickly. As usual with the Daring Bakers, this was a family project. Mini Me made the Swiss roll cake which we filled with a vanilla mascarpone mousse. Boy Mimi made his fabulous coffee ice cream, and I contributed the vanilla gelato and hot fudge sauce. We used the cake recipe provided on the Daring Bakers forum for the Swiss roll and while the texture was nice, it just didn't have enough chocolate flavor. The recipe can be found here.


Vanilla Mascarpone Mousse
8oz mascarpone
2 teaspoon vanilla
8oz whipping cream
1/2 cup sugar, divided

In a mixing bowl whip the cream with 1/4 cup sugar and 1 teaspoon vanilla. In a second bowl beat the mascarpone with the remaining teaspoon vanilla and sugar. Fold the whipped cream into the mascarpone.
Chill.


Coffee Ice Cream
1 1/2 cups whole milk
1 1/2 cups heavy cream,
3/4 cups sugar
4 egg yolks
1 teaspoon vanilla
2-3 tablespoons instant espresso powder
pinch salt

Heat milk, cream instant espresso powder and 1/2 cup sugar over medium heat,stirring to dissolve sugar, about 5 minutes.
Whisk egg yolks with remaining sugar until smooth. Stirring constantly  slowly add about 1 cup of the hot milk to the egg yolk. then slowly add the egg yolk mixture back into the remaining hot milk. continue to cook the custard over medium heat until it is very hot, but not simmering and custard coats the back of a spoon.
Strain custard into a bowl set over ice water and let cool. When cool remove from ice bath cover with plastic wrap and refrigerate until completely chilled, about 3 hours.
When chilled churn in ice cream machine according to manufacturer's directions.

Vanilla Gelato
2 cups whole milk
1/2 cup sugar
3 egg yolks
1 cup cream.
2 teaspoons vanilla
pinch of salt

Heat milk over low heat. In a small bowl beat egg yolks until thick and creamy. Add 2 tablespoons of hot milk to eggs stirring constantly. Add eggs, sugar and salt to remaining milk in sauce pan. Return to heat and cook over medium heat, until custard thickens, but do not boil.  Remove from heat. Place pan in a bowl of ice water to stop cooking then add cream and vanilla. Refrigerate until cold and process in your ice cream machine according to manufacturer directions.

Hot Fudge Sauce
1/2 cup brown sugar
1/2 cup white sugar
1/2 cup cocoa powder
pinch salt
2/3 cup heavy cream
4 tablespoons butter
1 teaspoon vanilla

Mix all ingredients except vanilla in a sauce pan. Stir to combine. continue string over medium heat until smooth and the sugars have melted. Remove from heat add vanilla and cool to room temperature. To serve warm, reheat over hot water or in microwave.


Sunita thank you for a fun challenge. To see what the other Daring Bakers made visit our blog roll