Tuesday, May 24, 2011

Hamburger Cupcakes


Imagine my surprise when Megan at in words and pictures asked me to do a guest post while she is off in Europe shooting a video on craft photography. My first thought was, she's nuts. But I've know Megan since she was a small girl, and she has a very special place in our hearts, so I knew we could not let her down. Megan is such a talented and creative person. She can put together a perfectly felted peep, then turn around and whip up some mushroom risotto, and just when you think she is done, Megan shows you some amazing gardening ideas. And on top of everything, she writes about it in a way that both makes you laugh and feel like you can do anything she just did! This girl can do it all. Her blog covers food, crafts, gardening, photography and life, so if you want a few details on how to make these fun cupcakes and a chance to meet Megan head on over to in words and pictures.


Tuesday, May 17, 2011

Monkey Cake


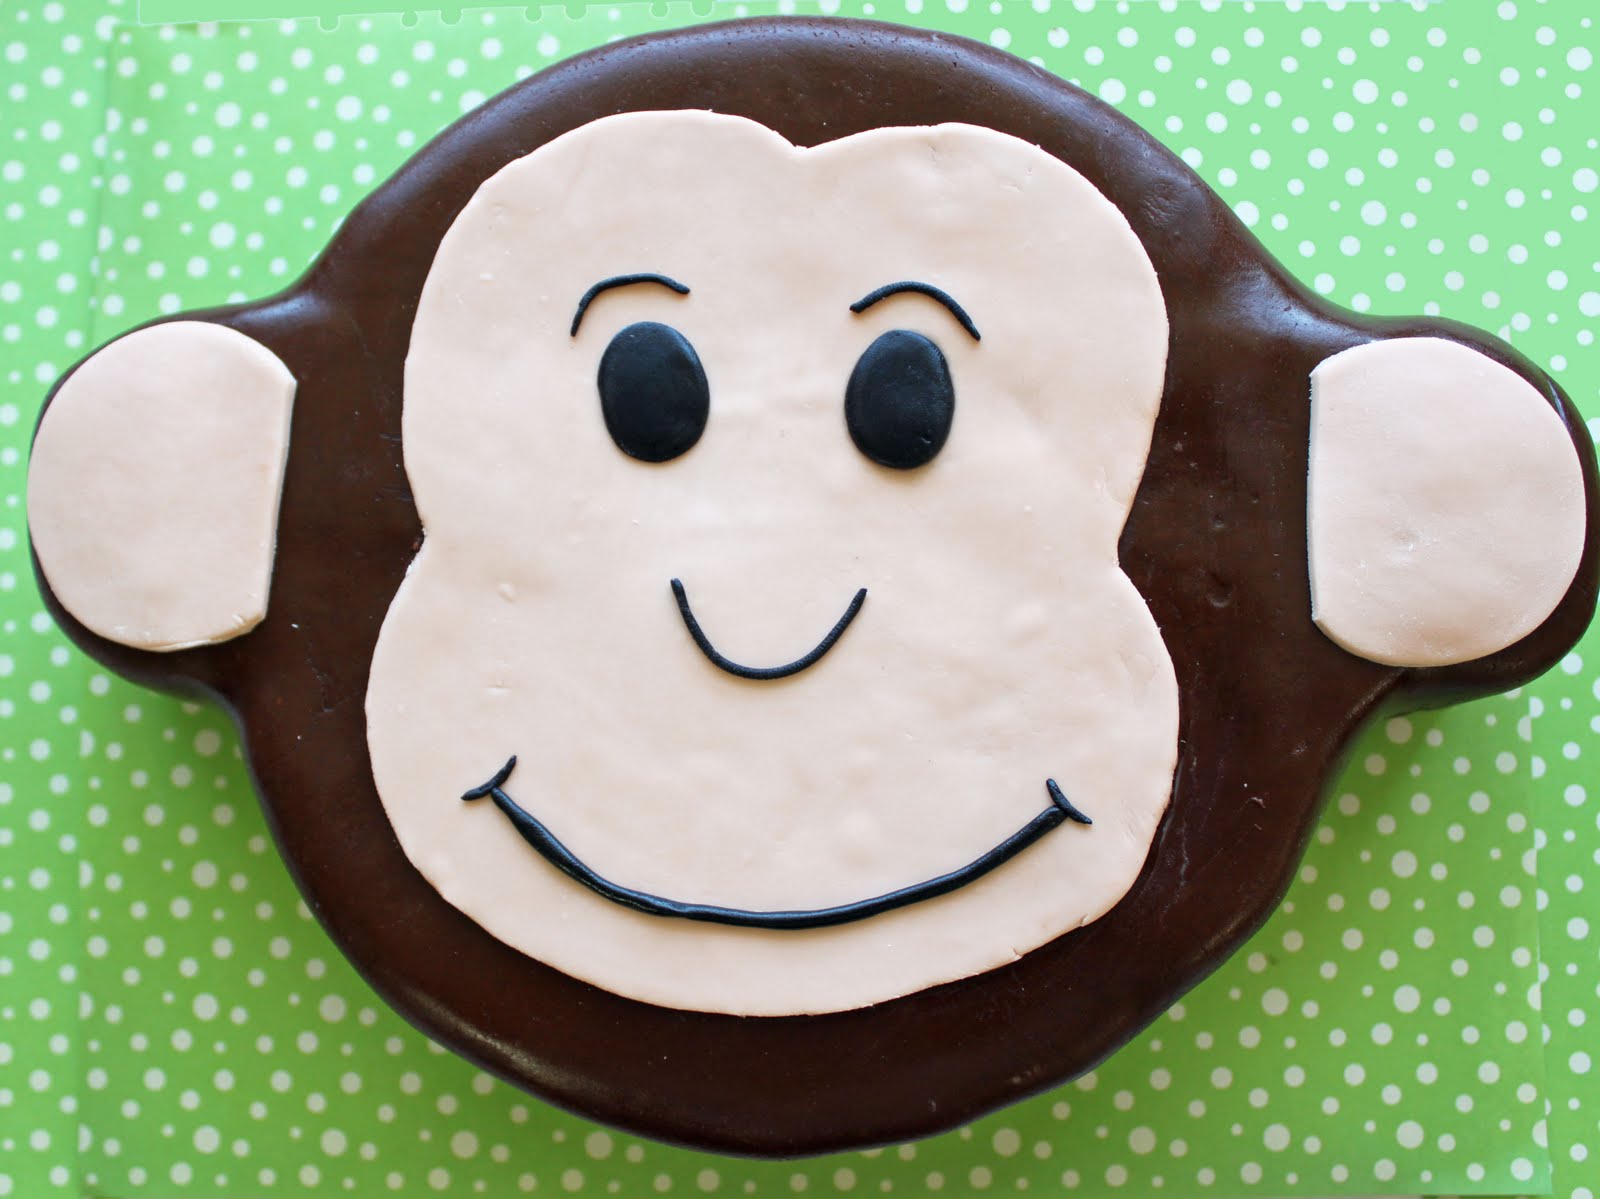
It's no secret that we like to monkey around here at Mimi's Kitchen, so when Mimi Jr. asked me to help her make a monkey cake for a friend, I was happy to assist. It has been many years since I covered a cake in fondant. The cakes always look beautiful, but my family didn't really go for the taste of the fondant so I stuck to buttercreams and ganaches for our family cakes. For this cake, we decide to try marshmallow fondant. It's super simple to make and it really does taste better than the fondant I remember making in the past. This is a really easy cake to make and we thought the fairly simple shape was a good starting point for us to get back into fondant covered cakes.

Marshmallow Fondant
allrecipes.com

Ingredients
1/4 cup butter
1 (16 ounce) package miniature marshmallows
4 tablespoons water
1 teaspoon vanilla extract
2 pounds confectioners' sugar, divided


Directions
1. Place the butter in a shallow bowl, and set aside.

2. Place the marshmallows in a large microwave-safe bowl, and microwave on High for 30 seconds to 1 minute to start melting the marshmallows. Carefully stir the water and vanilla extract into the hot marshmallows, and stir until the mixture is smooth. Slowly beat in the confectioners' sugar, a cup at a time, until you have a sticky dough. Reserve 1 cup of powdered sugar for kneading. The dough will be very stiff.

3.Rub your hands thoroughly with butter, and begin kneading the sticky dough. As you knead, the dough will become workable and pliable. Turn the dough out onto a working surface dusted with confectioners' sugar and continue kneading until the fondant is smooth and no longer sticky to the touch, 5 to 10 minutes.

4.Form the fondant into a ball, wrap it tightly in plastic wrap, and refrigerate overnight. To use, allow the fondant to come to room temperature, and roll it out onto a flat surface dusted with confectioners' sugar.
  printable recipe

Before we got started, Mimi Jr. sketched out her idea and made a template for the face. She started with an 8 inch chocolate layer cake, then filled and crumb coated it with an espresso buttercream frosting. Color your fondant first, before you start constructing the cake, since the color deepens as it rests. You will need three colors of fondant- tan, dark brown and black. For the dark brown fondant, we used both cocoa powder and brown gel food coloring to get the right color. Be careful with cocoa powder as it does seem to dry out the fondant if you add too much. The tan was colored with a small drop or two of brown gel, and the black was also colored with some gel coloring.

For the ears she made an extra cake layer in an 8 inch square pan, and using a cookie cutter, she cut out four small circles of cake, which she frosted and crumb coated like two mini layer cakes. Using the same cutter she cut out a half circle on the main cake on each side where she wanted the ears to be placed. She then frosted over the cut outs on the main cake and slid the ears into place. The frosting helped to hold everything together. Once it was all frosted and put together, we chilled the cake until every thing was set.
When the caked had firmed up in the fridge, we rolled out the dark chocolate fondant and draped it over the cake smoothing it out and using a pizza cutter to trim around the base of the cake.
Next up was the face and ears in tan fondant. We rolled a thin sheet of the tan fondant and placed the face template on top and cut around it with the tip of a sharp knife. We used the black fondant for the eyes, nose, and mouth. We attached all the pieces on top with a little bit of water.

This was a fun project to do and we liked working with this fondant. It was easy to make and use, and tasted so much better than any other fondant. I know we will definitely be using this again next time we have a fun cake project.


Thursday, May 5, 2011

Pomegranates


Ryan at POM Wonderful asked if I would like to try their product. No strings attached. He didn't ask me to write a post about it, he just asked me to enjoy it. And enjoy it we did. We love plain pomegranate juice, so we started by pouring POM and sparkling water over ice to make a really refreshing drink that was fruity but not too sweet. Although delicious as just a juice, we knew there were many more uses for our remaining bottles of POM. 


 Next we made a pomegranate curd. The egg yolks turned the curd a weird color, but it still tasted great. The curd can be used any way you would use a lemon or orange curd, and we turned it into the filling for some pink French Macaroons that I had made. The color combo is not so pretty, but the tangy curd and sweet chewy macaroons were perfect together.

Pomegranate Curd
adapted from Cook's Illustrated

1 cup pomegranate juice, reduced to 1/2 cup
1/2 cup sugar
2 large eggs
2 tablespoons unsalted butter, cold
1 tablespoon heavy cream
1/4 teaspoon vanilla
a pinch of salt

Heat pomegranate juice in in a small pan over medium heat until reduced to 1/2 cup.  In a non reactive sauce pan whisk eggs and sugar until light and lemon colored. Whisking constantly, slowly add the pomegranate reduction to the eggs. Place pan over medium heat and cook, stirring continuously until the mixture is thick and coats the back of a spoon (170 degrees). Remove from heat and stir in cold butter, mix until incorporated; stir in cream, vanilla and salt. Pour curd through a fine mesh strainer into a small bowl. Cover surface directly with plastic wrap and refrigerate until needed.
printable recipe


Then the curd became a white chocolate pomegranate mousse with a pomegranate reduction. We had made this mousse before without the pomegranate and found it a little too sweet from the white chocolate, but the addition of the curd and pomegranate reduction made it just right.


Pomegranate White Chocolate Mousse
adapted from 5 Ingredient Fix

7 ounces white chocolate, very finely chopped
2 large egg yolks
2 tablespoons granulated sugar
1 1/4 cups heavy cream, divided
1/2 cup pomegranate curd
1/2 cup pomegranate juice reduced by to 1/4 cup

Place white chocolate in a glass bowl and set aside. Whisk the egg yolks with the sugar until pale in color.
In a saucepan over medium-low heat, bring 1/4 cup cream to a simmer. While whisking, slowly pour the warm cream into the egg yolk mixture to temper. Pour the creamy mixture back into the pan, return to medium-low heat and stir with a wooden spoon until thickened and it coats the back of the spoon. Pour the hot egg mixture through a fine mesh sieve placed directly over the chopped white chocolate. Let stand a few minutes without disturbing and then stir the chocolate until completely smooth.Stir in the curd.

In another bowl, whip the remaining 1 cup cream until soft peaks form. Fold the half the whipped cream into the chocolate mixture to lighten, and then fold in the remaining whipped cream.

Spoon into serving dishes and refrigerate at least one hour. Drizzle with pomegranate reduction and shaved dark chocolate prior to serving.


Finally we made some pomegranate sorbet. It is so easy to make and perfectly refreshing for the hot weather ahead.


Pomegranate Sorbet
a method

Mix 2 cups pomegranate juice and the juice of one lime with simple syrup, to taste. Pour into ice cream machine and process according to manufacturer's directions. If you don't have an ice cream machine, just pour the mixture into a shallow pan and place in the freezer. Stir with a fork, breaking up the ice crystal every 15 minutes until frozen.


A big thank you to Ryan from POM for this great product. We enjoyed it in so many ways, and I have already received requests for pomegranate margaritas from Mr. Mimi and some dark chocolate pomegranate truffles from Mimi Jr., so I can see a few more bottles of POM on the grocery list in the near future so we can continue to explore the possibilities of POM! 


Tuesday, April 19, 2011

Flower Power


Mimi Jr. and I spent a fun afternoon making these cookies to cheer up Mini Me during mid term exams. We used our favorite white sugar cut out cookie dough and royal icing tinted with neon colors along with a few nonpareils.


These are easy to do, just outline and flood the cookies with the base color, and when dry, pipe on the petals and the center in a contrasting color. These are bright and perfect for spring. I got the inspiration while browsing blogs. I stopped at The Sweet Adventures of Sugarbelle who has a fun post on Easter Eye Candy. I noticed that a lot of decorators were using string work and I thought, what a great way to embellish your cookies. We have always been sprinkle girls at Mimi's kitchen, so this was a new adventure for us, although we couldn't quite get completely away from the sprinkles.


Sugar Cookies

3 c all-purpose flour
2 tsp baking powder
1 c sugar
2 sticks butter
1 egg
1/2 tsp pure vanilla extract
1/2 tsp pure almond extract
1/2 teaspoon salt


Preheat oven to 350.
Combine the flour and baking powder, set aside. Cream the sugar and butter. Add the egg and extracts and mix. Gradually add the flour mixture and beat just until combined, scraping down the bowl, especially the bottom.
Roll onto a floured surface and cut into shapes. Place on parchment lined baking sheets and bake for 10-12 minutes. Let sit a few minutes on the sheet, then transfer to a cooling rack.

printable recipe


 Foodie Friday at Designs by Gollum    Sweet Tooth Friday


Friday, April 8, 2011

Spring Cupcakes


This is a fun spring project inspired by Hello Cupcake.  It's perfect for kids- even your little ones can do this with an adult handy to cut the marshmallow. It is an easy project, with simple ingredients. Make and frost your favorite cup cakes, and grab some marshmallows and sprinkles. With a scissor, slice large marshmallows horizontally in five slices and coat the sticky sides in the colored sugar. Place slices, slightly overlapping, around the edge of the cupcake. For the sunflowers, fill the center of the cupcake with dark brown jimmies.


 For the daisies we used Dots, cut in half horizontally and squished flat for the center. You can use any color combination of candies, sugars, and jimmies to make many different spring flowers!


The butterflies were a bit more complicated. They are also from Hello Cupcake and are made with candy melts. 


Draw an antenna and a pair wings on paper, place paper on a baking sheet and cover with baking parchment. Melt candy melts in plastic frosting bottles, or zip lock bags. On your parchment, first outline the wings in one color then fill the center with a contrasting color, rap the pan on a hard surface to smooth the candy melts, and using a tooth pick, drag and swirl some of the edge color with the center color. Let set until hardened.  Assemble your butterflies on top of your frosted cupcakes. Place wings in frosting at angles pipe some candy melt dots between them (or use round candy) for the body and add your antenna.


Sounds easy. It is if...your kitchen is warm enough so the candy melts stay liquid for a few minutes. Our kitchen was very cold the day we made these butterflies, and when the liquid candy melts hit the parchment on the cold cookie sheet they hardened almost immediately, and the whole thing became very frustrating. Our solution: once the wings were piped, we slid the pan in the a warm oven for a minute to soften the candy melts. Then proceed with rapping and swirling. Success!

Thursday, March 31, 2011

Recipe Round Up


I really love belonging to cooking groups, but I don't like posting about foods that have no recipes to go with them, since this is a cooking blog. To that end I started doing a monthly roundup of recipes I made for Tuesday's with Dorie and French Fridays with Dorie. Well, this month I decide to combine both of the monthly round ups into one big round up. The recipes for Tuesday's with Dorie can be found on the weekly host's blog, to which I will include a link, but for French Friday's there is no host, so if it is a recipe that intrigues you send me an e-mail and I will give you more information.


Our Tuesday's with Dorie recipes were the Citrus Currant Sunshine Muffins and the Chocolate Pots de Creme.

Lauryn of Bella Baker chose Citrus Currant Sunshine Muffins. These muffins had a big citrus taste, with a coarse almost chewy texture. We made these three different ways; some plain, some with raisin, and a few with craisins. Everyone liked the craisin version the best. The dried cranberries added a nice sweet/tart taste to an otherwise pretty plain muffin. The raisins were good, adding sweetness, but lacking the balance of the semi-tart craisins.


 Christine of Black Cat Cooking  chose Chocolate Pots de Creme.
  This was an intensely chocolate pudding. Dorie had you cook and cool it in a water bath covered with plastic wrap, but I really don't think this improve the texture of this pudding, and next time I would skip this step. We would make this again for the deep, rich chocolate flavor. As a family we don't usually love chocolate flavored desserts because they tend to be too sweet or completely lacking chocolate taste, but this silky smooth pudding and Dorie's chocolate ice cream have both been winners, so she is definitely on to something with her chocolate treats!


The French Friday recipes we made this month were the salted butter break-ups. The pictures in the book were so fabulous and we were most excited about this recipe, but unfortunately, this was the most disappointing. It was really nothing more than a giant sugar cookie, brushed with egg wash for color. It was fun but nothing special. We were hoping the salt would come through, and even used the higher suggested amount, but it was pretty boring. We even tried dipping pieces in melted chocolate, and when that doesn't save a recipe, you know that it is something you probably won't make again.


Scallops with caramel orange sauce was a quick and tasty way to prepare scallops. Although caramel sounds like s dessert item, this sauce had a nice almost burnt taste that paired nicely with the sweet oranges, and was perfect over mildly sweet scallops. This is definitely a recipe that we will make again. It will be a nice change from a quick pasta or chicken dish on our busy school nights.

Brown butter, dried figs, raisins, pistachios, chives, almonds, Parmesan cheese and orange zest


And finally, the real star of this month's recipes was the Beggar's Linguine. Mimi Jr. and I made this for lunch one day because we were pretty sure that the other Mimi's weren't going to go for this fruity pasta. We even had our doubts as we were putting it together and taking our first few bites. We were really close to just skipping it, but figured that the whole point of the group was to try new things so we went for it. The most surprising thing was that with each bite we liked this strange pasta dish more and more. Somehow, the flavors all come together to create a wonderfully savory pasta that is not the sweet dish we had expected it to be based on the ingredients.What we didn't like were the small bits of fruit and nuts with the long strands of pasta. Mimi Jr. suggested that the fruit and nuts would be good with orzo or couscous as everything would be more similar in size and one forkful could get a little of everything. Since I had all the ingredients we made it the following day with couscous. I used about half the amount of butter, and it was perfect. We loved it at room temperature and think it would also be good served chilled as a salad or a side dish with some well seasoned grilled meats.

This month was full of surprises, with some new favorites, and some disappointments. We are excited to see what April's recipes will bring to the table.


Sunday, March 27, 2011

DB: Filled Meringue Coffee Cake

The March 2011 Daring Baker’s Challenge was hosted by Ria of Ria’s Collection and Jamie of Life’s a Feast. Ria and Jamie challenged The Daring Bakers to bake a yeasted Meringue Coffee Cake.


We had a choice of two version of the recipe- Jamie's or Ria's. We chose Jamie's version filled with cinnamon sugar, chopped nuts, and chopped chocolate. This soft, moist, slightly sweet coffee cake was really more of a bread than a cake. As with most yeast breads, they are best the day they are baked, so we made half the recipe that is below.

Mr. Mimi declared that he doesn't like chocolate in his breakfast foods and suggested that next time we fill the bread with raspberry jam instead of the chocolate and nuts. I think he may be on to something.

FILLED MERINGUE COFFEE CAKE
Makes 2 round coffee cakes, each approximately 10 inches in diameter
The recipe can easily be halved to make one round coffee cake

For the yeast coffee cake dough:
4 cups (600 g / 1.5 lbs.) flour
¼ cup (55 g / 2 oz.) sugar
¾ teaspoon (5 g / ¼ oz.) salt
1 package (2 ¼ teaspoons / 7 g / less than an ounce) active dried yeast
¾ cup (180 ml / 6 fl. oz.) whole milk
¼ cup (60 ml / 2 fl. oz. water (doesn't matter what temperature)
½ cup (135 g / 4.75 oz.) unsalted butter at room temperature
2 large eggs at room temperature

For the meringue:
3 large egg whites at room temperature
¼ teaspoon salt
½ teaspoon vanilla
½ cup (110 g / 4 oz.) sugar

For the filling:
1 cup (110 g / 4 oz.) chopped pecans or walnuts
2 Tablespoons (30 g / 1 oz.) granulated sugar
¼ teaspoon ground cinnamon
1 cup (170 g / 6 oz.) semisweet chocolate chips or coarsely chopped chocolate

Prepare the dough:
1. In a large mixing bowl, combine 1 ½ cups (230 g) of the flour, the sugar, salt and yeast.
2. In a saucepan, combine the milk, water and butter and heat over medium heat until warm and the butter is just melted.
3. With an electric mixer on low speed, gradually add the warm liquid to the flour/yeast mixture, beating until well blended. Increase mixer speed to medium and beat 2 minutes. Add the eggs and 1 cup (150 g) flour and beat for 2 more minutes. Using a wooden spoon, stir in enough of the remaining flour to make a dough that holds together. Turn out onto a floured surface (use any of the 1 ½ cups of flour remaining) and knead the dough for 8 to 10 minutes until the dough is soft, smooth, sexy and elastic, keeping the work surface floured and adding extra flour as needed.
4.Place the dough in a lightly greased  bowl, turning to coat all sides. Cover the bowl with plastic wrap and a kitchen towel and let rise until double in bulk, 45 – 60 minutes.

Once the dough has doubled, make the meringue:

In a clean mixing bowl  beat the egg whites with the salt, first on low speed for 30 seconds, then increase to high and continue beating until foamy and opaque. Add the vanilla then start adding the ½ cup sugar, a tablespoon at a time as you beat, until very stiff, glossy peaks form.

Assemble the Coffee Cakes:
Line 2 baking/cookie sheets with parchment paper.

Punch down the dough and divide in half. On a lightly floured surface, working one piece of the dough at a time (keep the other half of the dough wrapped in plastic), roll out the dough into a 20 x 10-inch (about 51 x 25 ½ cm) rectangle. Spread half of the meringue evenly over the rectangle up to about 1/2-inch (3/4 cm) from the edges. Sprinkle half of your filling ingredients  evenly over the meringue (ex: half of the cinnamon-sugar followed by half the chopped nuts and half of the chocolate chips/chopped chocolate).

Now, roll up the dough jellyroll style, from the long side. Pinch the seam closed to seal. Very carefully transfer the filled log to one of the lined cookie sheets, seam side down. Bring the ends of the log around and seal the ends together, forming a ring, tucking one end into the other and pinching to seal.

Using kitchen scissors or a sharp knife (although scissors are easier), make cuts along the outside edge at 1-inch (2 ½ cm) intervals. Make them as shallow or as deep as desired but don’t be afraid to cut deep into the ring.  Repeat with the remaining dough, meringue and fillings.

Cover the 2 coffee cakes with plastic wrap and allow them to rise again for 45 to 60 minutes.

Preheat the oven to 350°F (180°C).

Brush the tops of the coffee cakes with the egg wash. I have a convection oven so I skipped this step. Bake in the preheated oven for 25 to 30 minutes until risen and golden brown. The dough should sound hollow when tapped.

Remove from the oven and slide the parchment paper off the cookie sheets onto the table. Very gently loosen the coffee cakes from the paper with a large spatula and carefully slide the cakes off onto cooling racks. For a soft crust rub the crust with butter before cooling. Allow to cool.

Just before serving, dust the tops of the coffee cakes with confectioner’s sugar as well as cocoa powder if using chocolate in the filling. These are best eaten fresh, the same day or the next day.


For Ria's version, using saffron and garam marsala visit the Daring Baker's web site


Wednesday, March 23, 2011

Orange Cornmeal Cake


Nothing is more satisfying than stepping into the garden, picking some produce, bringing it into the kitchen, and transforming it into something for our family. So much of what we grow we eat as is, like the fat, juicy peaches we pick and eat right away as we stand looking for another to pluck, and the lettuce that becomes a delicious simple salad for lunch.


However, we almost have more citrus than we know what to do with. Besides the tangerine and the lime trees, we have 2 orange, 2 lemon and a grapefruit tree. We do have oranges almost year round, although by late fall the pickings can be pretty slim.


Since they are plentiful now we have been trying out pretty much anything that calls for oranges. This recipe is from Martha Stewart's Everyday Food, Fresh Flavor Fast. It has some unusaul ingredients for a cake, but we loved the way that the olive oil kept it moist, and complemented the bright flavors of the sweet citrus. The cake is not too sweet, and has a hearty texture from the cornmeal (we used polenta, a coarse cornmeal). It is all topped off with a crunchy, sugar crust that really brings the whole thing together. Even in the fall when our oranges are not so plentiful, we would definitely use some for this cake.


Orange Cornmeal Cake
Martha Stewart- Every Day Food, Fresh Flavor Fast
 
1/2 cup olive oil
1 1/4 cup AP flour
1/2 cup cornmeal
2 teaspoons baking powder
1 teaspoon salt
zest of one orange
2 eggs
1 cup suagr, 1/3 cup for topping
1/2 cup dry white wine or orange juice.

Directions:
1. Preheat oven to 375F. Oil an 8 inch round cake pan with additional olive oil.
2. Whisk together flour, cornmeal, baking powder, and salt.
3. Rub orange zest into the sugar and whisk in the oil, eggs, and wine until smooth.  Add flour mixture and whisk to combine.
4. Pour batter into prepared pan. Sprinkle evenly with 1/3 cup of sugar.  Bake until cake begins to pull away from the sides of pan and a cake tester inserted into the center comes out clean, 35-40 minutes.
5. Cool in pan for 20 minutes. Invert cake on to a plate and reinvert on to a wire rack and cool completely.

Serve with fresh orange segments.
printable recipe