Monday, December 27, 2010

Stollen: Daring Bakers December Recipe


With a dusting of powdered sugar and looking like a snow capped landscape, stollen is a wonderful holiday treat.  Stollen is a rich yeast bread loaded with candied orange peel, cherries, raisins and a thin layer of marzipan is tucked inside. When I was a child, a family friend made stollen for us every Christmas season. My mother tucked it into the freezer, so that we could have it on Christmas morning. Then as an adult, before I had children, I made stollen every Christmas for friends and family, but I haven't made it in years, so this was a fun challenge to do with the kids. Rather than making a stollen wreath, we chose to make the traditional loaf shape.  


The 2010 December Daring Bakers’ challenge was hosted by Penny of Sweet Sadie’s Baking. She chose to challenge Daring Bakers’ to make Stollen. She adapted a friend’s family recipe and combined it with information from friends, techniques from Peter Reinhart’s book.........and Martha Stewart’s demonstration. .
Since the recipe is long and detailed, this is the link to the printable Daring Bakers Stollen Recipe.

We decide to make our own candied orange peel for the bread and it really was the highlight of this recipe. We have a large tree in the backyard, and the winter season brings baskets full of the fresh fruit, so we were excited to try these out. The fresh candied peel was soft, sweet and delcious in the bread, a pleasant change from the store bought variety which can be hard and chewy.


Candied Citrus Peel
Ingredients:
Citrus Fruit
Sugar
Water

Remove the peel from 3 or 4 oranges (or lemons,limes or grapefruits) and cut in strips.

Blanch the peel 3 times. Place peel in a pot, cover with cold water and bring to a boil. When the water boils, drain and repeat twice more, for a total of three times.

Make a simple syrup: Put water and sugar in a medium pot stir to dissolve sugar and bring to boil. I used equal parts water and sugar, but I have seen recipes that use 3 parts sugar to 1 part water. You need enough syrup to cover the citrus peel. For 3 oranges I used 2 cups water and 2 cups sugar.

Add citrus peel to the simple syrup and simmer until translucent. This took me about an hour. The time will vary depending on how thick your citrus peel is. When translucent remove from the syrup, drain and place on a wire rack to dry. Once drained,you can roll the peel in additional sugar before drying, but I thought this was just to sugary and we ended up knocking the sugar coating off our peels.

Store in an air tight jar in the refrigerator or freeze.
printable recipe


Tuesday, December 7, 2010

Christmas Cut Out Cookies


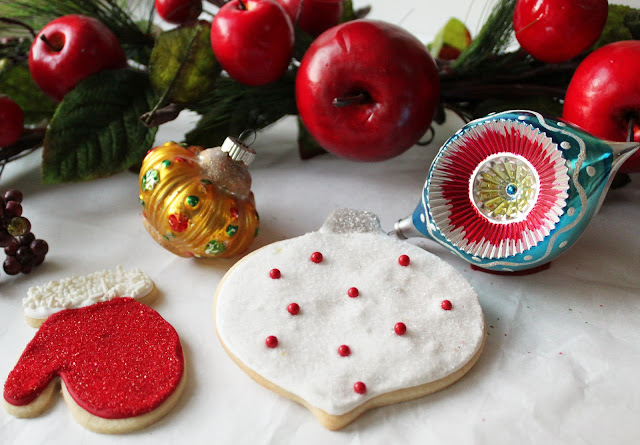
It's always an afternoon of fun when we decorate our Christmas cookies. We are glitter girls here at Mimi's kitchen and we like our cookies to reflect it. The sprinkle drawer is wide open as we pull out all the stops with our jimmies, sugars, and nonpareils. This is one of my very favorite things to do at Christmas, with one of us mixing and rolling, one of us changing pans in and out of the oven, and all of us having a wonderful afternoon that is fun, without all the stress and rush that so often comes with the holidays. We have been doing this for so long, and I love to remember the days when I was doing all the work and my girls were eating cookies as fast as I could make them, and ended up with more frosting and sprinkles on their faces than anywhere else. We have all grown a little since then, but there still appear to be a few cookies missing every time I turn around- but now it is usually Boy Mimi, or Mr. Mimi who sneak one as they pass by.

These cookies were done in royal icing, but we have done them with butter cream, which tastes better, and when you add all the decorative sugars and jimmies they still dry hard enough to stack.

 For our Christmas Cut Outs I use this vanilla sugar cookie recipe.


Sugar Cookies

3 c  all-purpose flour
2 tsp baking powder
1 c sugar
2 sticks butter
1 egg
1/2 tsp pure vanilla extract
1/2 tsp pure almond extract
1/2 tsp salt


Preheat oven to 350.


Combine the flour and baking powder, set aside. Cream the sugar and butter. Add the egg and extracts and mix. Gradually add the flour mixture and beat just until combined, scraping down the bowl, especially the bottom.
Roll onto a floured surface and cut into shapes. Place on parchment lined baking sheets and bake for 10-12 minutes. Let sit a few minutes on the sheet, then transfer to a cooling rack.

printable recipe

 For the royal icing I use the recipe on the Wilton's Meringue can. So break out the cookie cutters and kitchen "glitter" and have fun!


Links: Foodie Friday at Designs by Gollum

Thursday, December 2, 2010

Chocolate Peppermint Cookies


Dark chocolate, cripsy refreshing mint and creamy white chocolate combine to make this fantastic cookie.  If you are a Girl Scout thin mint lover this cookie is for you. The recipe comes from Martha Stewart, but I found it over at Barbara's blog, Moveable Feasts.  Barbara is an incredible blogger dishing up everything from retro 50's and 60's recipes to tomato sorbet, nothing is off limits for her.  Every recipe I have tried from her blog has been a hit.  Happily encouraging her fellow blogger, she is a great friend.  If you haven't visited with her you should definitely drop on by for a visit.


We made them last year at the last minute, not sure how we would like them, but they were gone fast (before I could even get a picture) and they were the first cookie requested by the family to kick off our holiday baking this year. We really love our usual holiday cookie traditions, so for us to find a new treat to add to the mix says a lot. They are great with an afternoon mocha and look very festive on a holiday cookie tray, or bagged up and tied with a cute red ribbon.

 
I used peppermint oil for these, because that's what I had, and since it is much stronger than extract i just used a few drops. The cookies themselves were perfectly minty, but once covered in the white chocolate, we felt they could have used just a bit more mint flavor. Next time I would err on making the cookies just slightly too minty so when they are all done, they will be the perfect balance of chocolate and mint. So don't be afraid to use slightly more extract if needed to suit your taste.


Chocolate Peppermint Cookies
(Adapted from Martha Stewart Living, December 2008 via Movable Feasts)

Ingredients:
1 cup all purpose flour plus more for surface
1/2 cup unsweetened Dutch-process cocoa powder
1/2 teaspoon baking soda
1/2 teaspoon baking powder
1/2 teaspoon salt
5 tablespoons unsalted butter, room temperature
3/4 cup sugar
1 large egg
1 large egg yolk
3/4 teaspoon pure peppermint extract
8 large candy canes or 30 peppermint candies, crushed
2 pounds white chocolate, coarsely chopped


Method:
Preheat oven to 325°. Sift flour, cocoa powder, baking soda, baking powder and salt into a bowl.

Beat butter and sugar with a mixer for 1 minute. Add egg, then yolk, beating well after each addition. Beat in peppermint extract. Slowly add flour mixture and beat just until incorporated. Mold dough into 1 large disk and cut in half. Wrap each in plastic wrap and refrigerate until firm, at least an hour (or up to two days).
 Roll out 1 disk on a lightly floured surface to 1/8 inch thickness. Use a 2" cookie cutter to cut out circles and place them on parchment paper. Freeze until firm, at least 15 minutes.

Repeat with remaining disk.

Bake until cookies are dry to the touch, about 12 minutes. Transfer parchment, with cookies, to wire racks and allow to cool. Make sure that your cookies are complete baked you do not want a soft center.
 Melt chocolate in a heatproof bowl set over a pot of gently simmering water. Remove from heat and dunk cookies into the melted chocolate. Turn cookies using a fork; let excess drip off and gently scrape the bottom of the cookies against the edge of the bowl. Place on parchment lined baking sheets and sprinkle with the crushed candy.
 Refrigerate until set, up to 3 hours. Decorated cookies are best served the same day. (I have successfully kept these cookies for 2 weeks stored in an air tight tin and hidden from my family)

Martha says you will get about sixty 2 inch cookies but I only got about 3 1/2 dozen. Next time I will use a 1 3/4 inch cutter since the baked cookies would then be about 2 inches.

printable recipe


Links:Foodie Friday at Designs by Gollum


Monday, November 29, 2010

French Fridays Round Up


I hope that everyone had a wonderful Thanksgiving. We were pretty busy at Mimi's Kitchen. Mini Me was home from college, and Boy Mimi had a big soccer tournament, and time just flew by. So I'm just now getting around to posting the French Fridays with Dorie November recipe round up. For November, no specific order was given, so we got to bake at our own pace.  The nice thing about the recipes in this group is that you can often combine one or two into one meal.

First up for us was the pumpkin gorgonzola flan.  I had misgivings about this recipe, but that's what cooking groups do, push you to make something that you may not have tried otherwise.
 For us this flan was a no go.  The texture was good but we just didn't like the combination of pumpkin and blue cheese. It may be because the blue cheese I used was not a mild cheese, like gorgonzola is. We felt the flavor of the cheese was just too overwhelming, but we did like the texture and flavor of the pumpkin part. The honey and creme fresh were not optional in my opinion, as they were needed to balance out the strong flavor of the cheese.


Next up was the chicken.....  I love roasting chicken in my dutch oven so I knew that this was one recipe that we would enjoy. The big treat was the bread at the bottom of the pot. I used 2 small pieces of bread so everyone could have a bite. As strange as it sounds to add this step to a roast chicken, the result was delicious, and I don't think I'll roast a chicken with out it again.


Dorie's potatoes were an easy side dish to make. They were everything you would expect- rich, creamy and satisfying. But I have to say that even though my family liked them, they said they prefer my usual recipe for scalloped potatoes, made with cream cheese and herbs. We did really like the cheesy crust on top, and will probably adapt it to some other potato side dishes this fall.

To finish things off we made the semolina cake. This cake really has potential. We thought the flavor needed a little boost, maybe from some rum with those raisins, or a sprinkling of citrus zest. The cake it self doesn't have much personality, but you can certainty add some with  different fruits or nuts. Although we baked it until a knife came out clean, as Dorie directed, it was still underdone in the middle. The center had a floury, semolina taste, while the outsides had a firmer texture without the taste of undercooked flour, so next time I would bake it until the center isn't so visibly soft, instead of using the knife test.


For the most part, we really liked the recipes for November. I learned a tasty new addition for roast chicken, and although we didn't love the flan, it was fun to make something new and think of ways we could tweak it to make it something we like, and leave it marked as a "try again" recipe. We are looking forward to December's recipes! 

Monday, November 22, 2010

Indian Pudding


One of our most cherished and controversial- some love it, others hate it- family recipes is Indian Pudding. Bring the subject up at any family gathering and you are sure to get plenty of opinions. My dad's mother passed along this family recipe to my mother nearly 70 years ago, and she  made it every Thanksgiving for the next 40 years. When I married, my mother passed along the recipe to me, and now I have been making it for the past 25 years. Mimi Jr. has  learned to make it, so someday she will become the keeper of the tradition. My grandmother would be pleased that this recipe can still be found on our Thanksgiving table so many years later and with many more years to come.


It's not to pretty to look at, but as we all know, looks can be deceiving. Made with corn meal, milk, molasses, raisins and dates, it is a thick, rich pudding that needs just a little whipped cream to mellow all of that natural sweetness. It is pretty rich so just a small bowl is very satisfying. Even after all the turkey, potatoes, and pumpkin pie, the Indian Pudding lovers in my family can always find room for this once-a-year treat.

Grammie Small's  Indian Pudding

1 1/2 quarts milk
1/2 cup yellow corn meal
3/4 cup molasses
1/4 cup white sugar
1/4 cup brown sugar
1/2 teaspoon salt
1/8 teaspoon fresh grated nutmeg or ginger
1/8 teaspoon cinnamon
1/2 cup raisins or 1 cup chopped dates, or a combination (I use 1/2 cup raisins and 1/2 cup dates)
1 can evaporated milk- not always necessary, but I always have one on hand just in case.

Put milk in medium sauce pan turn heat to low and whisk in the cornmeal.  Add remaining ingredients stirring to combine.  Continue cooking on medium heat, stirring often, until mixture is thick.  Pour into a greased baking dish. Bake in a 300 degree oven for about 2 hours.  Check once or twice, and if it becomes to thick or dry, add canned milk on top during the baking. Do not stir. The pudding should be very soft. It can be made ahead, but rehaet before serving. It is best topped with slightly sweetened whipped cream or ice cream.

printable recipe


Happy Thanksgiving!


Tuesday, November 16, 2010

TWD:Cranberry Lime Galette


 Whitney, April, and Elizabeth of Celestial Confections chose Cranberry Lime Galette to make this week. When I first read the recipe, I thought that there were a lot of individually assertive ingredients. Ginger, lime, and cranberry can all be pretty strong on their own, so I wasn't too sure how they would be when combined. We were pleasantly suprised at how beautifully everything came together. The hint of lime in the background was a nice contrast to the slightly spicy ginger and sweet/tart cranberries.  
Since I had some pie dough in the fridge, and it only rolled out to a 10 inch circle, I used 1/2 the filling ingredients and the galette was the perfect size for the four of us.
Dorie says to use her "good for just about everything" pie crust. I have made this several times and it is good, however I have found a better pie crust- Cooks Illustrated Foolproof Pie dough. It's much the same as Dorie's but you replace some of the water with vodka. The alcohol cooks out and leaves no flavor, and the result is the best pie crust I have made. This dough is so forgiving, even the scraps which I rolled together came out light and flaky. 
If you are not familiar with Cooks Illustrated, pick up their Holiday Baking issue and enjoy. I have had success with all the recipes from there, and can't wait to pick something to try from the holiday issue!

Cranberry Lime Galette
Baking- from my house to your- Dori Greenspan

Pie Dough for a single crust , chilled
3 TBSP ground nuts (walnuts, almonds, pecans or skinned hazelnuts)
3 TBSP dry bread crumbs (unseasoned, store bought)
2 cups cranberries, fresh or frozen (let thaw and pat dry)
1 medium apple, peeled, cored, and cut into 1/2 inch chunks
1/2 cup moist, plump dried cranberries (optional)
3/4 cup (packed) light brown sugar
a 1 1/2-inch piece of fresh ginger, peeled and finely chopped*
grated zest of 1 lime
juice of 1/2 lime
3 Tbsp raspberry jam or jelly
decorating (coarse) or granulated sugar, for dusting
confectioners' sugar, for dusting

Center a rack in the oven and preheat the oven to 400 degrees F. Line a baking sheet with parchment (see below) or a silicone mat.

To make it easier to move the pie dough onto the baking sheet, roll it between sheets of parchment (in which case, you can use one of the rolling sheets to line the baking sheet) or wax paper or plastic wrap. Alternatively, work on a well-floured surface, taking care to keep the dough moving by turning it and flouring the surface often.

Roll the dough into a large 1/8-inch circle. Using a pastry wheel or a paring knife, trim the dough to a 13-inch diameter. Transfer the dough to the baking sheet and keep it covered in the refrigerator while you make the filling.

Mix together the nuts and bread crumbs.

Toss together the remaining ingredients (except the decorating and confectioners' sugars for dusting) in a bowl, stirring just to mix.

Remove the crust from the refrigerator. Using a cake pan or pot lid as a template and the tip of a blunt kitchen knife as a marker, gently trace a 9-inch circle in center of the dough--this is the area for the filling. Sprinkle the center circle with the nut and crumb mixture and top with the filling. Now gently lift the unfilled border of dough up and onto the filling: as you lift the dough and place it on the filing, it will pleat. Brush the dough very lightly with a little water, then sprinkle it with a teaspoon or two of decorating or granulated sugar.

Bake the galette for 35-40 minutes, or until the crust is brown, the cranberries have popped and the filling is bubbling. Place the baking sheet on a rack to cool for 10 minutes.

Very carefully slide a small baking sheet or a cake lifter under the galette and slip the galette onto a rack to cool. Serve the galette with it is just warm or when it has reached room temperature, lightly dusted with confectioners' sugar.

* We used a micro-plane and grated the ginger, it seemed much stronger than when we chopped it so we did not use the entire amount. Use your own judgement on how much to add.


Foolproof Pie Dough via Cooks Illustrated
2 1/2 cups unbleached flour
1 teaspoon table salt
2 tablespoons sugar
12 tablespoons cold unsalted butter cut into 1/4 inch pieces
1/2 cup cold vegetable shortening, cut into 4 pieces
1/4 cup cold vodka
1/4 cup cold water

1.Process 1 1/2 cups flour, salt, sugar until combined.  Add butter and shortening and process until dough just starts to clump (it will look like cottage cheese curds with no visible flour) scrape bowl of processor. Add remaining flour and pulse until mixture is evenly distributed around the bowl and the mass of dough has been broken up.  Empty mixture into a medium bowl.
2. Sprinkle vodka and water over mixture.  With a rubber spatula, use folding motion to mix, pressing down on dough until dough is slightly tacky and sticks together. Divide into 2 even balls, flatten into a 4 inch disk. Wrap in plastic wrap and refrigerate at least 45 minutes.
*Note this pie dough is very wet and need a bit of flour when rolling it out.

foolproof pie dough printable recipe


If you want the recipe for the galette, visit Celestial Confections.  To see what the other TWD bakers made
visit our blog roll.
Cranberry Lime Galette printable recipe

Thursday, November 11, 2010

Brown Sugar Shortbread Turkeys


Everyone expects turkey at Thanksgiving, full of stuffing, and sliced only to be smothered in delicious pan gravy. But how about a little brown sugar for your turkey this year? These turkey cut out cookies are made with a brown sugar shortbread dough and frosted with royal icing for an easy, fun addition to your table (if you can find room!) To make the brown icing, I added some cocoa powder to help with the color and add some flavor. I've been making these brown sugar shortbread cookies for more years than I can count. They have a good depth of flavor from the brown sugar, and a nice crisp texture that makes these cookies as good plain as they are frosted. I always make sure to roll them to 1/4" so they stay thin and crunchy. This is our family favorite roll out dough that we use for almost every holiday (except Christmas when we use a vanilla/almond dough) and every other time we can think of an excuse to spend an afternoon rolling and frosting cookies.


Brown Sugar Shortbread Cookies
                                 via Betty Crocker

1 cup butter
½ cup brown sugar
¼ cup sugar
2 ¼ cups flour
1 tsp salt
1 tsp vanilla

Pre heat oven to 300F.
1. Mix together butter, sugars and vanilla.
2. Add flour and salt. Mix thoroughly.
3. Roll out ¼” thick on a lightly floured board.  Cut in desired shapes.
4. Place on ungreased cookie sheet. Bake 20- 25 minutes @ 300F.
Cool and frost
printable recipe


Add the names of your dinner guest for the perfect place cards.


Links: Foodie Friday at Designs by Gollum
Fresh,Clean and Pure Fridayat La Bella Vita

Tuesday, November 9, 2010

TWD: Cranberry Shortbread Cake

  This week Jessica of A Singleton in the Kitchen chose Not-Just-for Thanksgiving Cranberry Shortbread cake


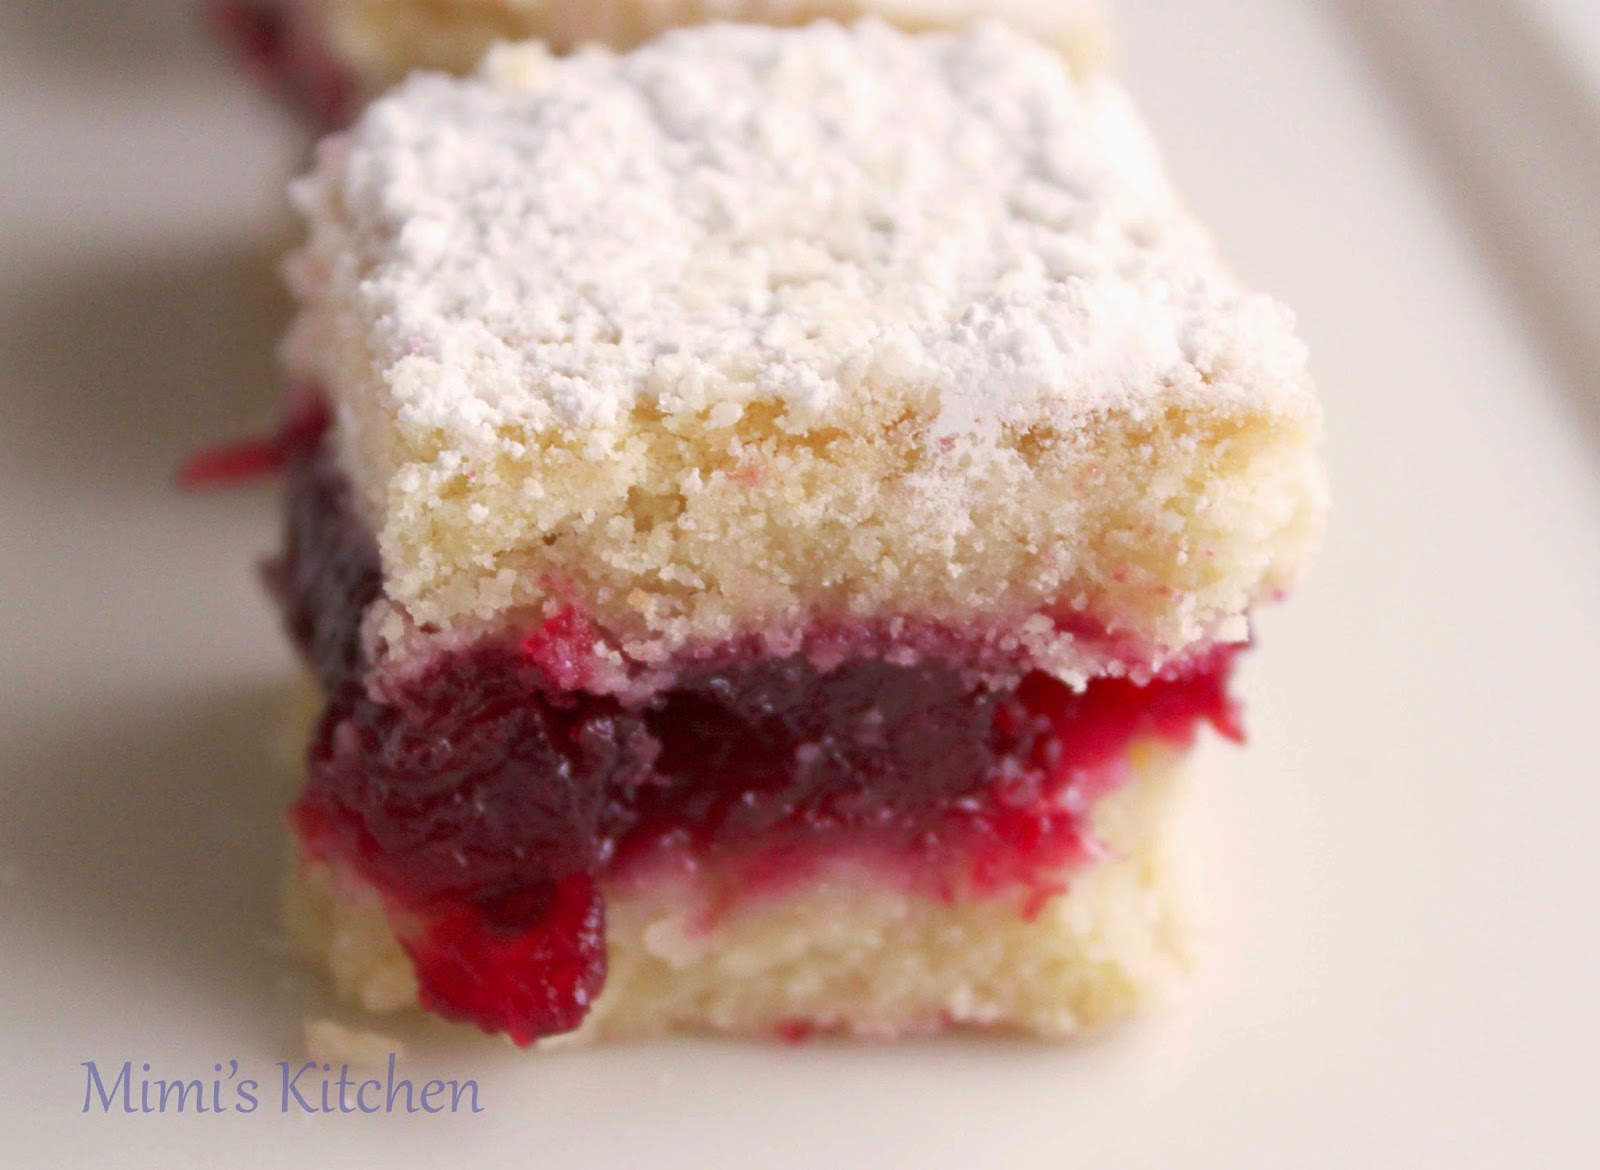
 Fresh, tangy cranberry and orange jam sandwiched between two layers of soft sweet cake made for a delicious fall treat. We loved that it was a combination of two of our favorites- shortbread and cranberry. The cranberry filling still had enough of the tart and slightly bitter flavors that we love in the fresh berries, and the cake had the perfect amount of sweetness to complement the cranberries without making them too sweet. We thought that they tasted even better after sitting in the fridge for a few hours.
The rich jewel tones of the jam and the soft ivory cake make for an eye catching dessert and a very pretty addition to a holiday dessert tray. I made ours in a 9x9 square pan instead of the round spring form pan called for in the recipe, dusted them with powdered sugar and cut them into bite size bars, which I liked because you were able to see the layers really well in each piece. 

I love to cook with fresh cranberries while they are in season, and this will definitely be added to our list of cranberry treats we look forward to every year!
Not-Just-for Thanksgiving Cranberry Shortbread cake
Baking: from my home to yours Dorie Greenspan


For the cake:

2 1/2 cups flour

1 teaspoon baking powder

Pinch salt
13 tablespoons unsalted butter, room temperature
1 cup plus 2 teaspoons sugar
1 large egg
1 large egg yolk
1 teaspoon vanilla extract.

Jam filling
1 large navel orange
About 1/4 cup orange juice
12 ounces fresh cranberries
1 cup sugar
Make jam:
Grate zest of orange into a medium saucepan. Slice off the peel, removing white pith, slice between membranes to release segments, cut segments into 1/4 inch pieces and toss into the pan. Squeeze the juice from the membranes into a measuring cup and water or juice to measure 1/4 cup. Pour it into the pan. Add the cranberries to the pan, stir in 3/4 cup sugar and set pan over medium heat and bring to a boil, stirring frequently.  Cook, stirring almost constantly, until cranberries pop and your spoon leaves tracks, about 5 minutes. Scrape jam into a bowl, taste it if it is too tart add more sugar to taste. Cool to room temperature. Store I fridge up to 2 weeks.
Cake:
Whisk together flour, baking powder and salt.
Working with a stand mixer fitted with paddle, beat butter on medium speed until soft and smooth. Add 1 cup of sugar and continue to beat until it dissolves into the butter. Reduce speed to low and add the egg and yolk, beating until they too are absorbed. Beat in vanilla . Add flour, mixing only until it is incorporated, do not over beat. Dough will be thick.
Turn dough on to a work surface and gather it into a ball, then divide in half and pat each half into a disk. Wrap disk in plastic and refrigerate 15-30 minutes.
Pre heat oven to 350f. Lightly butter a 9 inch spring form pan. I used a 9 inch square pan fitted with a parchment sling.
Work with one piece of dough at a time. For the bottom layer, roll or pat 1 disk of dough into bottom of pan. Spread the cranberry jam over the dough. Unwrap the second disk leave on plastic wrap and roll or press until it is the dimension of your pan. Carefully lift the dough and invert it onto the filling, lift off the plastic wrap and use your fingers to even it as necessary so that it covers the filling. Brush the top of the cake very gently with water and sprinkle with the remaining 2 teaspoons sugar.
Bake 35-40 minutes, or until the top of the cake is lightly golden and a thin knife inserted into the center comes out clean. Transfer the pan to a cooling rack and cool for 20 minutes. Release from pan (lift out sling or run a knife around the inner edge of spring from pan, remove sides)and let cool to room temperature.

  Visit Jessica for the recipe and visit our blog roll to see just what the other TWD bakers thought.


Friday, October 29, 2010

French Fridays Round UP


When the new group formed for Dorie's New book Around My French Table, I wanted to belong. It is a great way to experience a new cookbook, instead of having it decorate my shelf like so many others. In Tuesday's with Dorie, I found that some recipes that I would have never considered were keepers after all.


What I didn't want was for my blog to be just about cookbooks and their associated groups. I love to participate, but I like to do my own thing too. So for French Fridays, instead of posting each Friday, I have decided to do a monthly round up of the recipes. It was an impressive  group of recipes for October. The first time I make a recipe I do it as written, no variations. I want to see just what it is that Dorie is presenting. These were all recipes that I would make again, but with my own twists next time around.


   Our favorite for this month was the Gerard's Mustard Tart. Next time I might add some roasted chicken or cooked shrimp to the tart to make it more of a complete meal. I would also cut the leeks into rounds instead of strips. Although the Hachis Parmentier sounded like a French version of Shepherd's Pie, it was not quite what we expected. We thought the flavor could have used a boost and maybe some veggies. Next time I would double the meat portion of the recipe, add some veggies, and mix the cheeses into the potatoes, which I would make slightly richer and thicker.


The Vietnamese spicy chicken soup had fabulous flavors and since I am not a coconut lover, I was surprised at how much I liked it. With some veggie potstickers, this would make a great meal on a cold day. I did skip the gougeres, so the last thing I made was the Marie-Helene's Apple Cake. It was moist and loaded with big pieces of apple, similar to our family favorite apple cake. You can add little whipped cream and a touch of caramel sauce if you feel the need to dress it up, but most of it was gone before I got a chance to do that.
We really liked the October recipes and Dorie's new book, and we can't wait to see what next month will bring!


Wednesday, October 27, 2010

Buttermilk Donuts and a Winner

Mimi's Kitchen had to close for a few days so we could take care of our termite troubles. Not a fun activity. It's like moving, having to pack everything up and then unpack just a few day later. Now that I'm back in the kitchen, I hope to catch up on all the good food that you have posted to your blogs in the last week or so.
For our "welcome back to the kitchen" treat we jumped right into the Daring Baker's challenge, which was donuts. There is nothing like fresh donuts to pick up your spirits when you have been locked out of your kitchen for a couple of days! We choose to make the buttermilk donuts, and they were delicious- light, tender and cakey without being greasy. We iced them with a simple glaze and dressed them up for Halloween. They were good plain, but we began thinking of all the spices and flavors we could add to the dough for a new twist. We also liked that they can be decorated in so many different ways for various holidays or events, like baby showers or birthdays.

 The October 2010 Daring Bakers challenge was hosted by Lori of Butter Me Up. She used several sources for her recipes including Alton Brown, Nancy Silverton, Kate Neumann and Epicurious. 
If you would like the recipes visit Lori or the Daring Kitchen.  Donut making would not be complete without a few donut holes, which we rolled in cinnamon sugar. They would also be good in powdered sugar or dunked in any left over glaze.
Finally, the winner of the Dove Chocolate give away is Jamie of Good Eats and Sweet Treats. Please e-mail me your mailing information and Laura will send you your winnings.

Old-Fashioned Buttermilk Cake Doughnuts:

Yield: About 15 doughnuts & 15 doughnut holes, depending on size

Ingredients

¼ cup sour cream  
3 ¼ cup All purpose flour extra for dusting surface
¾ cup White Granulated Sugar
½ teaspoon Baking Soda
1 teaspoon Baking Powder
1 teaspoon Kosher (Flaked) Salt (If using table salt, only use ½ teaspoon)
1.5 teaspoon Nutmeg, grated
1 1/8 teaspoon Active Dry Yeast
¾ cup + 2 Tablespoon Buttermilk
1 large Egg
2 Egg Yolk
1 Tablespoon Pure Vanilla Extract
Powdered (Icing) Sugar (Used for decorating and is optional)

Directions:


1.    In a small stainless-steel bowl set over a pot of gently simmering water, heat the sour cream until just warm.

2.    Over a large mixing bowl, sift together the flour, sugar, baking soda, baking powder, salt, nutmeg; make a large well in the center. Place the yeast in the well; pour the sour cream over it. Allow it to soften (if using packed fresh yeast), about 1 minute

3.    Pour the buttermilk, whole egg, egg yolks, and vanilla extract into the well. Using one hand, gradually draw in the dry ingredients. The mixture should be fairly smooth before you draw in more flour. Mix until it is completely incorporated. The dough will be very sticky. Wash and dry your hands and dust them with flour.

4.    In Sift an even layer of flour onto a work surface. Don’t be afraid to use a lot of flour. You don’t want the doughnuts sticking to your counter. Scrape dough out of bowl onto the surface; sift another layer of flour over dough. Working quickly, pat dough into an even 1/2-inch (12.5 mm) thickness. Dip cutter in flour and, cutting as closely together as possible, cut out the doughnuts and holes. Place holes and doughnuts on a floured surface. Working quickly, gather scraps of dough together, pat into 1/2-inch (12.5cm) thickness, and cut out remaining doughnuts and holes.
  Heat oil to 375 F. Drop three to four doughnuts at a time into the hot oil. Once they turn golden brown, turn them and cook the other side. Once cooked, place on a baking sheet covered with paper towels to drain,  decorate as desired.